BUNKERSYNCBACK TO WEBSITE
Complete setup and user guide

The BunkerSync Ultimate Guide

Everything your team needs to set up and use Team Hub, from the first login to daily jobs, clipping data, bunker work, snagging and manager controls.

This guide covers the complete current platform, including the advanced Irrigation mapping, faults, stock and sprinkler coverage tools.

Screenshots are kept compact for easier reading — tap any image to enlarge it.
BunkerSync app icon added to a phone home screen

Add Team Hub to the phone home screen so it opens like a normal app.
1

Share the link

Send team.bunkersync.com and the club course code to the team.

2

Add to home screen

Install the web app shortcut on iPhone or Android.

3

Complete club setup

Add team members, machines, holiday rules, links and an admin PIN.

4

Start using modules

The team can then use the shared tools from one dashboard.

1

First login

Share Team Hub and add it to the phone

Team Hub is a web app, so there is nothing to download from an app store. Share one link with the team, add it to the home screen and sign in with the club course code.

Send the Team Hub link

  1. Send the team to team.bunkersync.com.
  2. Give them the club course code.
  3. Ask each person to add Team Hub to their phone home screen.
  4. Open the new BunkerSync icon, enter the course code and tap Login.

iPhone

  1. Open the link in Safari.
  2. Tap the Share button.
  3. Choose Add to Home Screen.
  4. Tap Add.

Android

  1. Open the link in Chrome.
  2. Tap the three-dot menu.
  3. Choose Add to Home screen or Install app.
  4. Confirm the installation.
Tip: Opening BunkerSync from its home-screen icon gives the cleanest, most app-like experience.
BunkerSync icon on a phone home screen
Home-screen iconThe shortcut appears as a normal BunkerSync app icon.
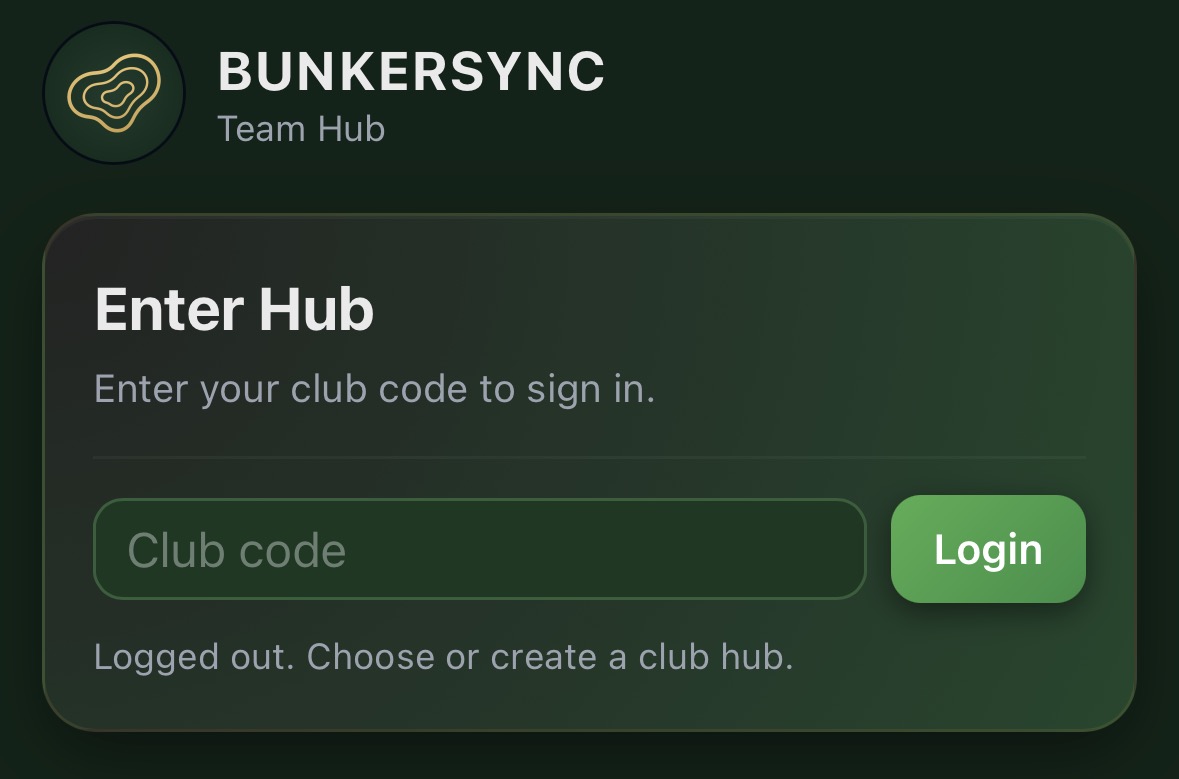
Team Hub course code login
Course-code loginEnter the code supplied for the club and tap Login.
2

Initial club setup

Set up Team Hub

After login, Team Hub opens to the module dashboard. The settings cog contains the shared club setup used throughout the app.

Dashboard and access

The dashboard contains the available modules. Tap the settings cog in the top-right corner to open club setup. The cog turns gold when admin mode is active.

All team members

Can open the shared modules, view information, record work and submit holiday requests.

Administrators

Can change settings, approve holidays, edit the calendar and Daily Jobs, upload the daily tee sheet image and access manager-only controls.
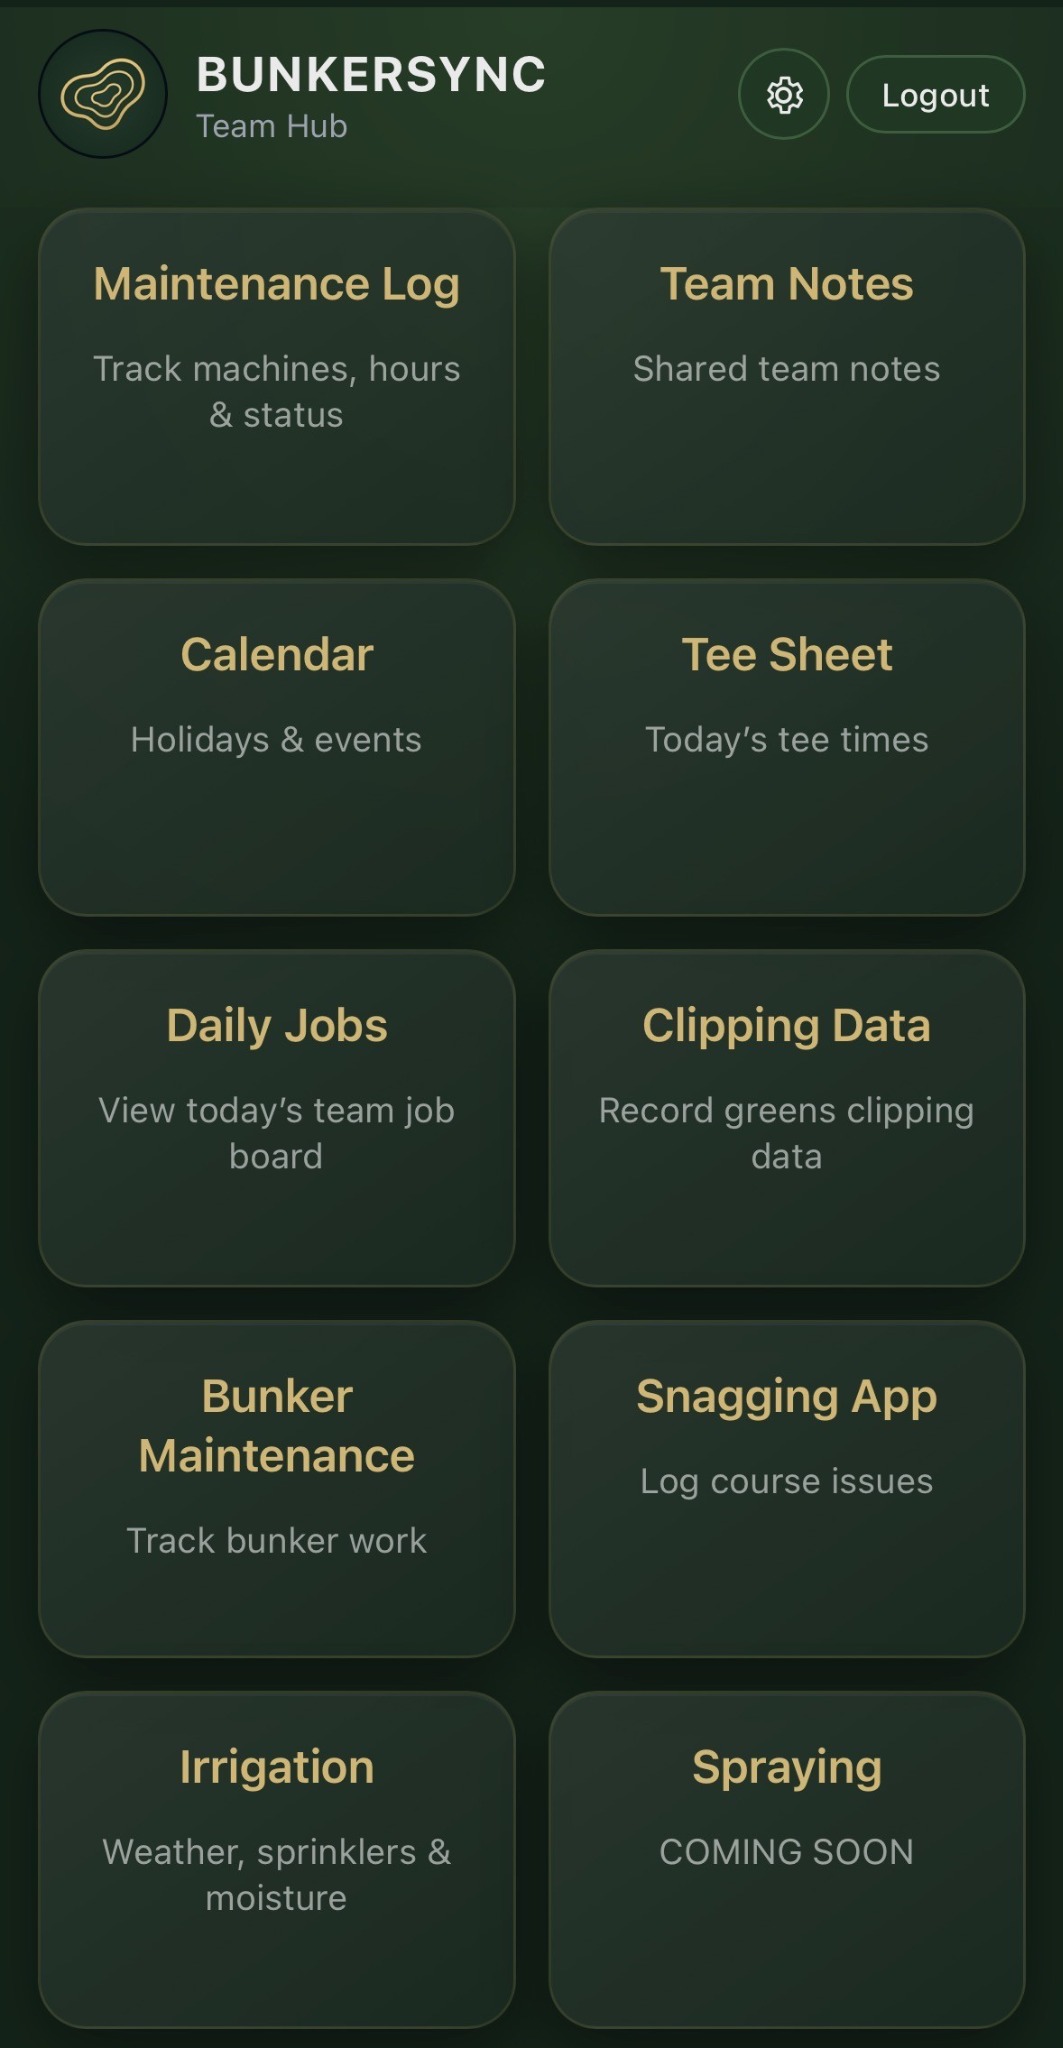
BunkerSync Team Hub dashboard with all modules
Team Hub dashboardAll available club modules are opened from this screen.

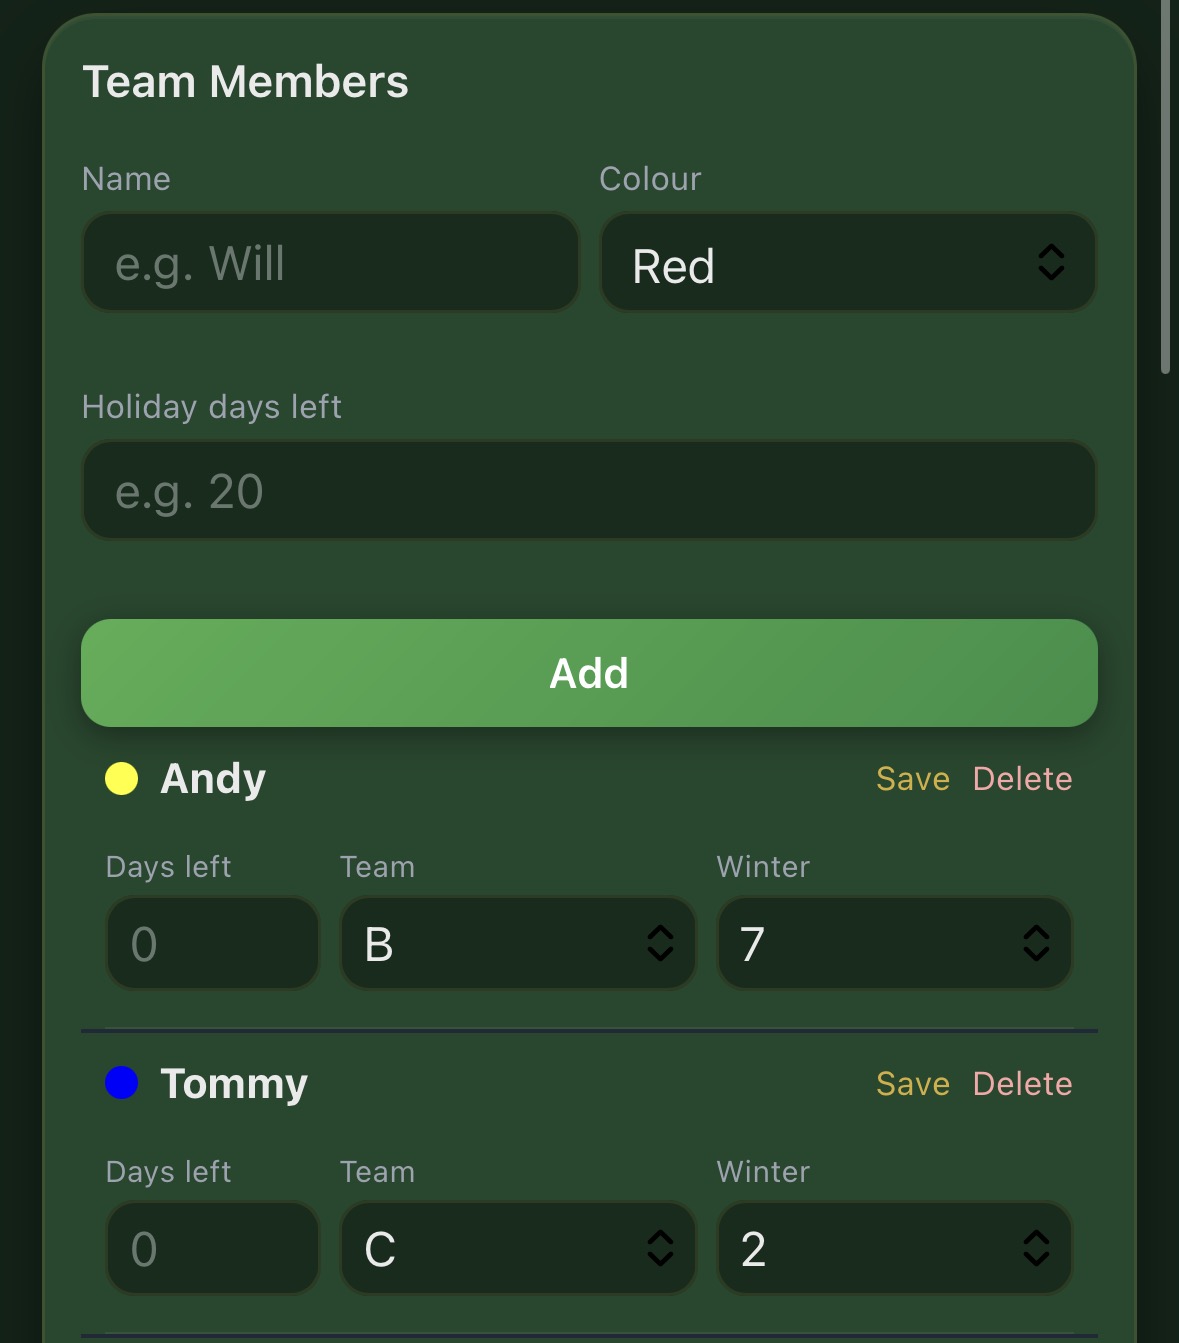
Add team members

  1. Enter the team member's name.
  2. Assign a colour so their holidays are easy to identify on the calendar.
  3. Enter holiday days remaining when the holiday-request feature is being used. Leave it blank if the club is not tracking allowances in BunkerSync.
  4. Optionally assign the person to a summer weekend team or winter rotation number.
  5. Tap Add. The person becomes available across the relevant Team Hub features.
Existing team members: use the controls beside each name to adjust remaining days, weekend assignments or remove the person.
Team Hub settings for adding team members, colours and holiday days
Team MembersNames, calendar colours, holiday allowance and rota assignments are managed here.

Holiday-request rules

  1. Enter the maximum number of staff normally allowed off on the same day.
  2. Turn on Allow staff holiday requests.
  3. Tap Save.

Staff can still submit a request when the limit is reached, but the app displays a warning so the clash is clear before it is sent or approved.
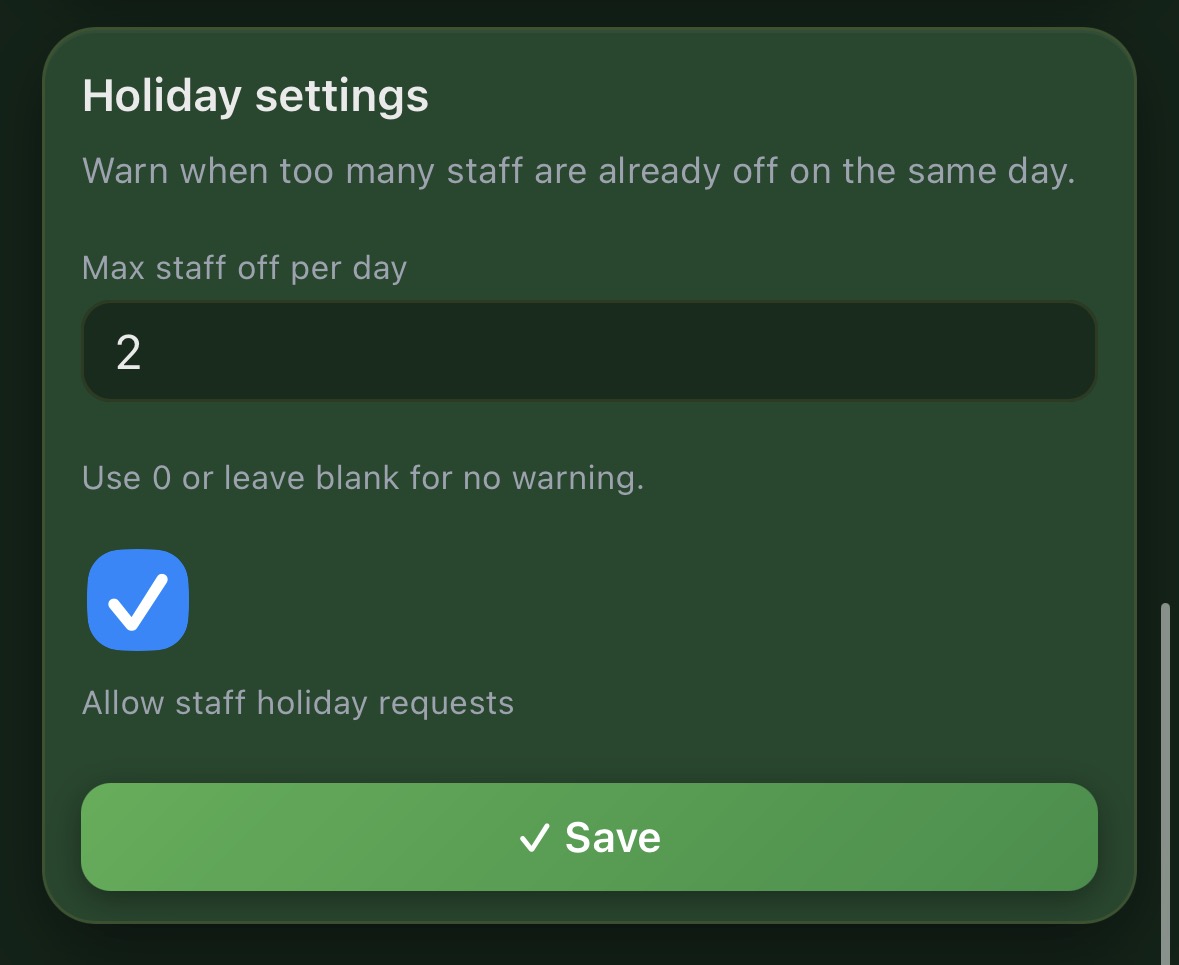
Holiday settings with maximum staff off and requests enabled
Holiday settingsUse 0 or leave the limit blank when no warning is required.

Weekend rota

The rota is optional. Turn it on only when the club wants weekend teams or individual winter numbers displayed on the calendar.
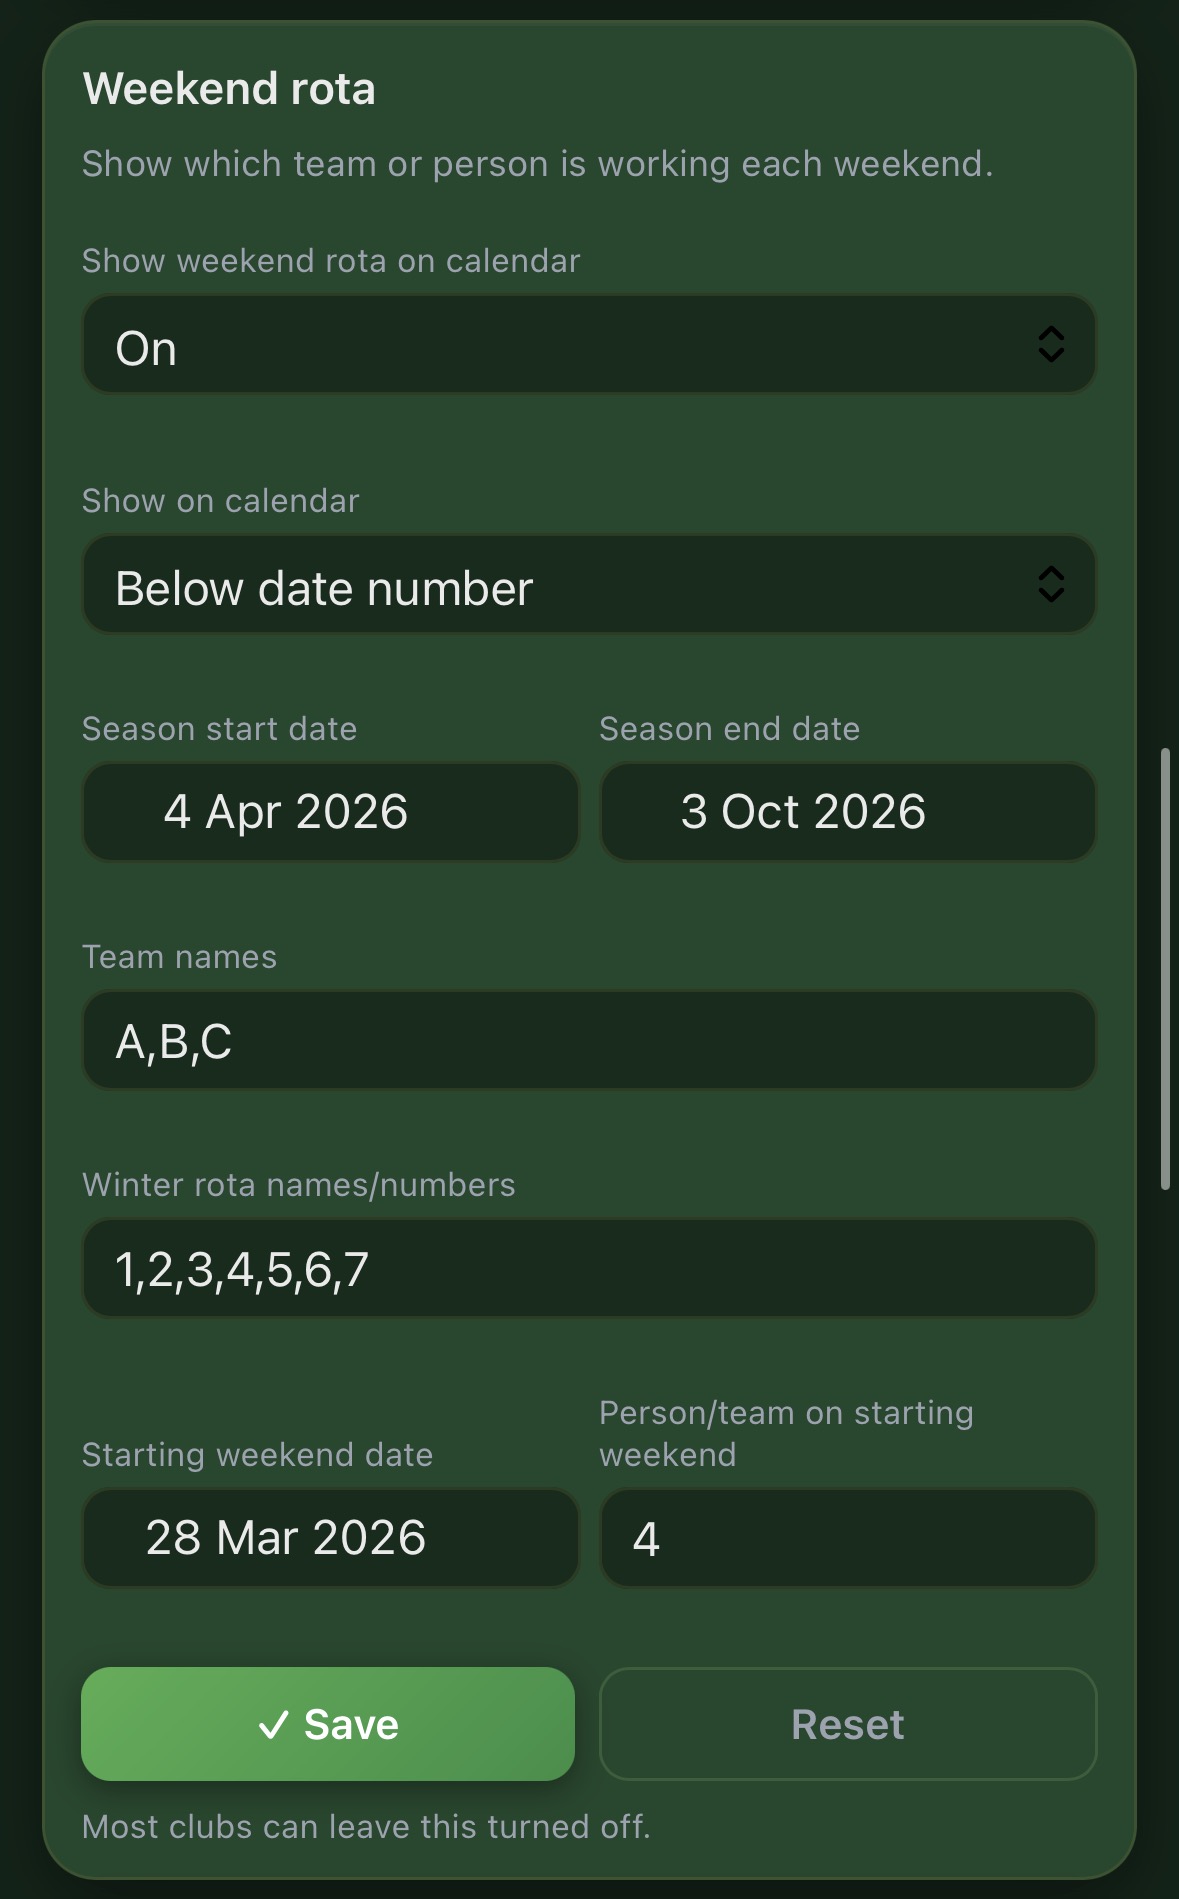
  1. Set Show weekend rota on calendar to On.
  2. Choose where the rota label appears on each calendar date.
  3. Enter the summer season start and end dates.
  4. Enter the summer team names, separated by commas, for example A,B,C.
  5. Enter the winter rotation names or numbers, separated by commas, for example 1,2,3,4,5,6,7.
  6. Choose a starting weekend and the team or person due to work first, then tap Save.
Why choose a starting person? It lets the rota begin with someone who has not just worked the previous weekend, rather than always restarting from the first name or number.
Weekend rota setup with summer and winter rotation
Weekend rotaSummer teams and winter individual rotations can use different sequences.

Add maintenance machines

Add every machine or vehicle that the team needs to sign out in the Maintenance Log. Use clear names that are easy to recognise, especially where the club owns several similar machines.
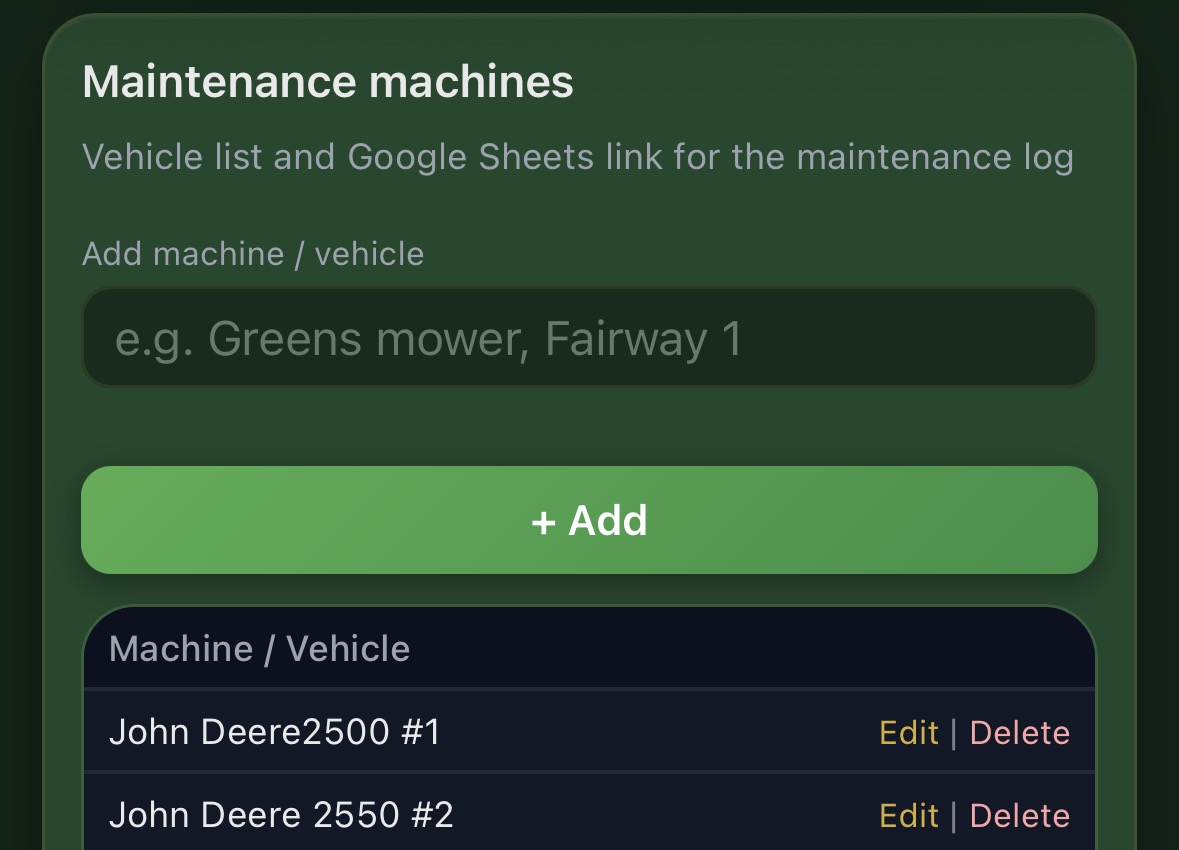
  1. Enter a machine or vehicle name.
  2. Tap Add.
  3. Use Edit or Delete to keep the list current.
Maintenance machine list in Team Hub settings
Maintenance machinesThe shared list feeds directly into the Maintenance Log.

Links and Sheets

The links section can hold the optional holiday backup and the club tee-sheet address.
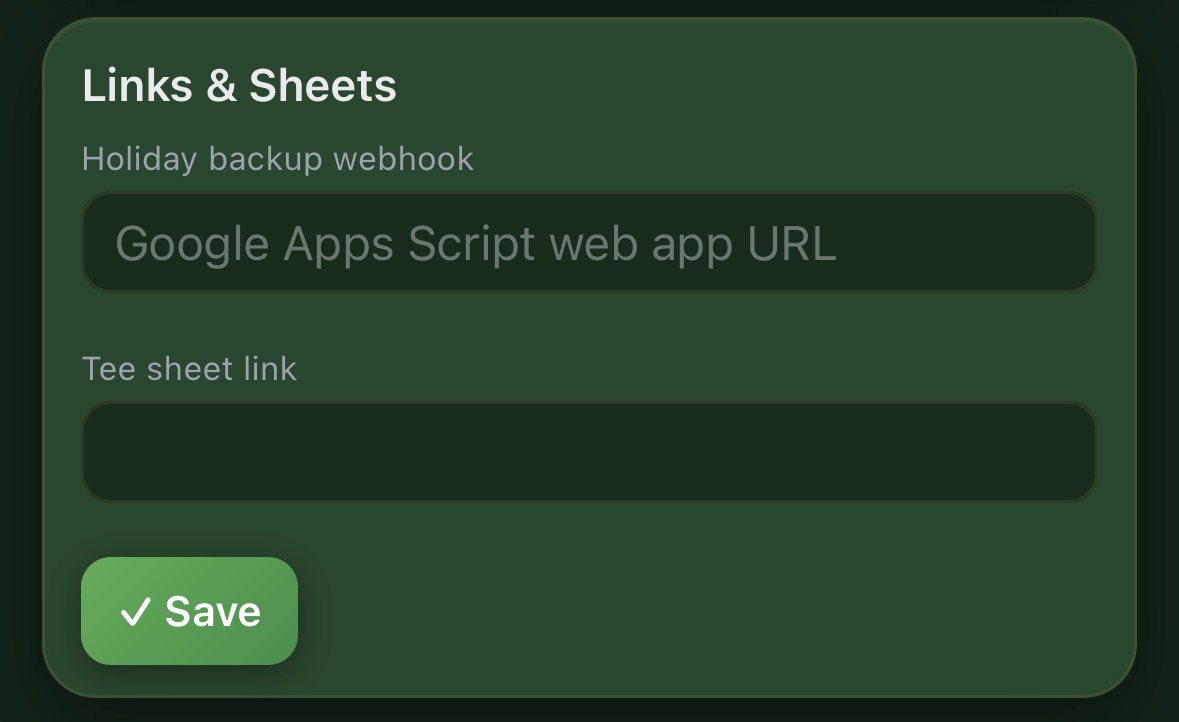
  1. For holiday backup, paste the supplied Google Apps Script web app URL. This is not the normal Google Sheet sharing link.
  2. Paste the full address used to open the club tee sheet.
  3. Tap Save.
Tee-sheet links: a BRS daily link may end in day.php, but this is not a universal requirement. Always paste the exact address used by the club.
Links and Sheets settings for holiday backup and tee sheet
Links & SheetsOptional connected links are saved once for the club.

Set the admin PIN

The PIN protects setup and manager-only controls while allowing the rest of the team to use the hub normally.

  1. Enter a PIN.
  2. Tap Save admin PIN.
  3. Share it only with the people who should have manager access.

Admin mode remains active on that device for up to 30 days unless the user explicitly logs out. A gold settings cog confirms that admin mode is active.
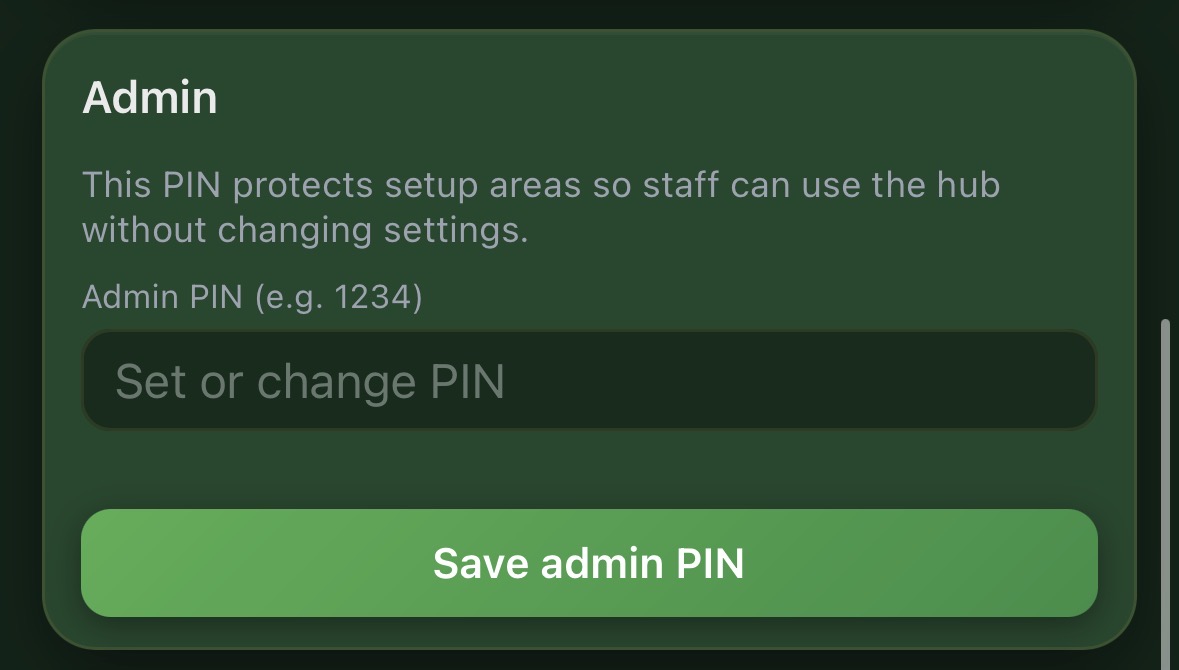
Admin PIN setup
Admin PINUse the PIN to protect settings and approval controls.

Check the version number

The current Team Hub version appears at the bottom of settings. Quote this number when reporting an issue so it is clear which release is installed.
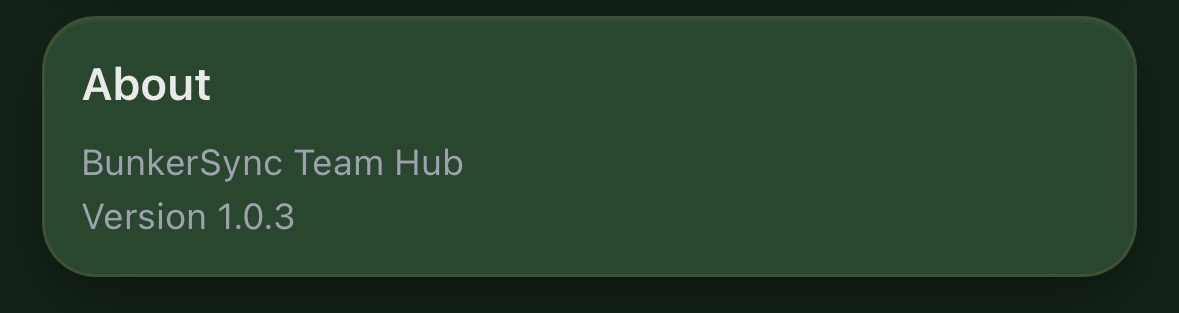
BunkerSync Team Hub version number
AboutThe version number is shown at the bottom of the settings screen.
3

Machine records

Maintenance Log

Record who used each machine, its hours and its condition. Active amber and red faults are brought together for the mechanic and highlighted on Team Hub.

Sign out a machine

There are three ways to choose a machine: search for it, select it from the list, or scan its QR code.

  1. Select or scan the machine. The first QR scan may ask for camera permission because BunkerSync is a web app.
  2. Choose Green, Amber or Red.
  3. Enter the current hours and your initials.
  4. Add a clear fault note when Amber or Red is selected.
  5. Tap Add.

The form also shows the last recorded status, date, initials and hours for the selected machine.
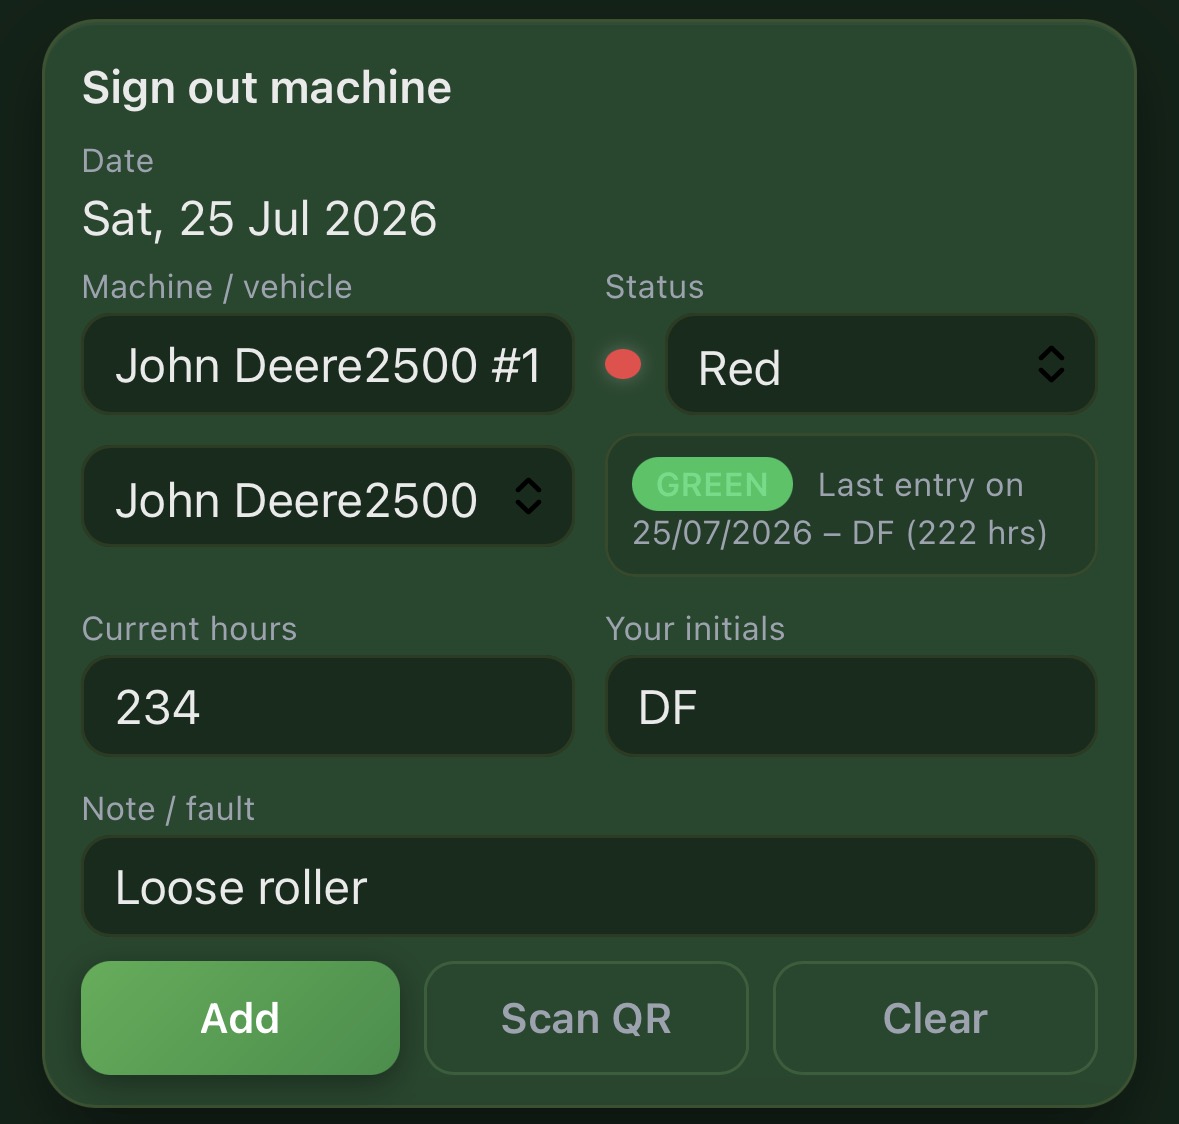
Green — operating normallyAmber — monitor or attention requiredRed — fault or urgent attention
Maintenance Log machine sign-out form
Sign out machineSelect the machine, record hours and initials, then add the condition and fault note.

Search the maintenance history

Saved records appear below the form. View all entries, today's entries, Red entries or Amber entries, and use the search field to find a machine, initials or note.
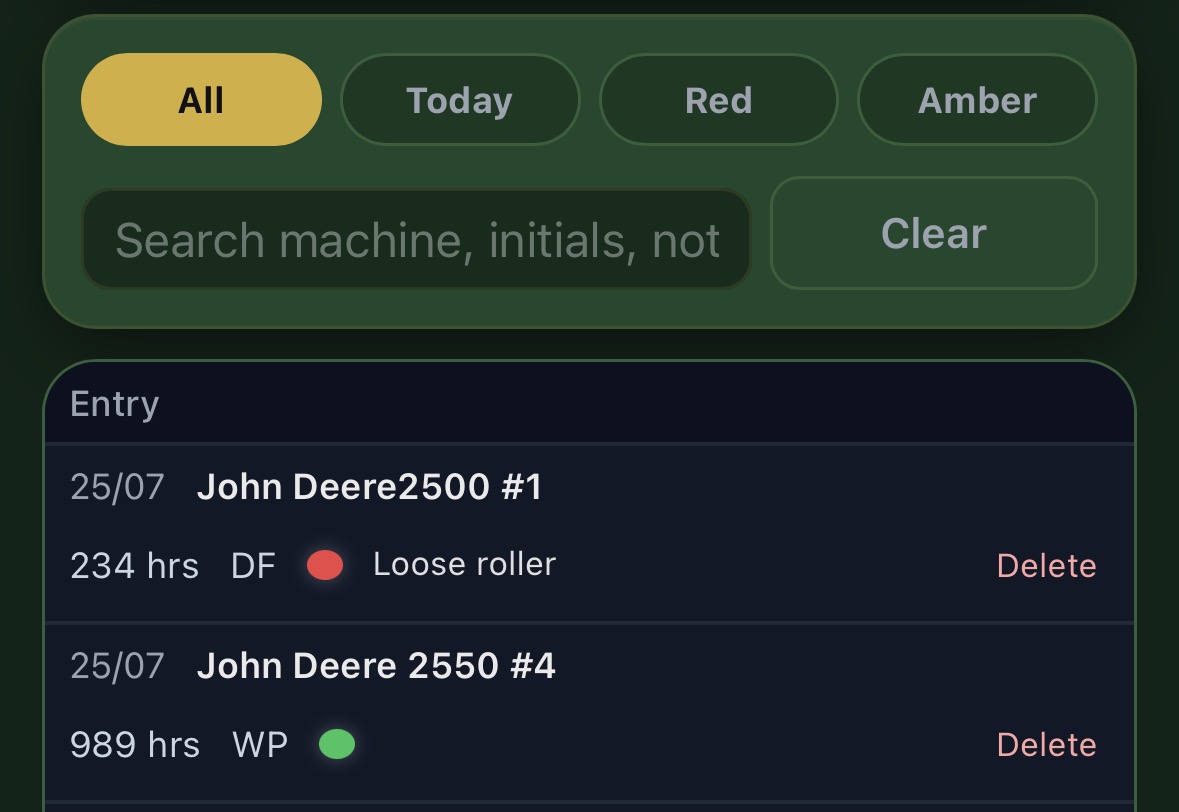
In-app history: the list keeps the most recent 500 entries. When that limit is reached, the oldest in-app records are replaced by newer ones.
Maintenance history filters and machine entries
Maintenance historyFilter or search the log to find previous records quickly.

Use the machine status board

Every machine with an active Amber or Red status is shown on one status board with its date, hours, initials and fault note. Once the repair is complete, tap Mark fixed to remove it from the active attention list.
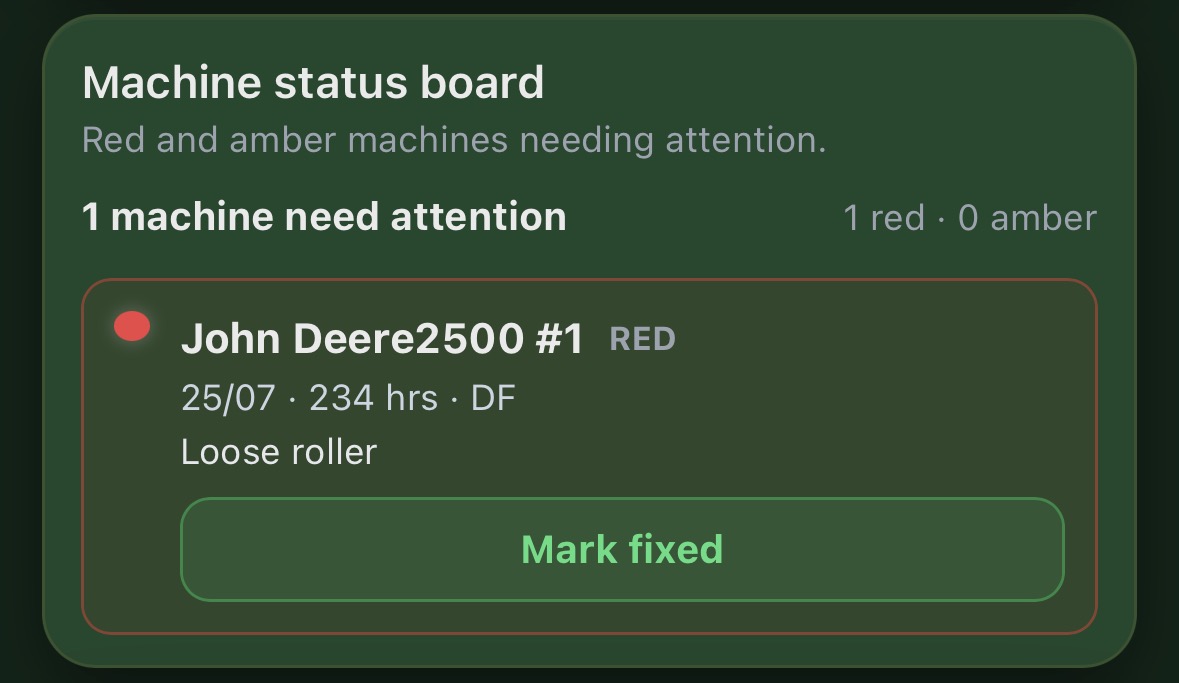
Machine status board with red fault and mark fixed button
Machine status boardThe mechanic can see all machines requiring attention in one place.

Team Hub warning

A warning dot appears on the Maintenance Log tile whenever an Amber or Red machine is active, so the issue is visible before the module is opened.
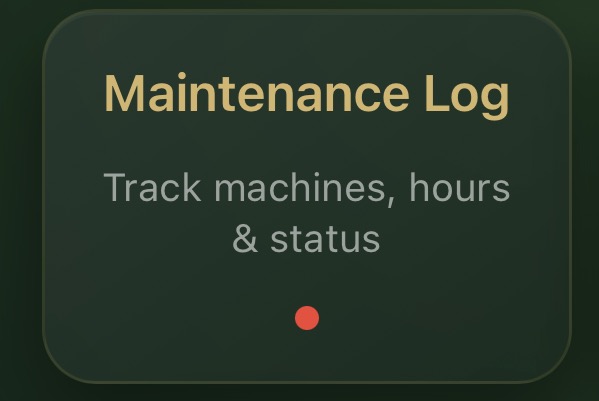
Maintenance Log Team Hub tile with warning dot
Dashboard warningThe coloured dot indicates an active machine issue.
4

Holidays, events and rota

Calendar

The shared calendar combines staff holidays, club events, blocked dates and the optional weekend rota. Admins can manage requests and staff can submit leave from the same screen.

Read the calendar

Holiday entries use the colour assigned to each team member. Weekend teams or winter numbers appear on Saturdays and Sundays, and club events are shown on their dates.
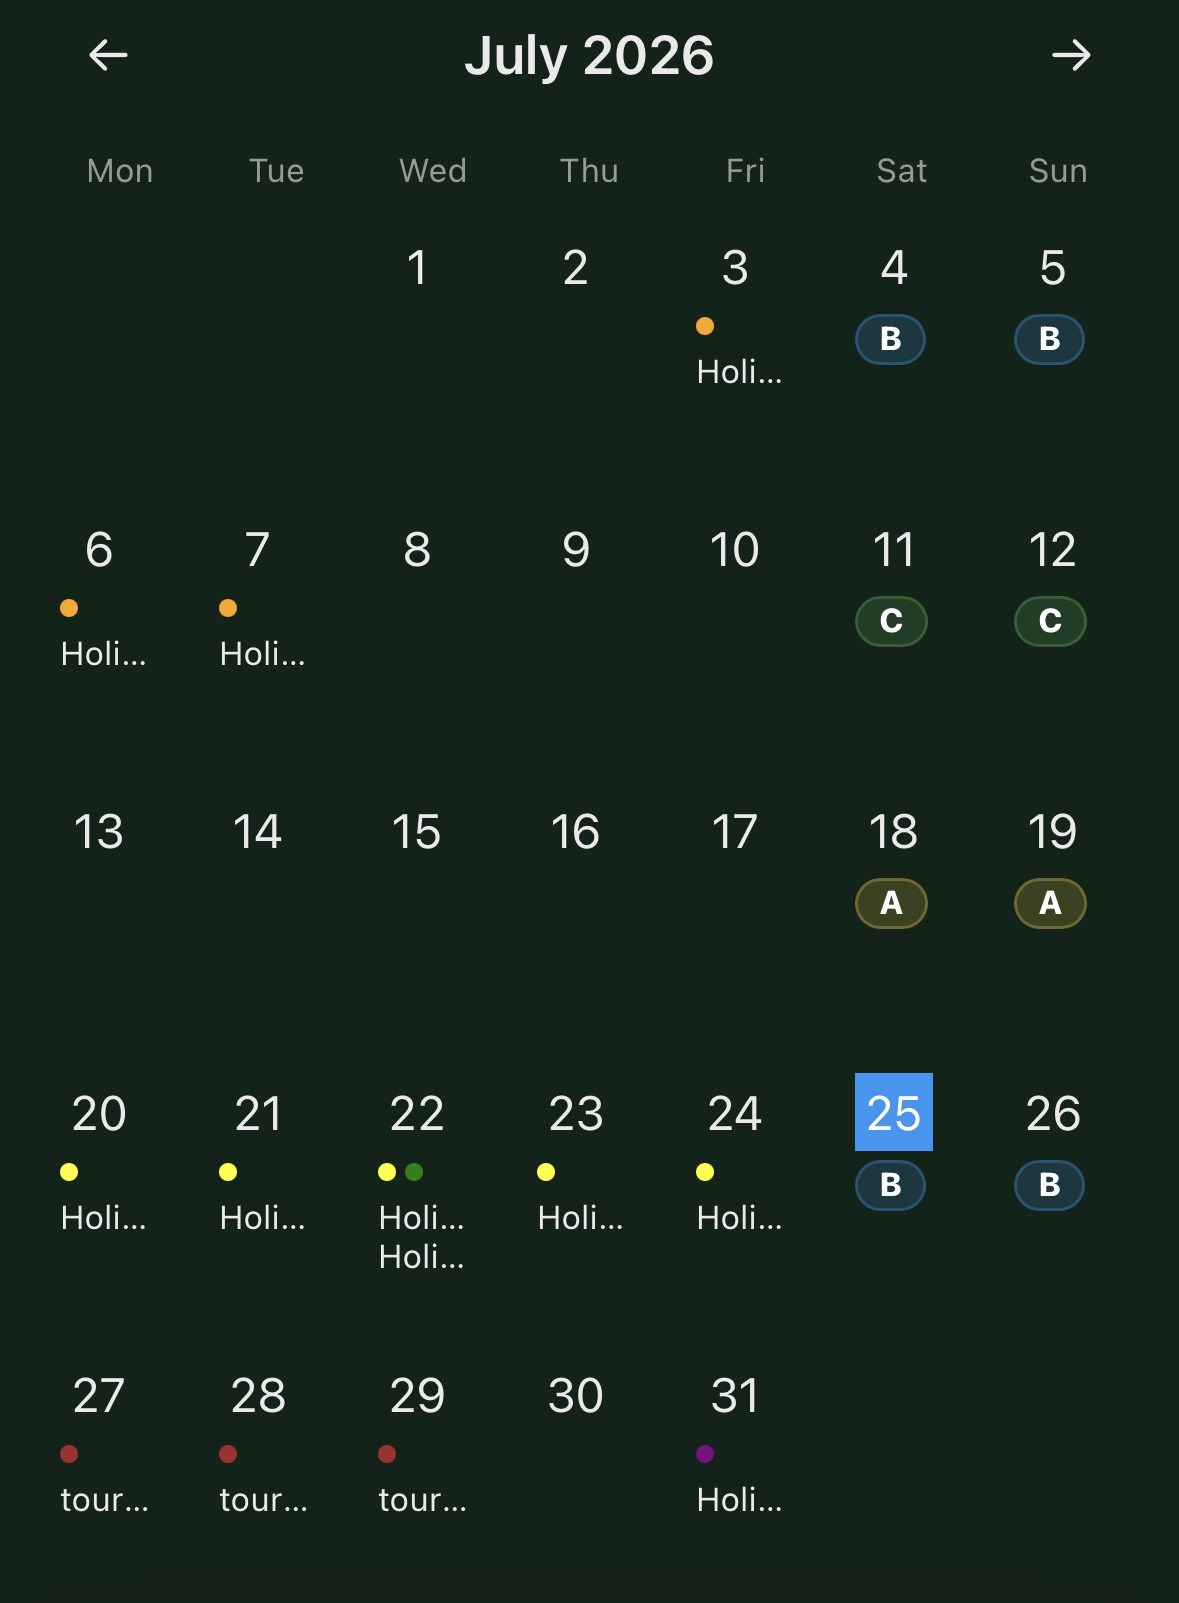
  1. Use the left and right arrows to move one month at a time.
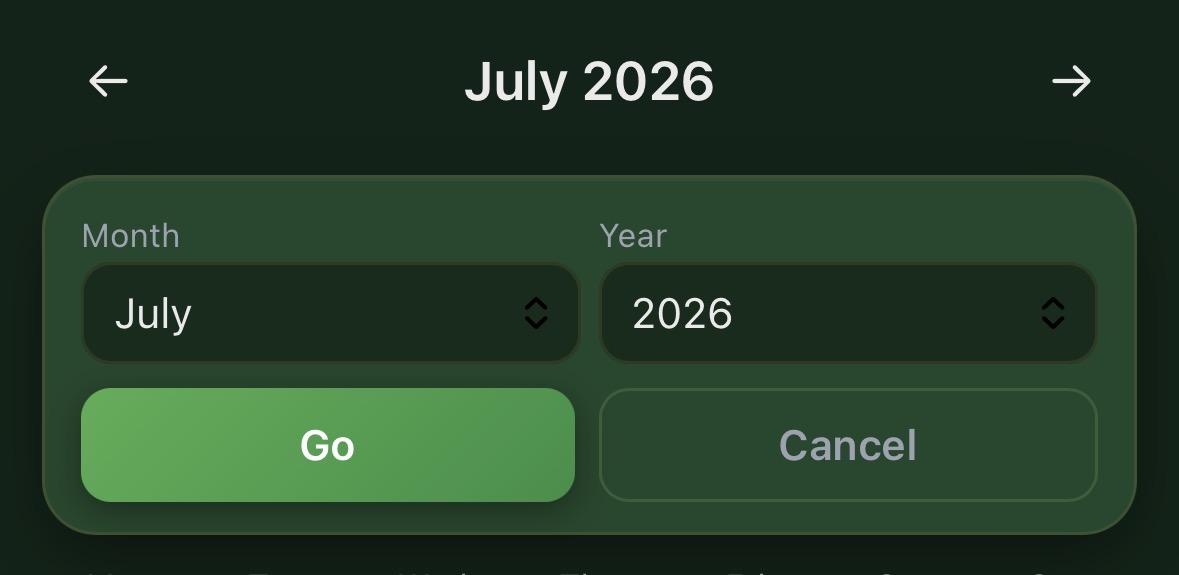
  2. Tap the month and year heading to jump directly to another month or year.
  3. Tap any date to view all holidays and events underneath the calendar.
Calendar with holidays, events and weekend rota
Monthly calendarColoured dots identify holidays and rota labels show weekend coverage.
Calendar month and year shortcut
Jump to a dateSelect a month and year, then tap Go.
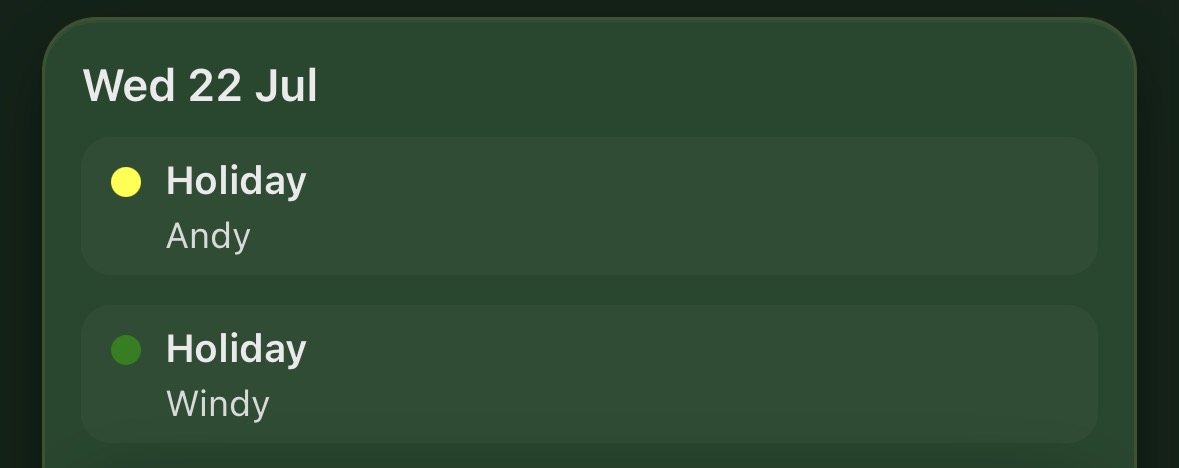
Calendar details showing two holidays on one day
Day detailsTap a date to see every holiday and event recorded for that day.

Approve holiday requests

When admin mode is active, pending requests appear below the calendar. Each request shows the person's current allowance and the number of days that would remain after approval.

  1. Review the requested dates and remaining allowance.
  2. Tap Approve or Decline.
  3. Approved days are automatically deducted from the remaining holiday figure in Team Hub settings.

Admins can also use the buttons below the request panel to add an event, book a holiday directly or block days.
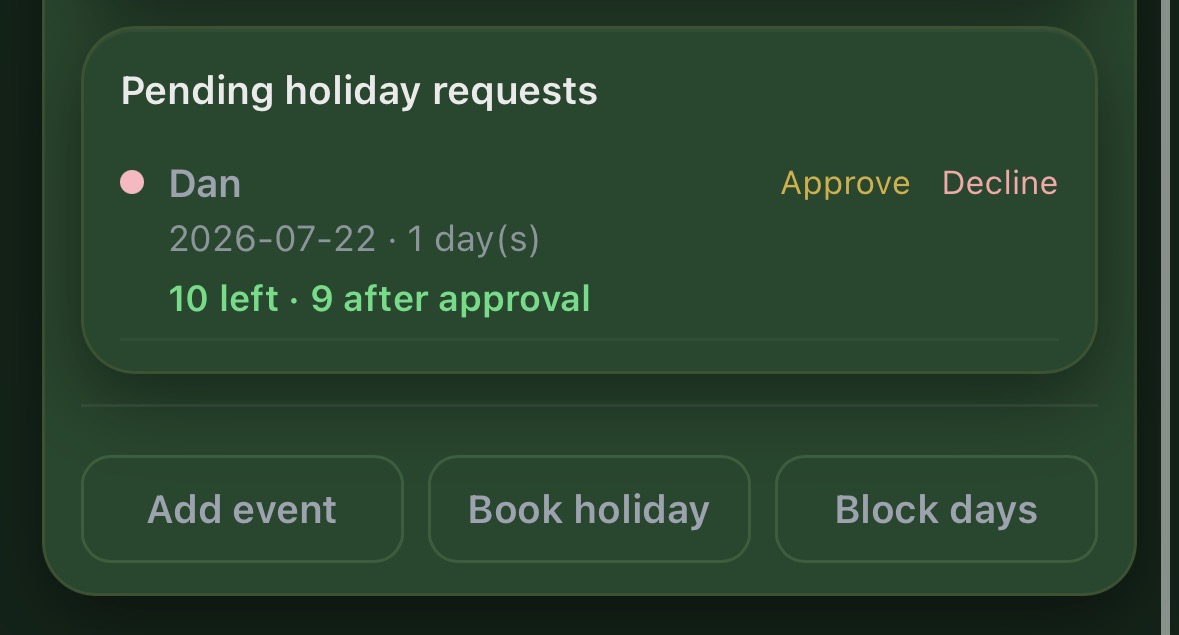
Pending holiday request with approve and decline controls
Admin controlsReview allowance before approving and use the calendar-management buttons below.

Block important dates

Blocked dates are shown with a red circle. Use them for major competitions, maintenance week or other periods when additional leave should be avoided.
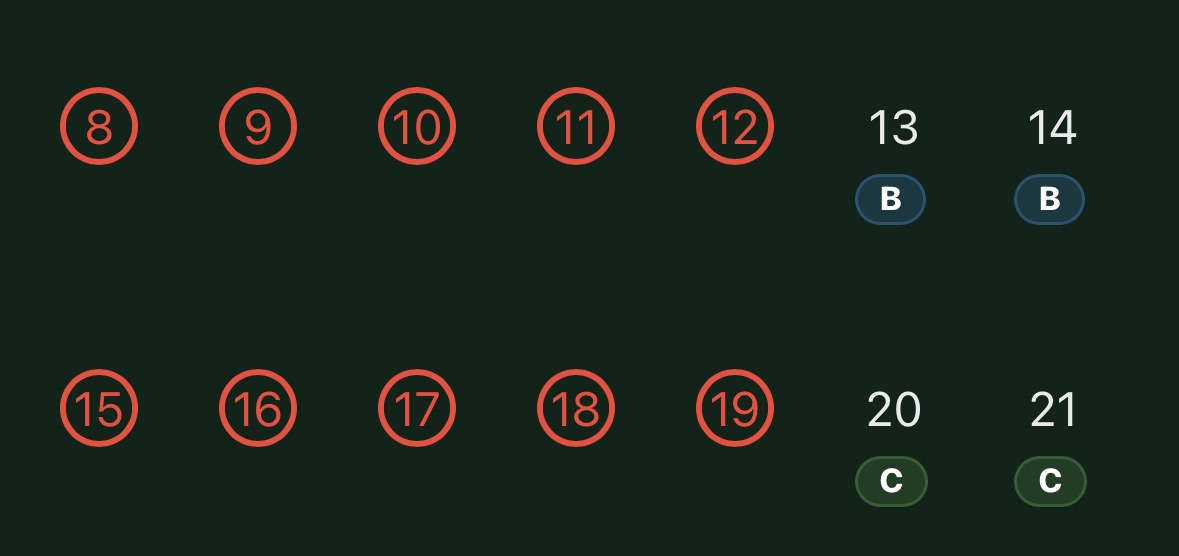
Blocked does not hide the date: it makes the restriction highly visible so staff understand that the day is not normally available.
Calendar dates circled red to show blocked days
Blocked datesRed circles make restricted periods easy to recognise.

Pending requests on Team Hub

When an administrator is signed in, the Calendar tile shows the number of pending holiday requests.
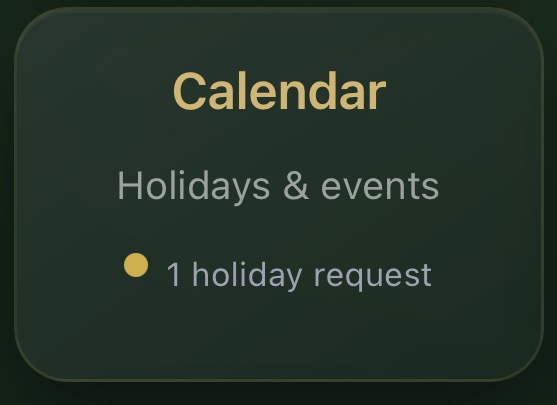
Calendar Team Hub tile showing one pending holiday request
Calendar warningOutstanding requests are visible from the dashboard.

Request a holiday as a staff member

Non-admin users can submit a request from the form at the bottom of the calendar screen.

  1. Select the team member.
  2. Enter the number of days.
  3. Check the requested start date.
  4. Add an optional note.
  5. Tap Send request.

If too many people are already off, the app displays the warning configured in settings before the request is submitted.
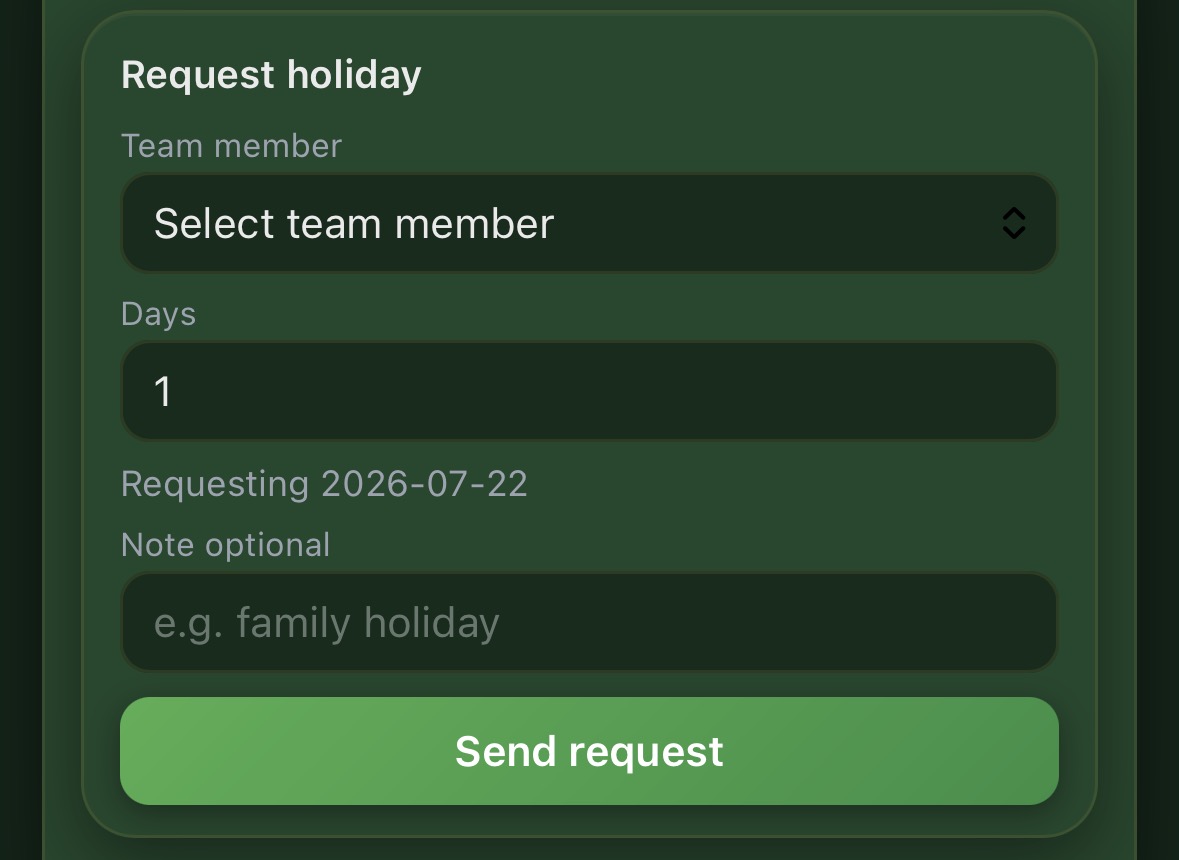
Staff holiday request form
Request holidayThe request remains pending until an administrator approves or declines it.
5

Shared job board

Daily Jobs

Build the daily work board inside Team Hub. Names come directly from the Team Members list and the whole team can see the latest assignments.

Assign the day's work

The board opens on today's day. Use the day buttons at the top to move through the week or open the separate weekend board.
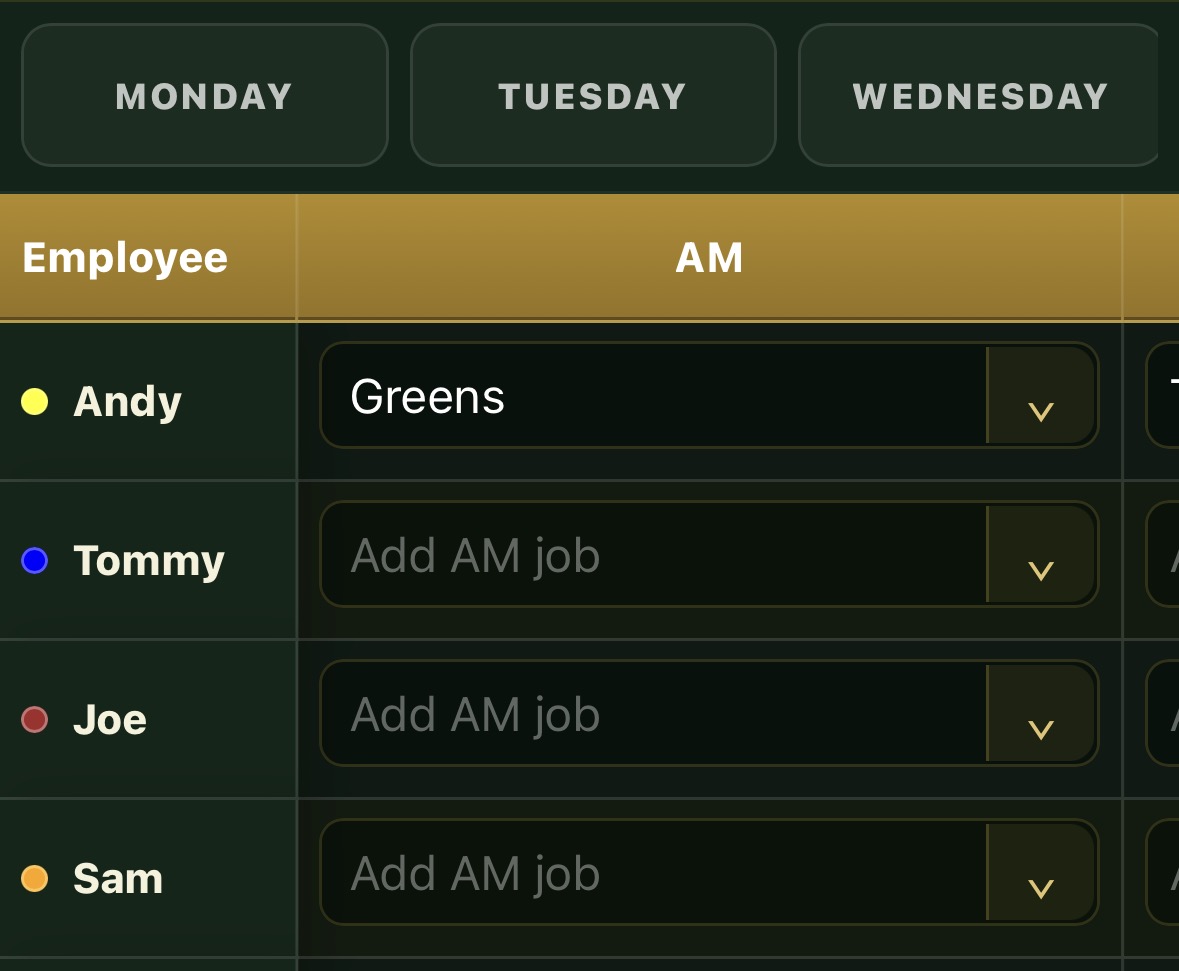
  1. Sign in as admin; only administrators can change the board.
  2. Add an AM task for each person.
  3. Assign a vehicle where required.
  4. Add the PM task.
  5. Longer entries wrap and the box expands so the full instruction remains visible.
Daily Jobs board with team members and AM assignments
Daily Jobs boardTeam names and colours are pulled automatically from Team Hub settings.

Use quick jobs or type your own

Tap the dropdown arrow beside a job box to open common greenkeeping tasks. Choose a shortcut or type a different instruction directly into the box.
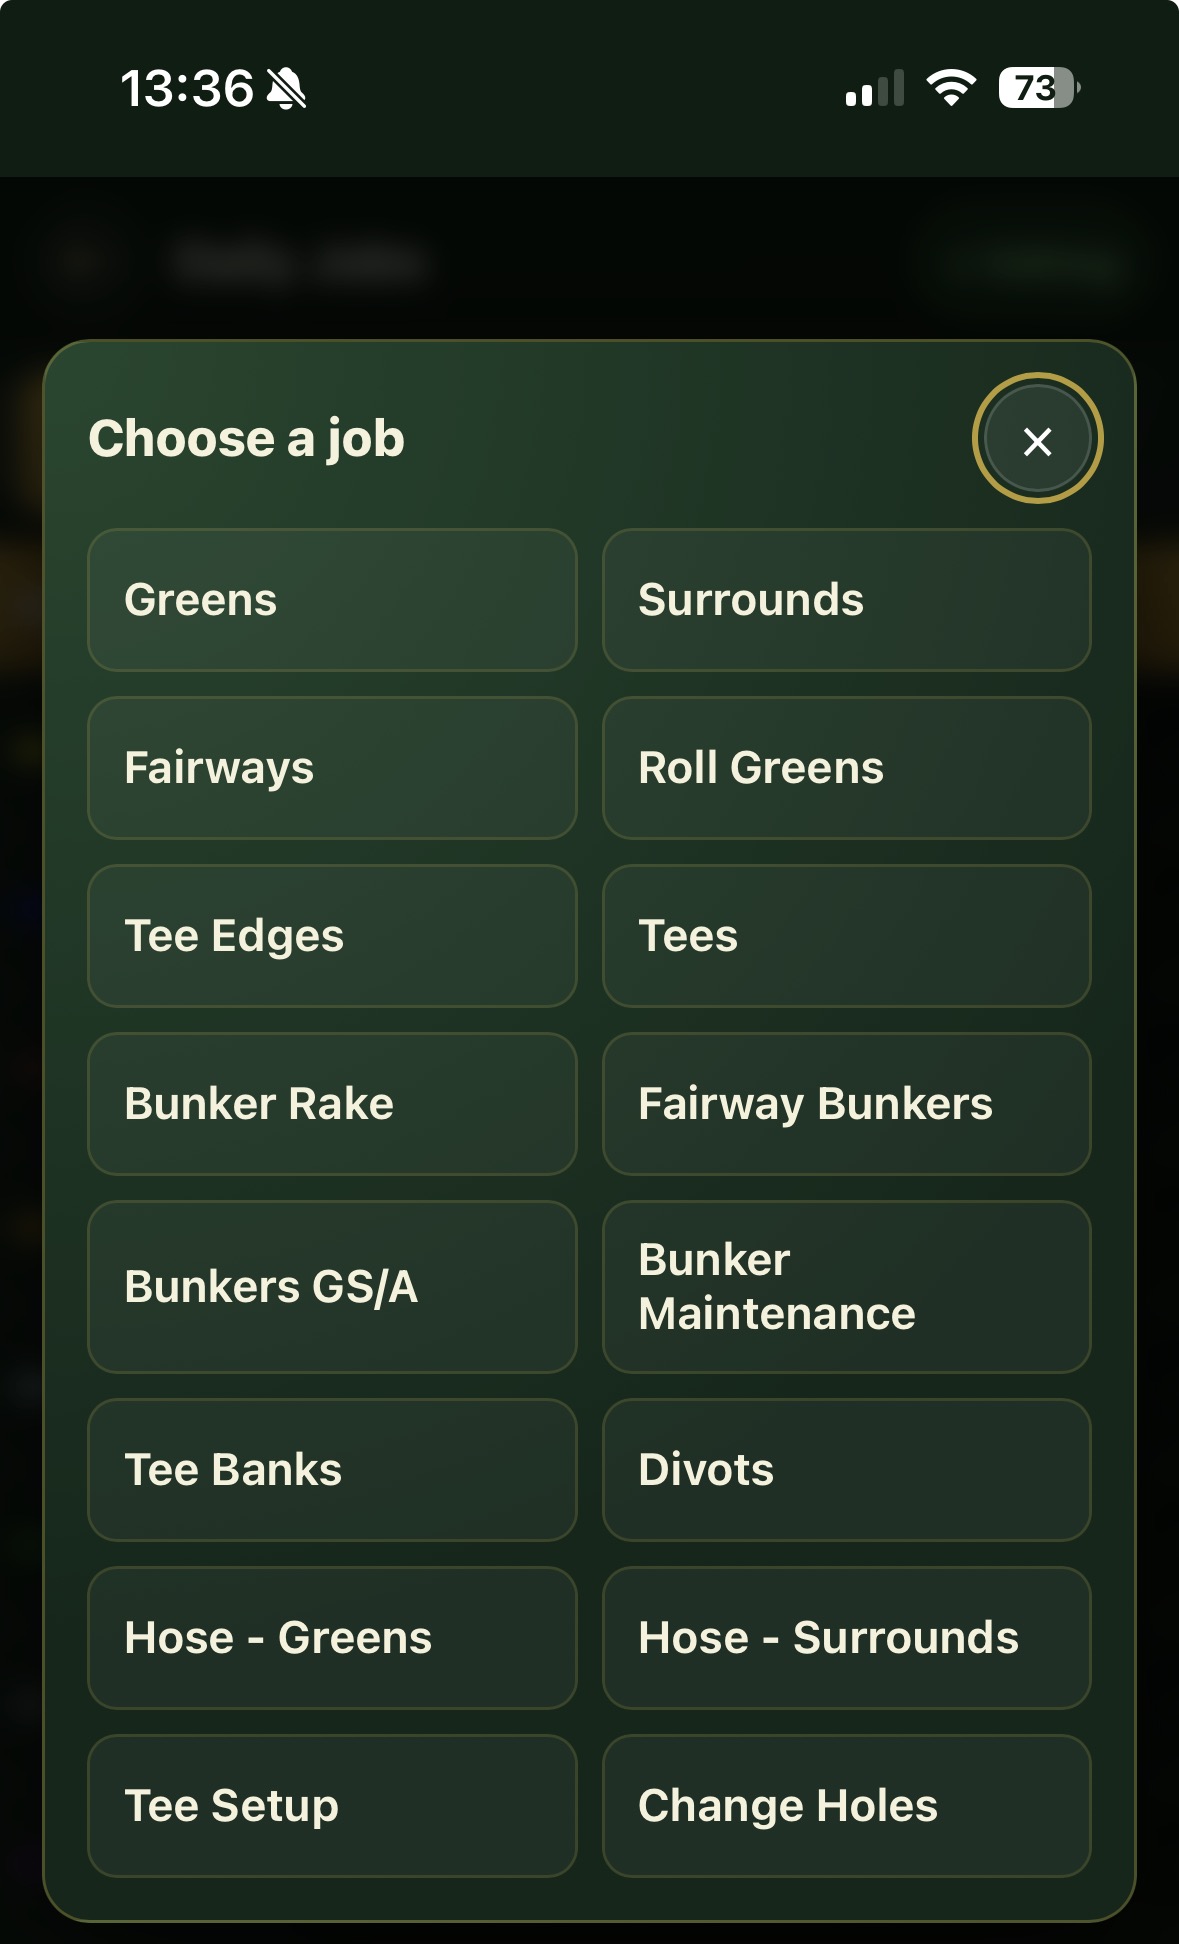
Daily Jobs quick task selector
Choose a jobFamiliar jobs are one tap away without preventing custom instructions.

Rotate the phone for the clearest view

Landscape mode shows the employee, AM task, vehicle and PM task together, which is useful during the morning team briefing.

Daily Jobs row in phone landscape view
Landscape viewRotate the phone to see the full working row at once.
6

Greens yield tracking

Clipping Data

Record the volume collected from every green and let BunkerSync convert it into mL/m². Multiple vehicle and cut slots allow separate or shared rounds.
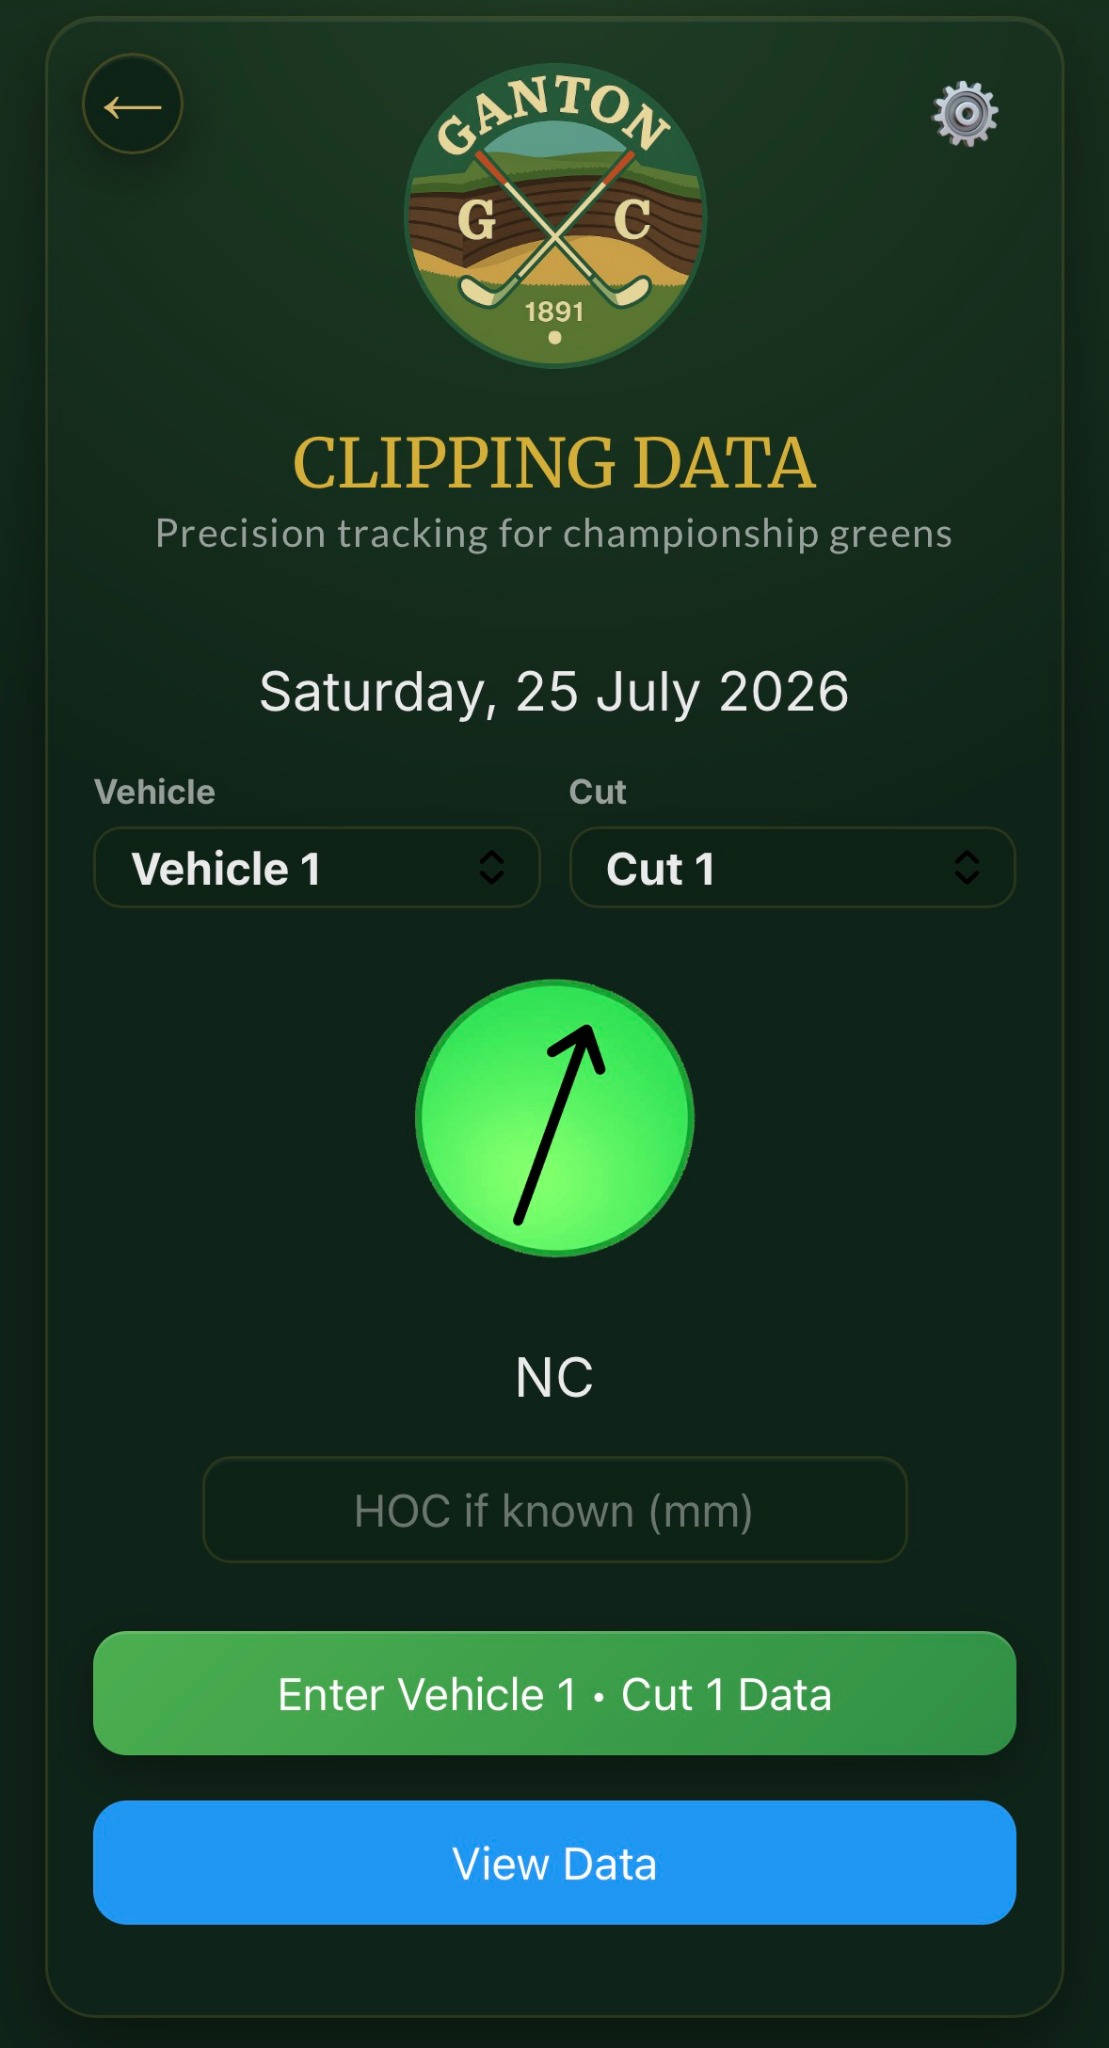
Start a clipping round

  1. Check the selected Vehicle and Cut.
  2. If several people or machines are contributing to one combined dataset, everyone should choose the same slot, normally Vehicle 1 · Cut 1.
  3. Use different vehicle or cut slots only when those collections need to remain separate.
  4. Enter the height of cut if known.
  5. Check the visual direction arrow and the day's instruction, such as NC for no clean-up.
  6. Tap the green Enter Data button.
Shared entry: devices using the same vehicle and cut work on the same live round.
Clipping Data home screen with vehicle, cut, arrow and buttons
Clipping homeStart data entry or open the built-in charts from this screen.

Set directions, notes and green sizes

Tap the settings cog in the top-right corner.
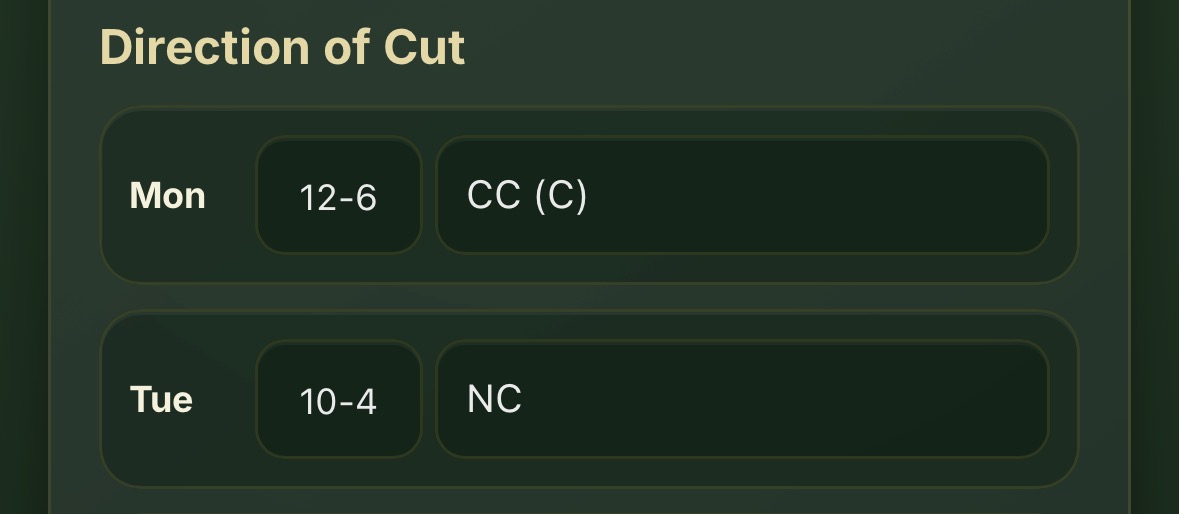
  1. Set the direction of cut for each day.
  2. Add the short direction label and any daily instruction or clean-up note.
  3. Enter the area of every green in square metres.
  4. Save the setup. Green areas normally only need entering once unless the measurements change.
Clipping direction and notes settings
Direction of cutThe chosen direction and notes appear automatically on the home screen.
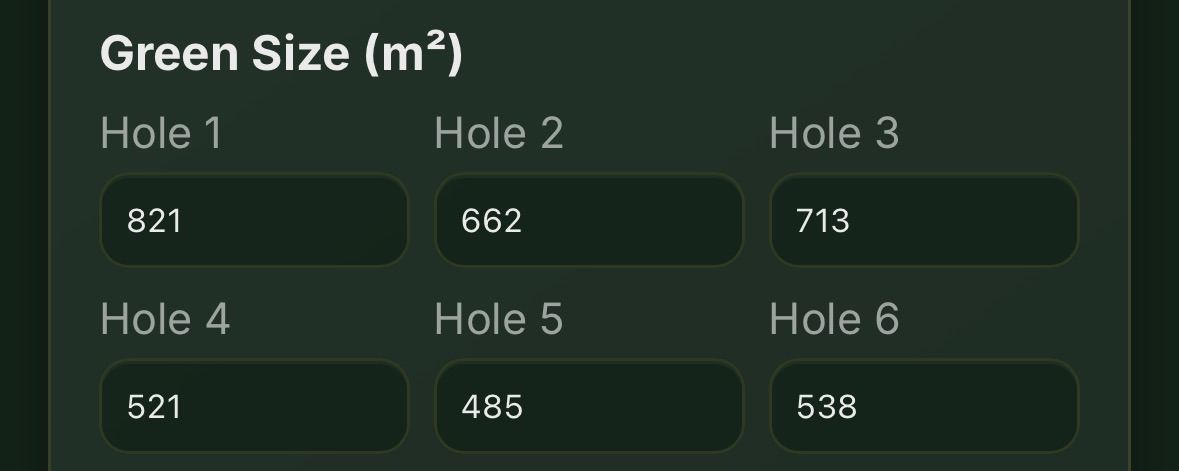
Clipping green size settings in square metres
Green sizesAccurate m² values allow fair comparison between differently sized greens.

Enter litres and finish

  1. Enter the collected volume for each green in litres.
  2. Continue until all required greens are complete.
  3. Tap Finish.
  4. BunkerSync converts every result into millilitres per square metre (mL/m²).
  5. Where a Google Sheets connection is configured, the completed result can sync to the sheet. Use Send Report to share the report through WhatsApp.
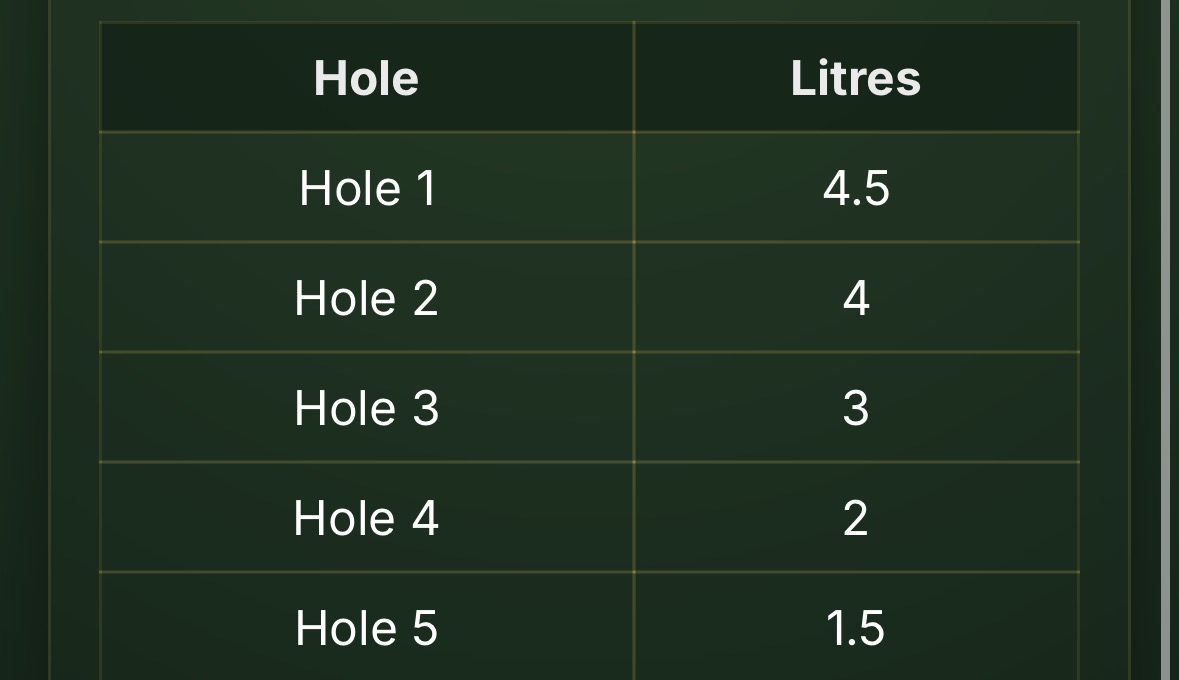
Clipping litres table by hole
Enter litresRecord the actual collected volume against each green.
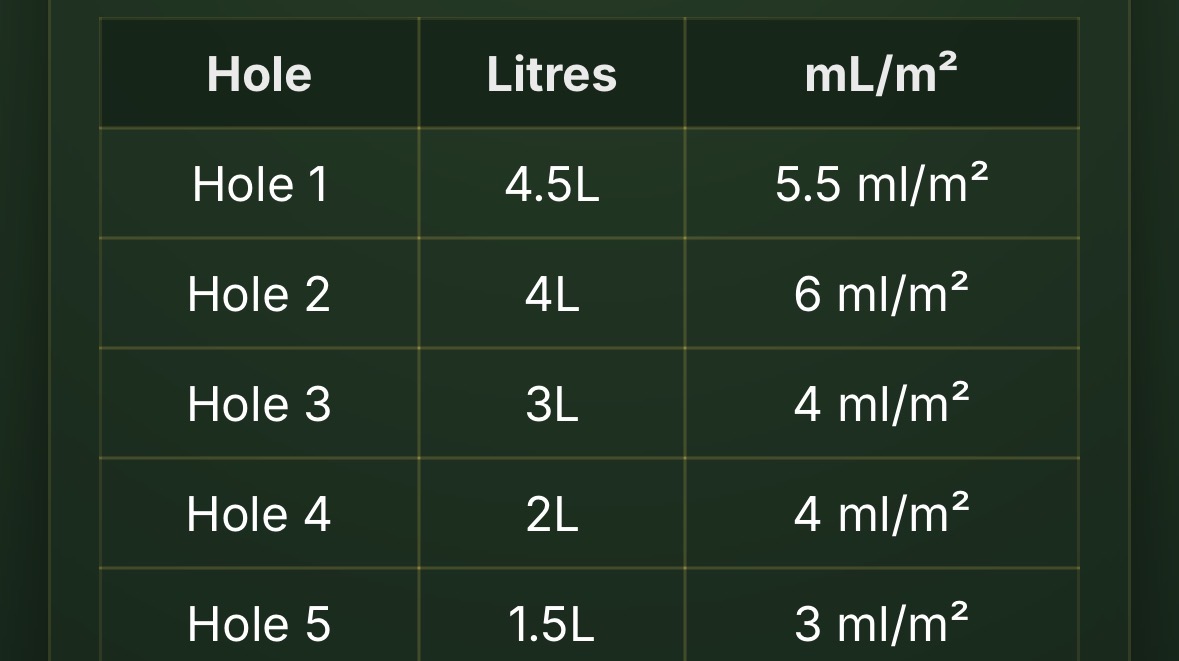
Clipping results converted to millilitres per square metre
Converted resultsThe final table displays litres and mL/m² side by side.

View trends and comparisons

Tap View Data on the clipping home screen. Choose Today, Week, Month or Calendar and switch between Average and Total yield.

The data view includes summary figures, the number of cuts, a daily trend chart and a green-by-green comparison.
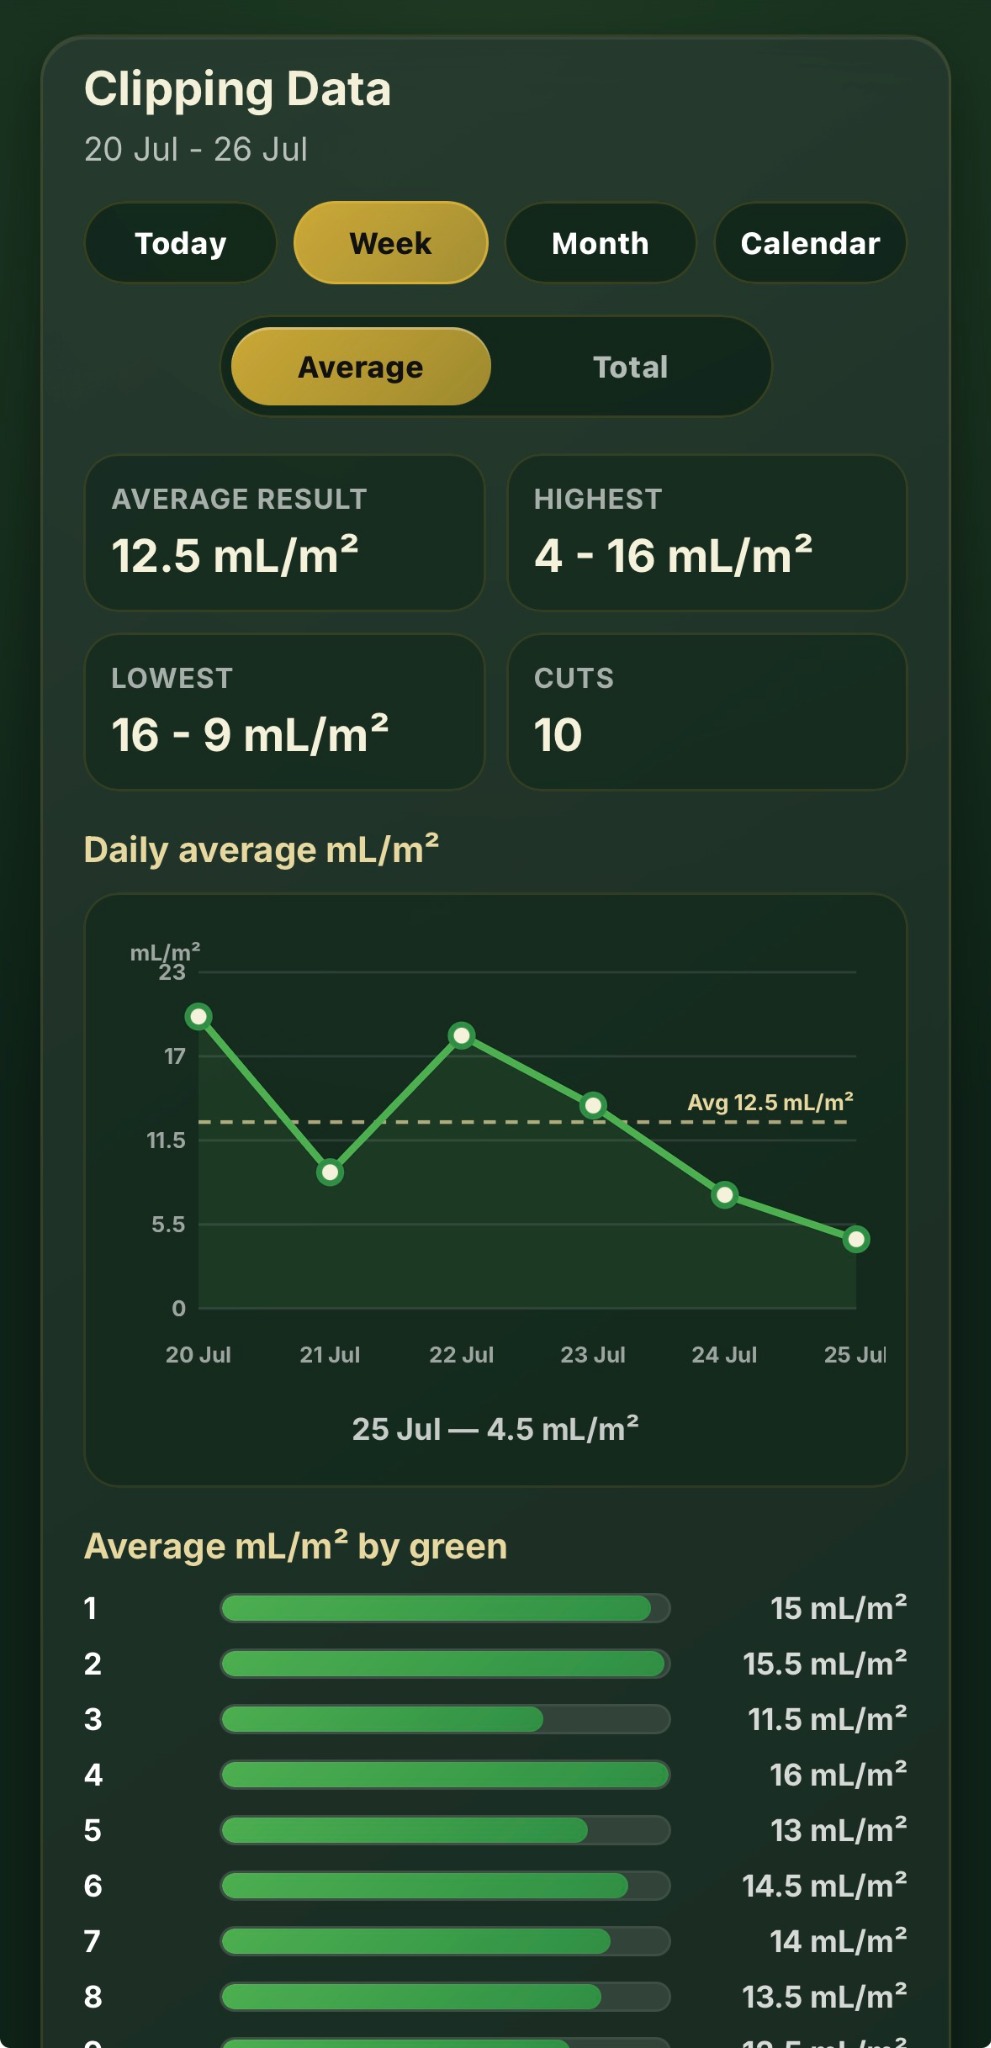
Clipping Data week view with trend chart and green comparison
Clipping data viewReview average or total yield across the chosen period.
7

Mapped bunker work

Bunker Maintenance

Assign work to the exact bunker, give it a priority and track progress using status dots on the hole map, hole tile and full-course map.

Choose a hole or the full-course map

When individual hole maps are available, use tiles 1–18. Clubs without hole images can use the large course map.

Adding hole maps: contact BunkerSync if the club has suitable course-map files. They can be sent using a file-transfer link and prepared for use in the app.

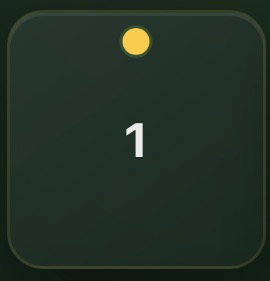
The dots above each hole number summarise the current bunker statuses on that hole. The MAP tile summarises outstanding work placed on the full-course map.
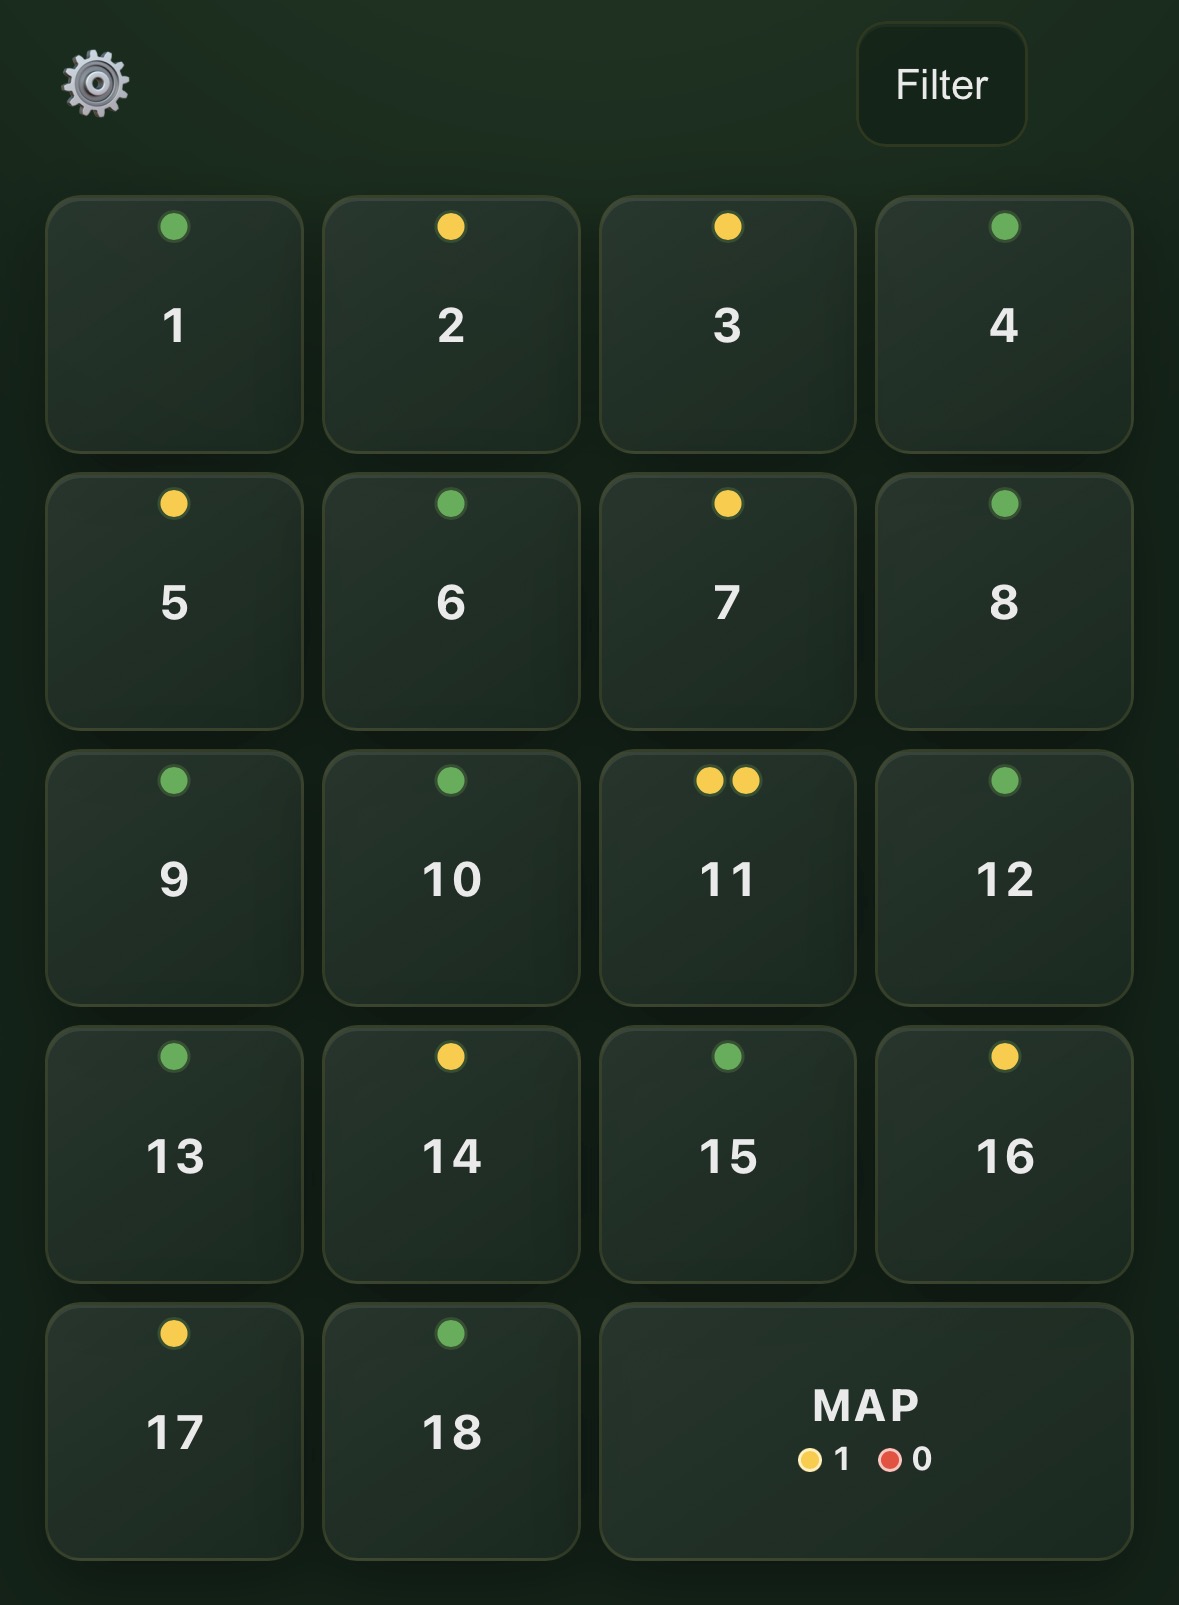
Bunker Maintenance home screen with hole status tiles and map
Bunker homeSelect a numbered hole or open the large course map.

Assign work to a bunker

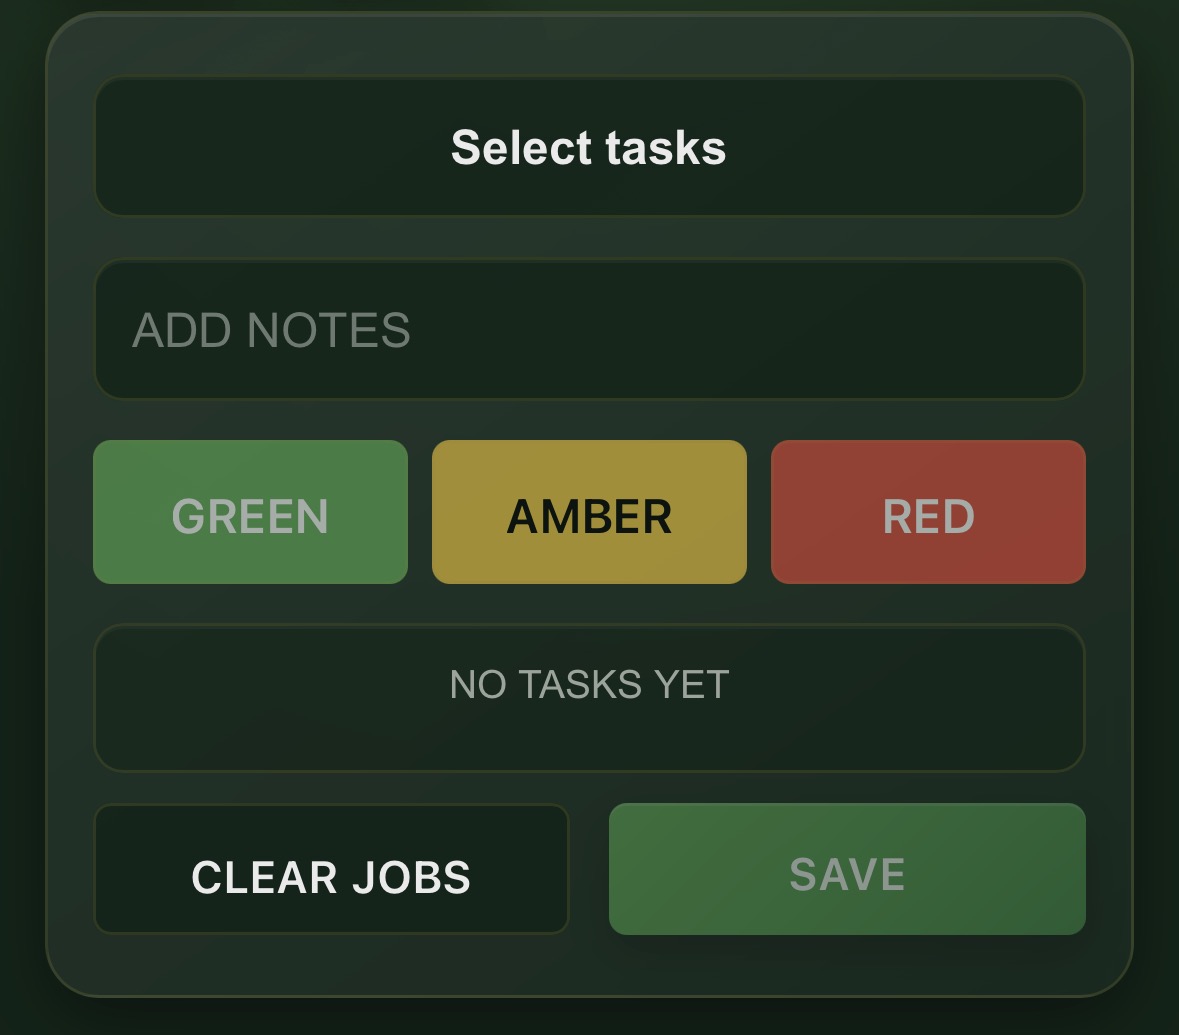
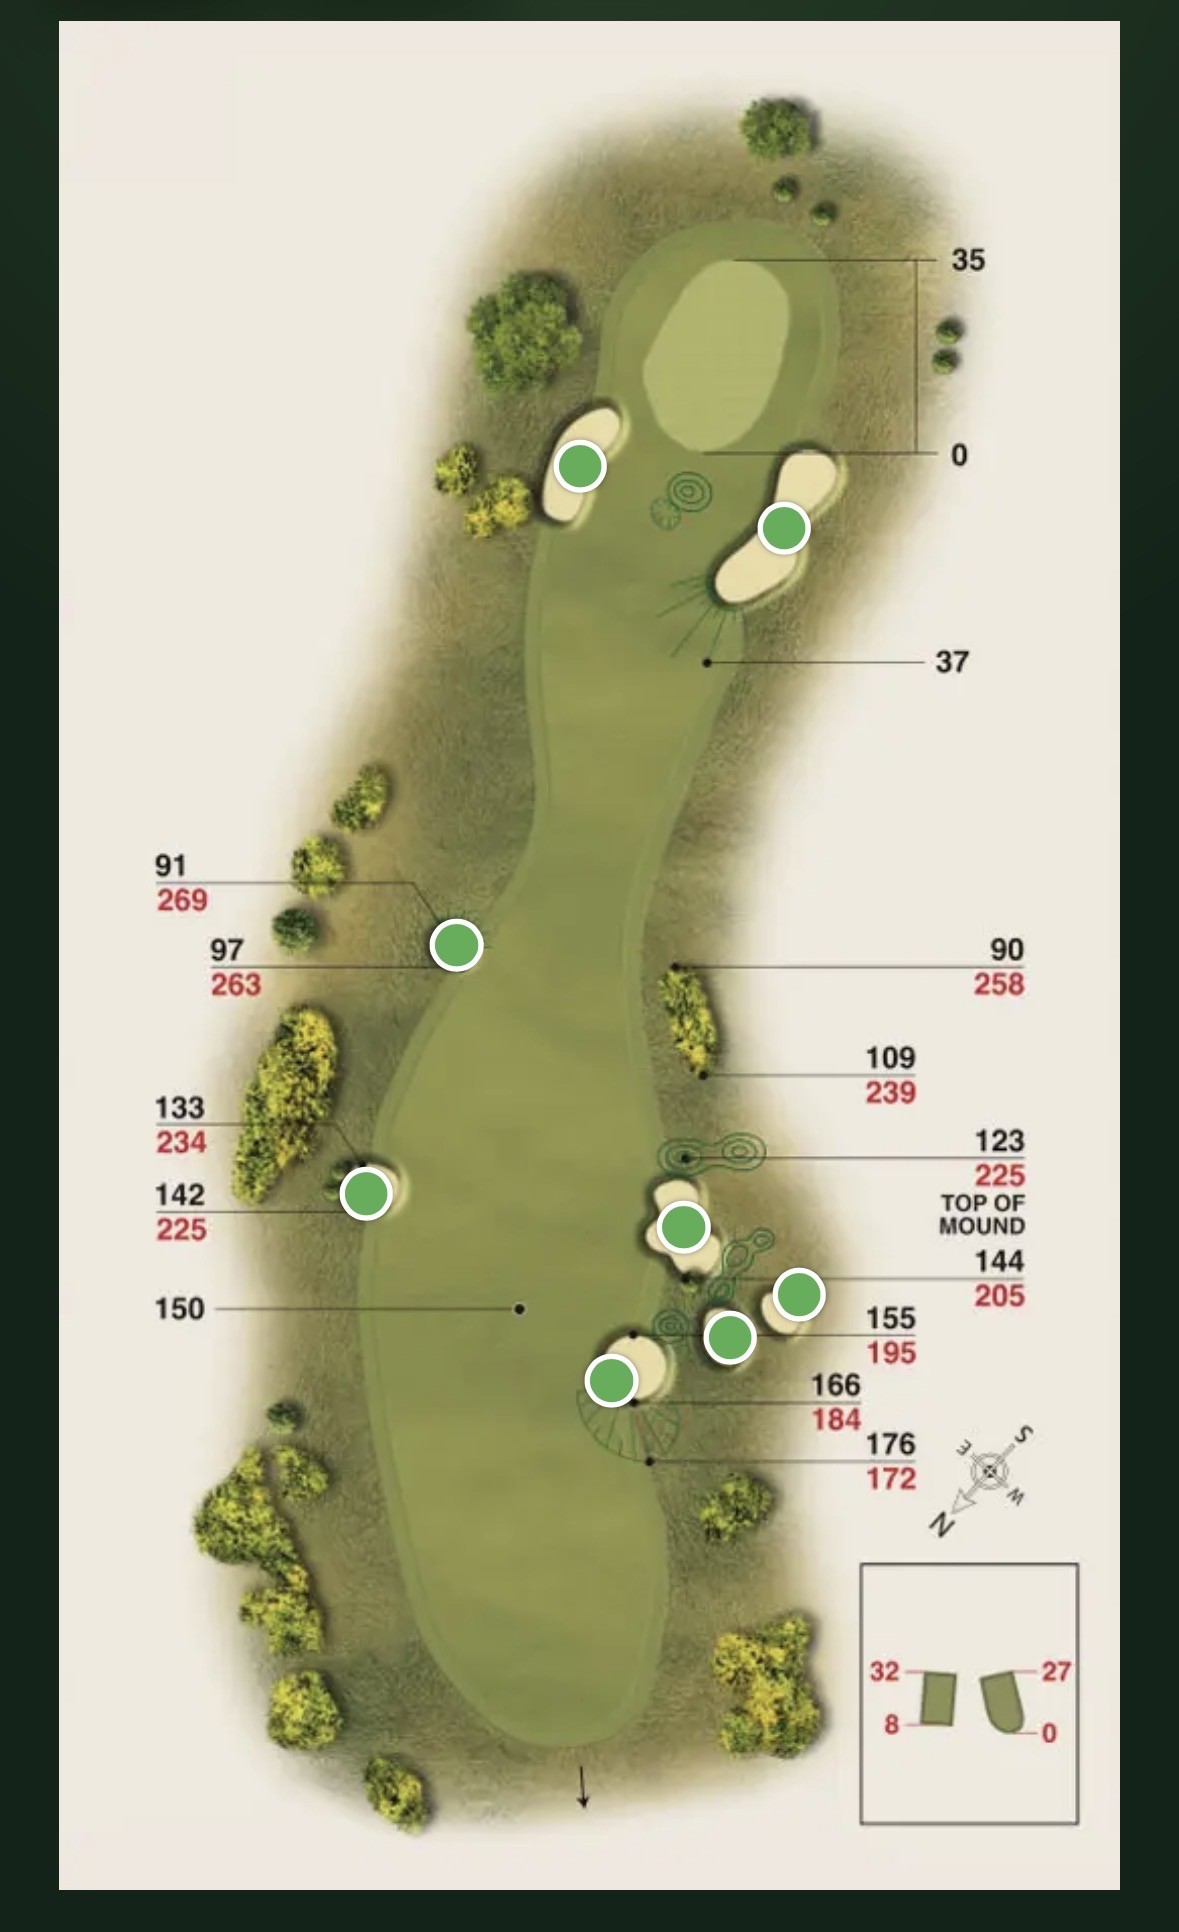
  1. Open the hole and tap the bunker dot.
  2. Tap Select tasks.
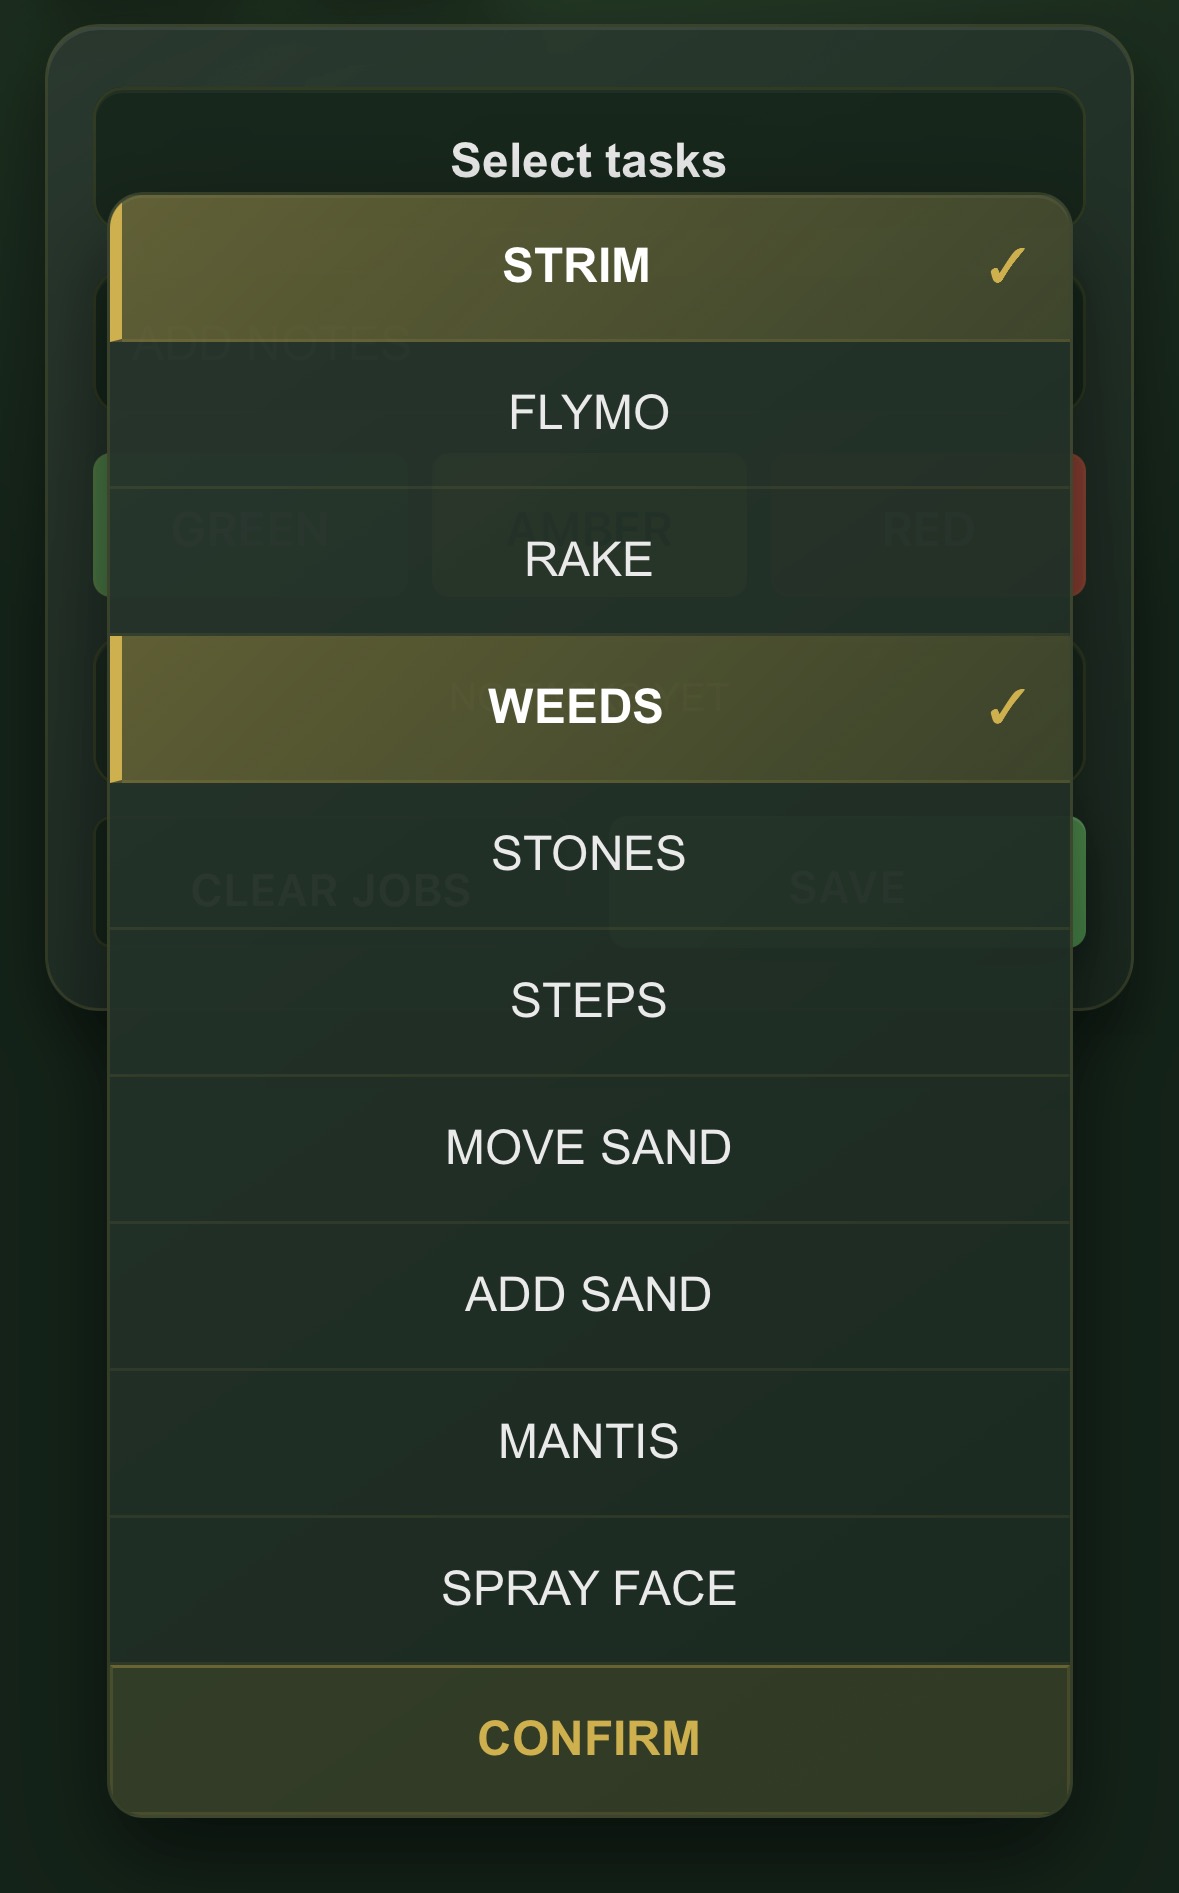
  3. Choose one or more tasks and tap Confirm.
  4. Add an optional note.
  5. Select Amber or Red to set the priority. If no priority is chosen, the job defaults to Amber.
  6. Tap Save.
Hole map with bunker position dots
Select a bunkerTap the dot placed over the bunker requiring work.
Bunker job edit screen
Add job detailsOpen the task list and add a note or priority.
Bunker task selector with multiple selected tasks
Select tasksMore than one task can be assigned before confirming.
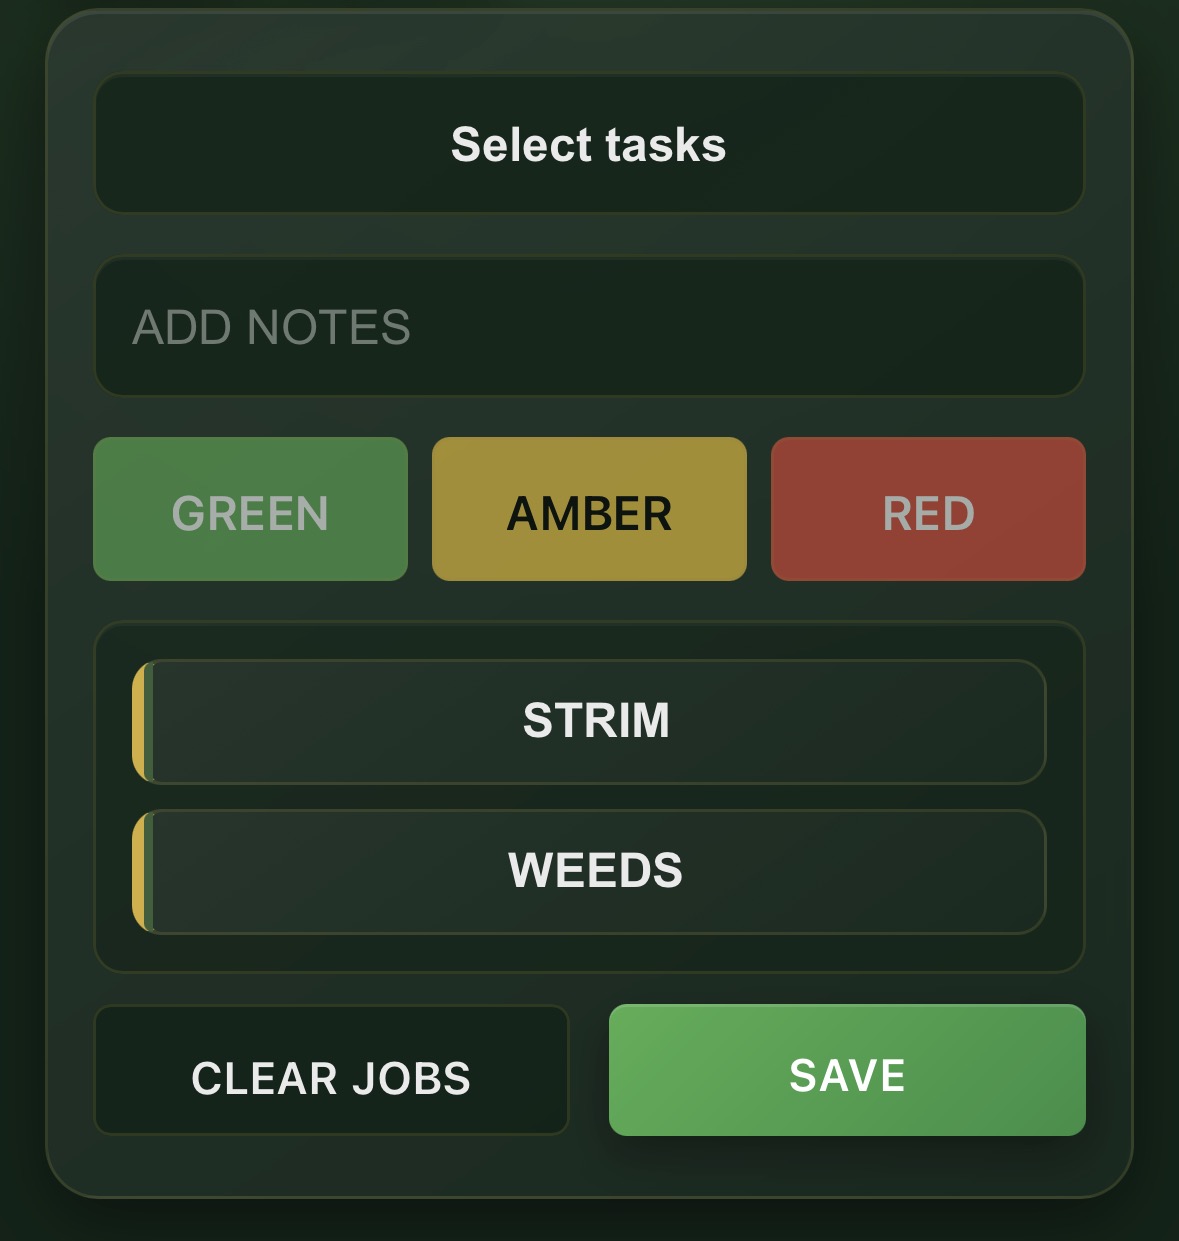
Selected bunker tasks ready to save
Ready to saveSelected tasks appear in the job panel before the status is saved.

Understand bunker statuses

After saving, the dot on the map and the corresponding hole tile update immediately.

Green — no outstanding workAmber — work requiredRed — urgent or high priority

When the work is complete, open the bunker again and tap Clear Jobs. This removes the outstanding tasks and returns the bunker to green.
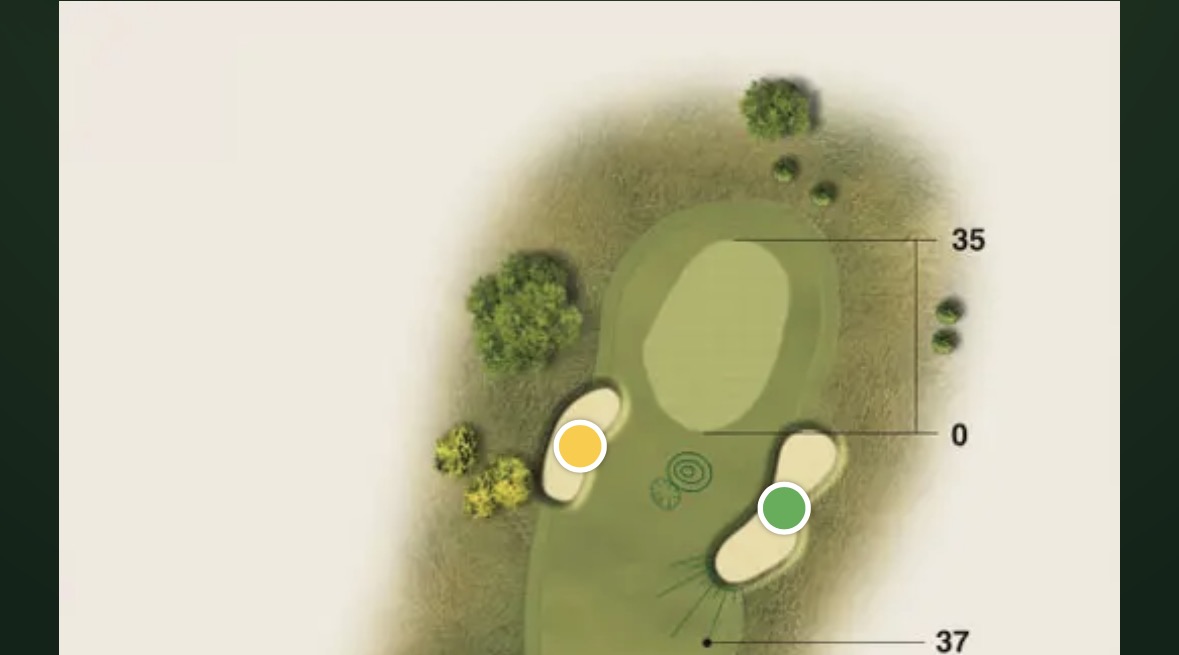
Bunker map showing amber and green status dots
Map statusEach bunker displays its own current colour.
Bunker hole tile with amber status dot
Hole statusThe home tile also shows that the hole has outstanding work.

Filter the work list

  1. Tap Filter in the top-right corner.
  2. Select a task, such as strimming, weeds or adding sand.
  3. Tap Confirm.

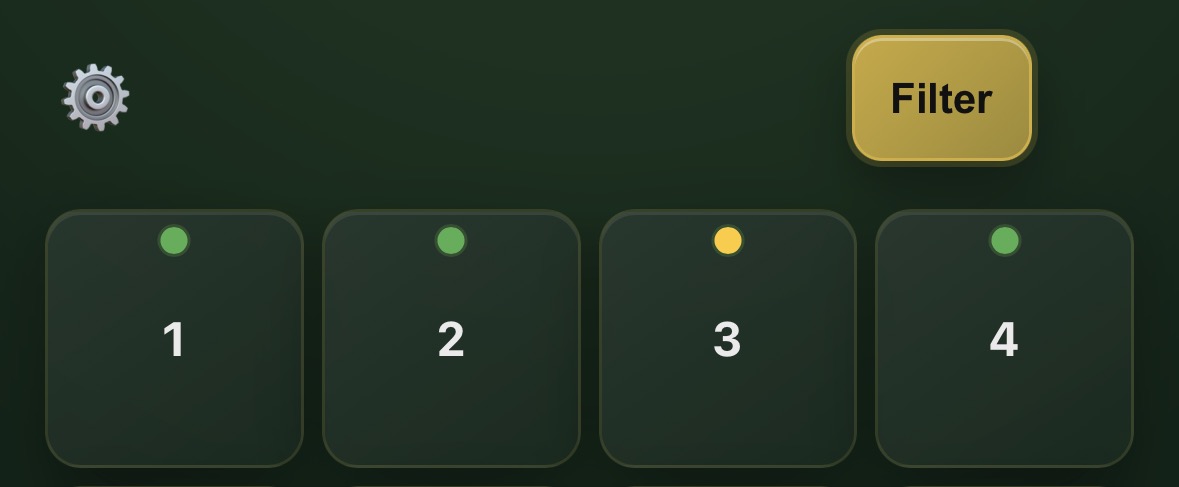
The Filter button turns gold while a filter is active, making it clear that the screen is not showing every outstanding job.
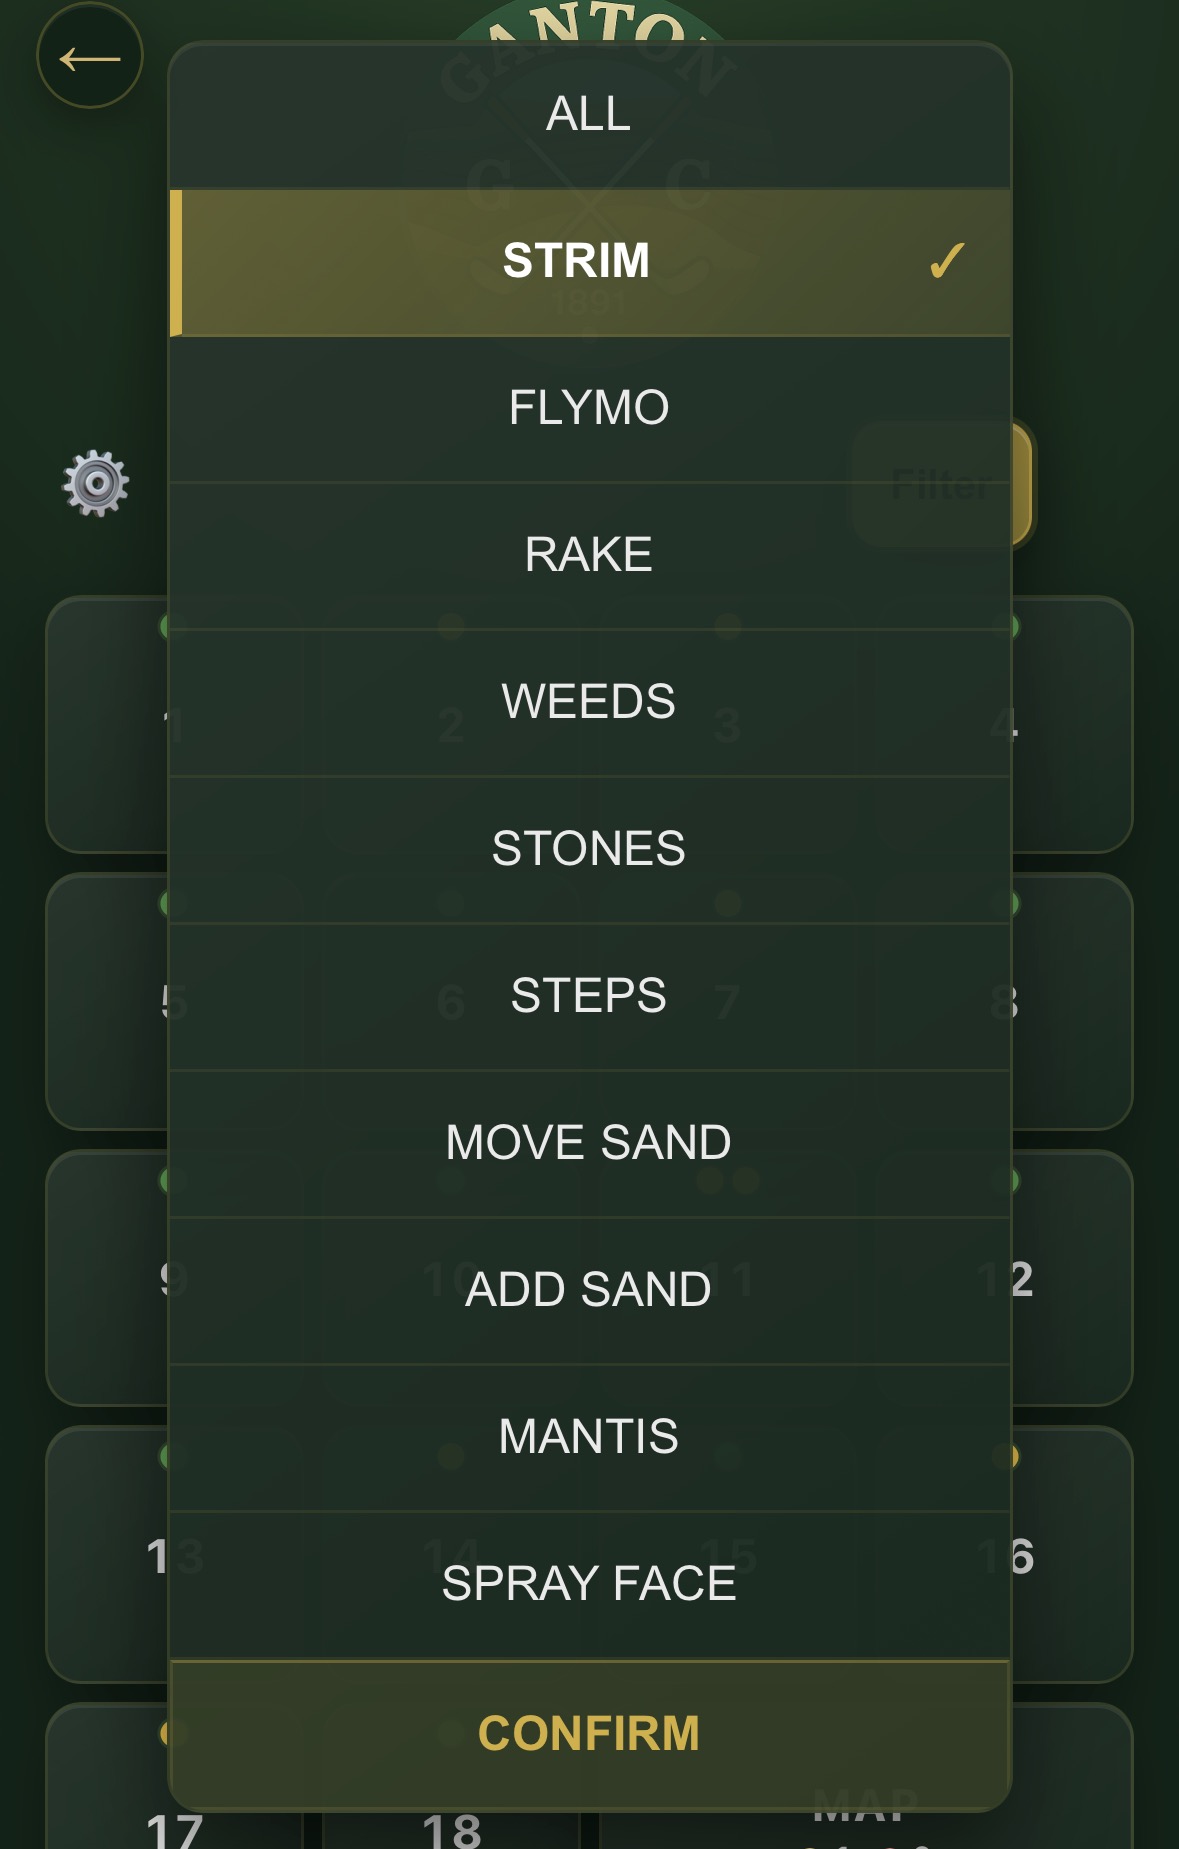
Bunker task filter menu
Choose a filterSelect one task or All.
Gold Bunker filter button showing active filter
Filter activeThe gold button is a reminder that results are filtered.

Place bunker positions

Open the Bunker settings using the cog in the top-left corner.
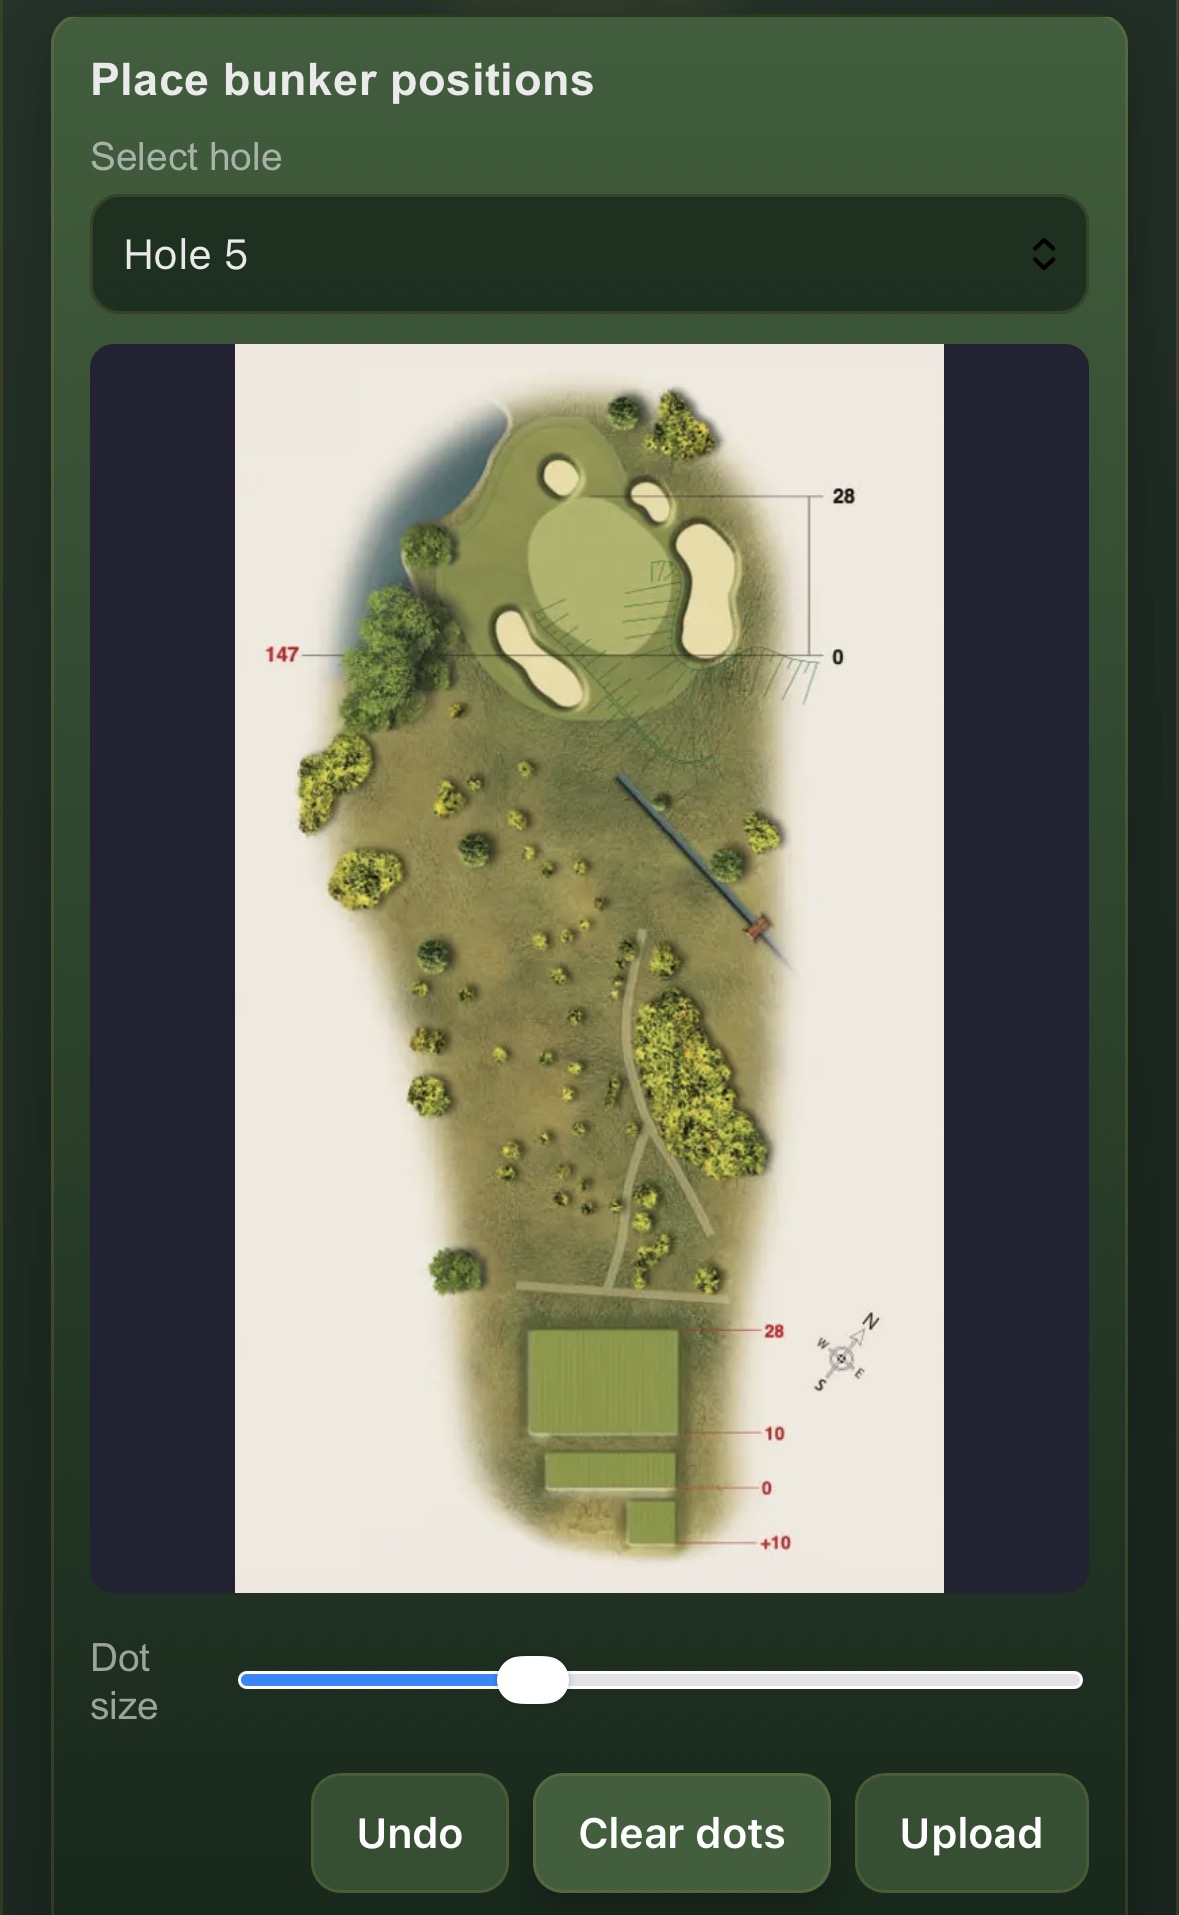
  1. Choose the numbered hole map or the full-course map from the dropdown.
  2. If old positions need replacing, tap Clear dots.
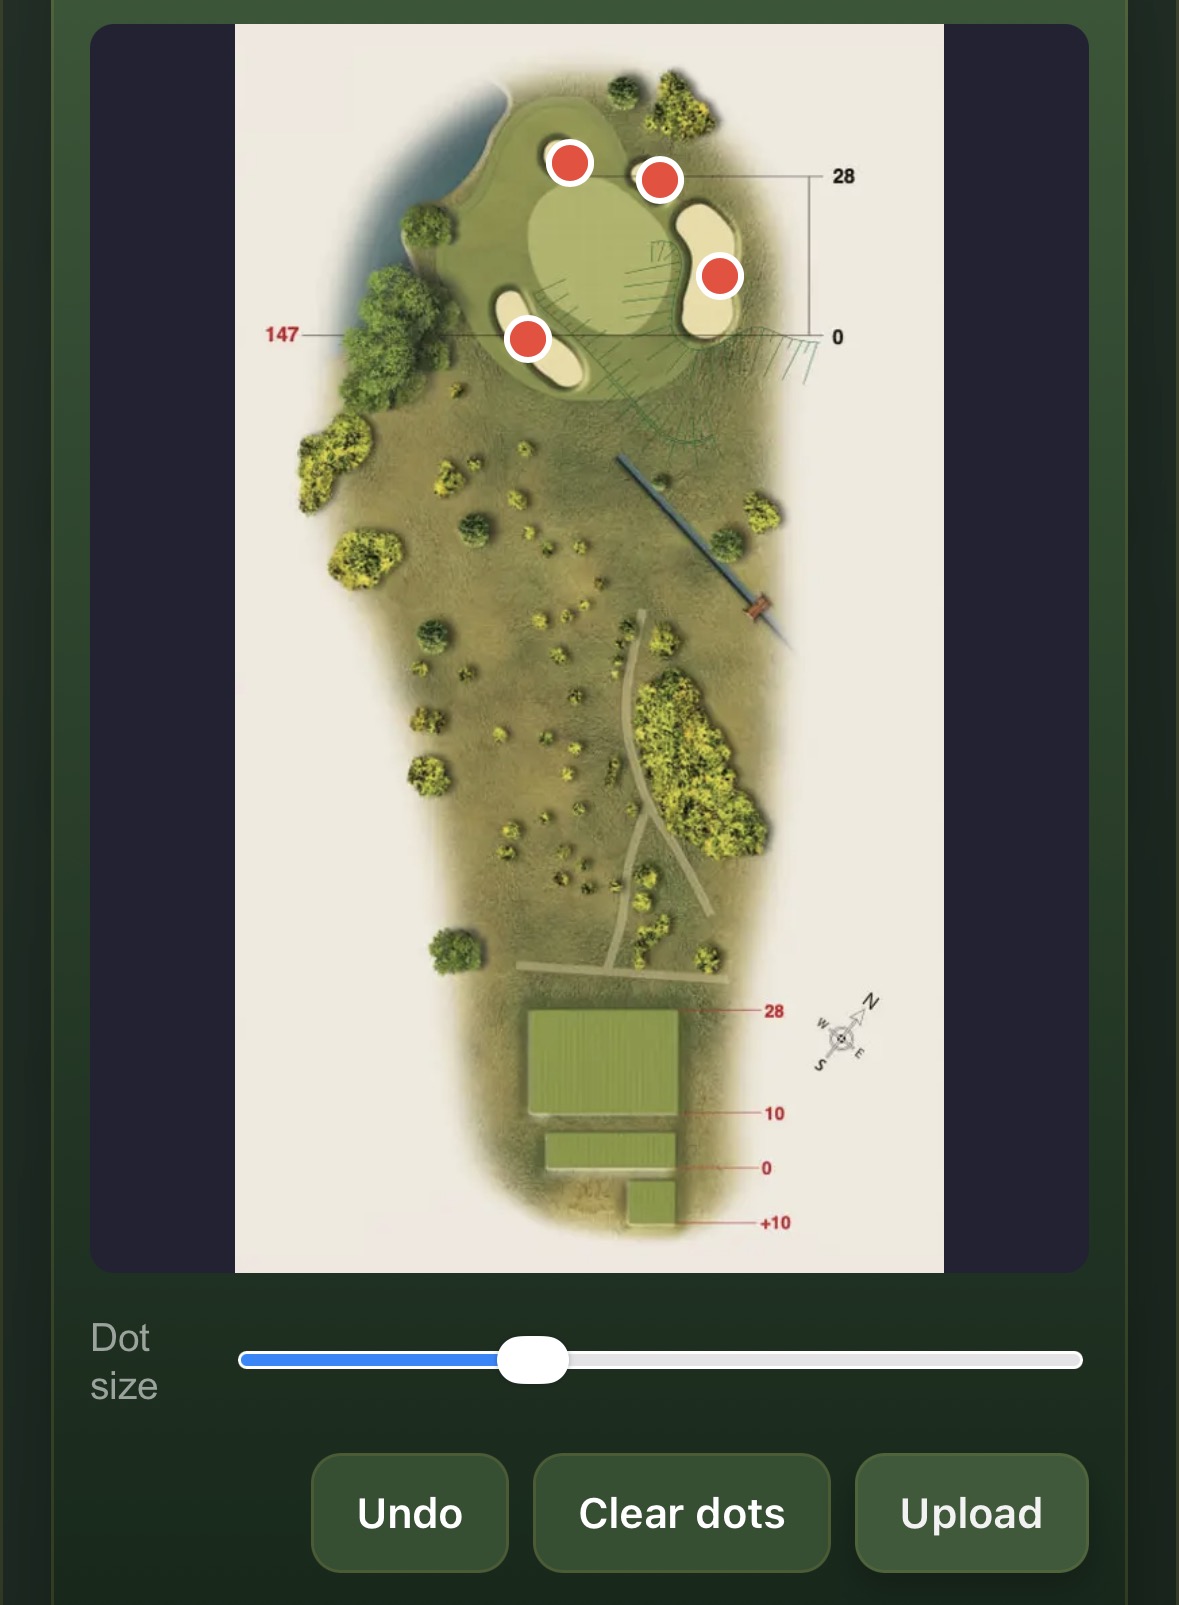
  3. Tap the map to place a dot over each bunker.
  4. Use Undo when a dot is placed incorrectly.
  5. Press and hold a dot on mobile to drag it, or click and drag on a computer. Fine positioning is often easier on a PC.
  6. Adjust the dot-size slider if required.
  7. Tap Upload only when the positions are correct.
Bunker settings for choosing a hole map and placing dots
Choose the mapSelect the hole before placing or replacing bunker positions.
Red bunker position dots placed on a hole map
Position the dotsUse Undo, Clear dots and Upload to complete the map setup.

Set the full-course map location

  1. Enter the club latitude and longitude using decimal coordinates.
  2. Choose the desired opening zoom level.
  3. Alternatively, stand at the course and tap Use current GPS.
  4. Tap Save map location.

This shared location is used on every staff device and is also used by the Snagging App.
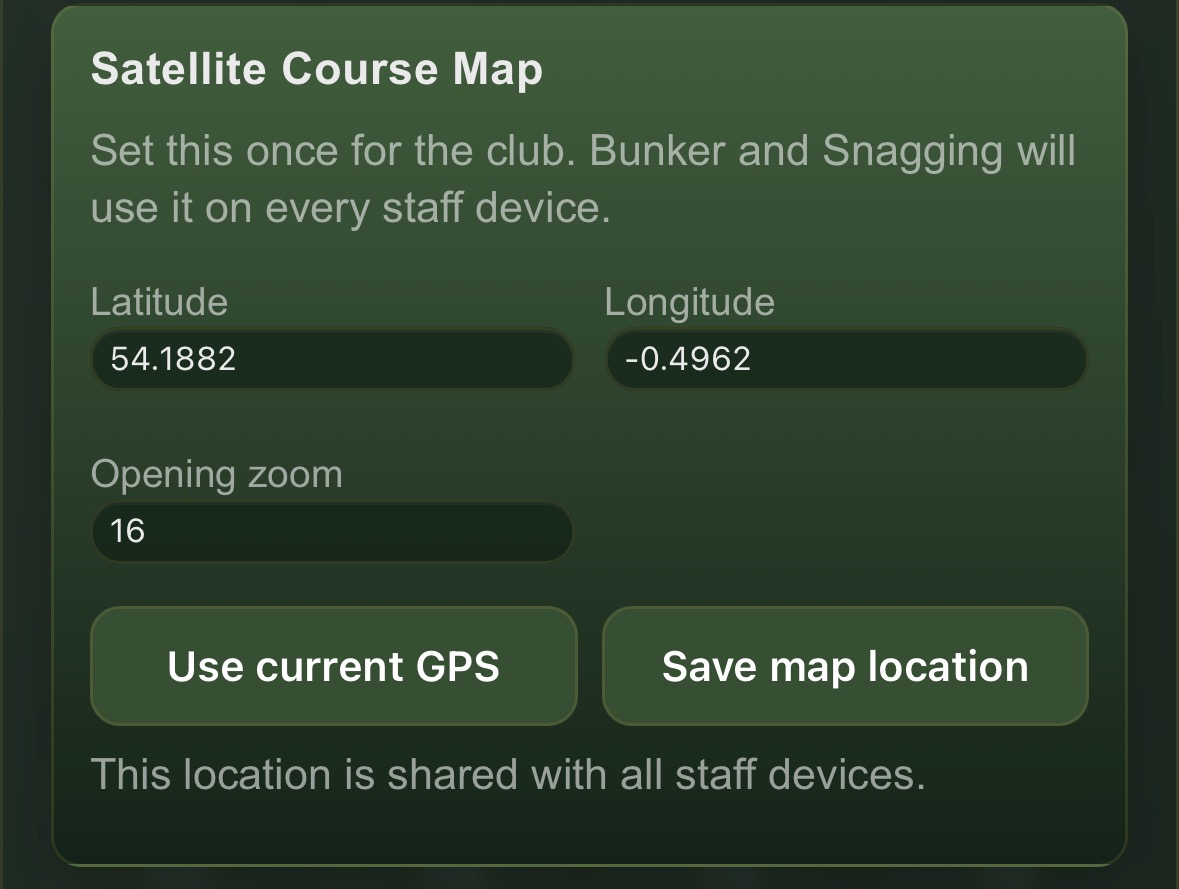
Satellite course map latitude, longitude and zoom settings
Course map locationSave the centre point and opening zoom once for the whole club.

Customise the bunker task list

Enter one task per line and tap Save. The updated list then appears in the bunker task selector.
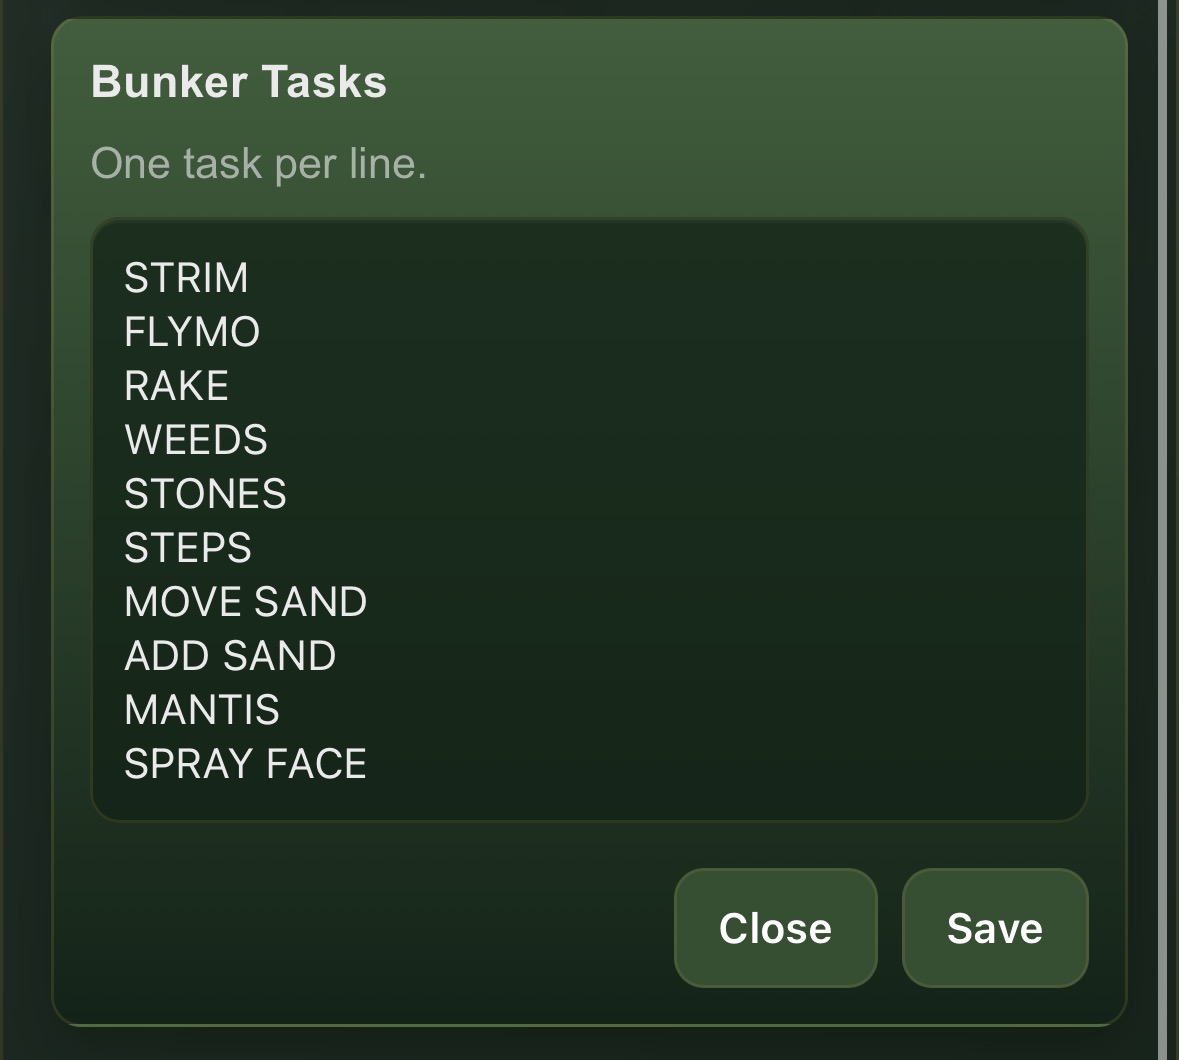
Custom Bunker Tasks list in settings
Bunker TasksKeep the list relevant to the work carried out at the club.
8

Course issues

Snagging App

Drop a pin exactly where an issue has been found, add its details and status, then keep completed jobs visible in blue until they are cleared.

Drop a snag pin

The full-course map location saved in Bunker Maintenance is shared with Snagging, so it only needs to be configured once.
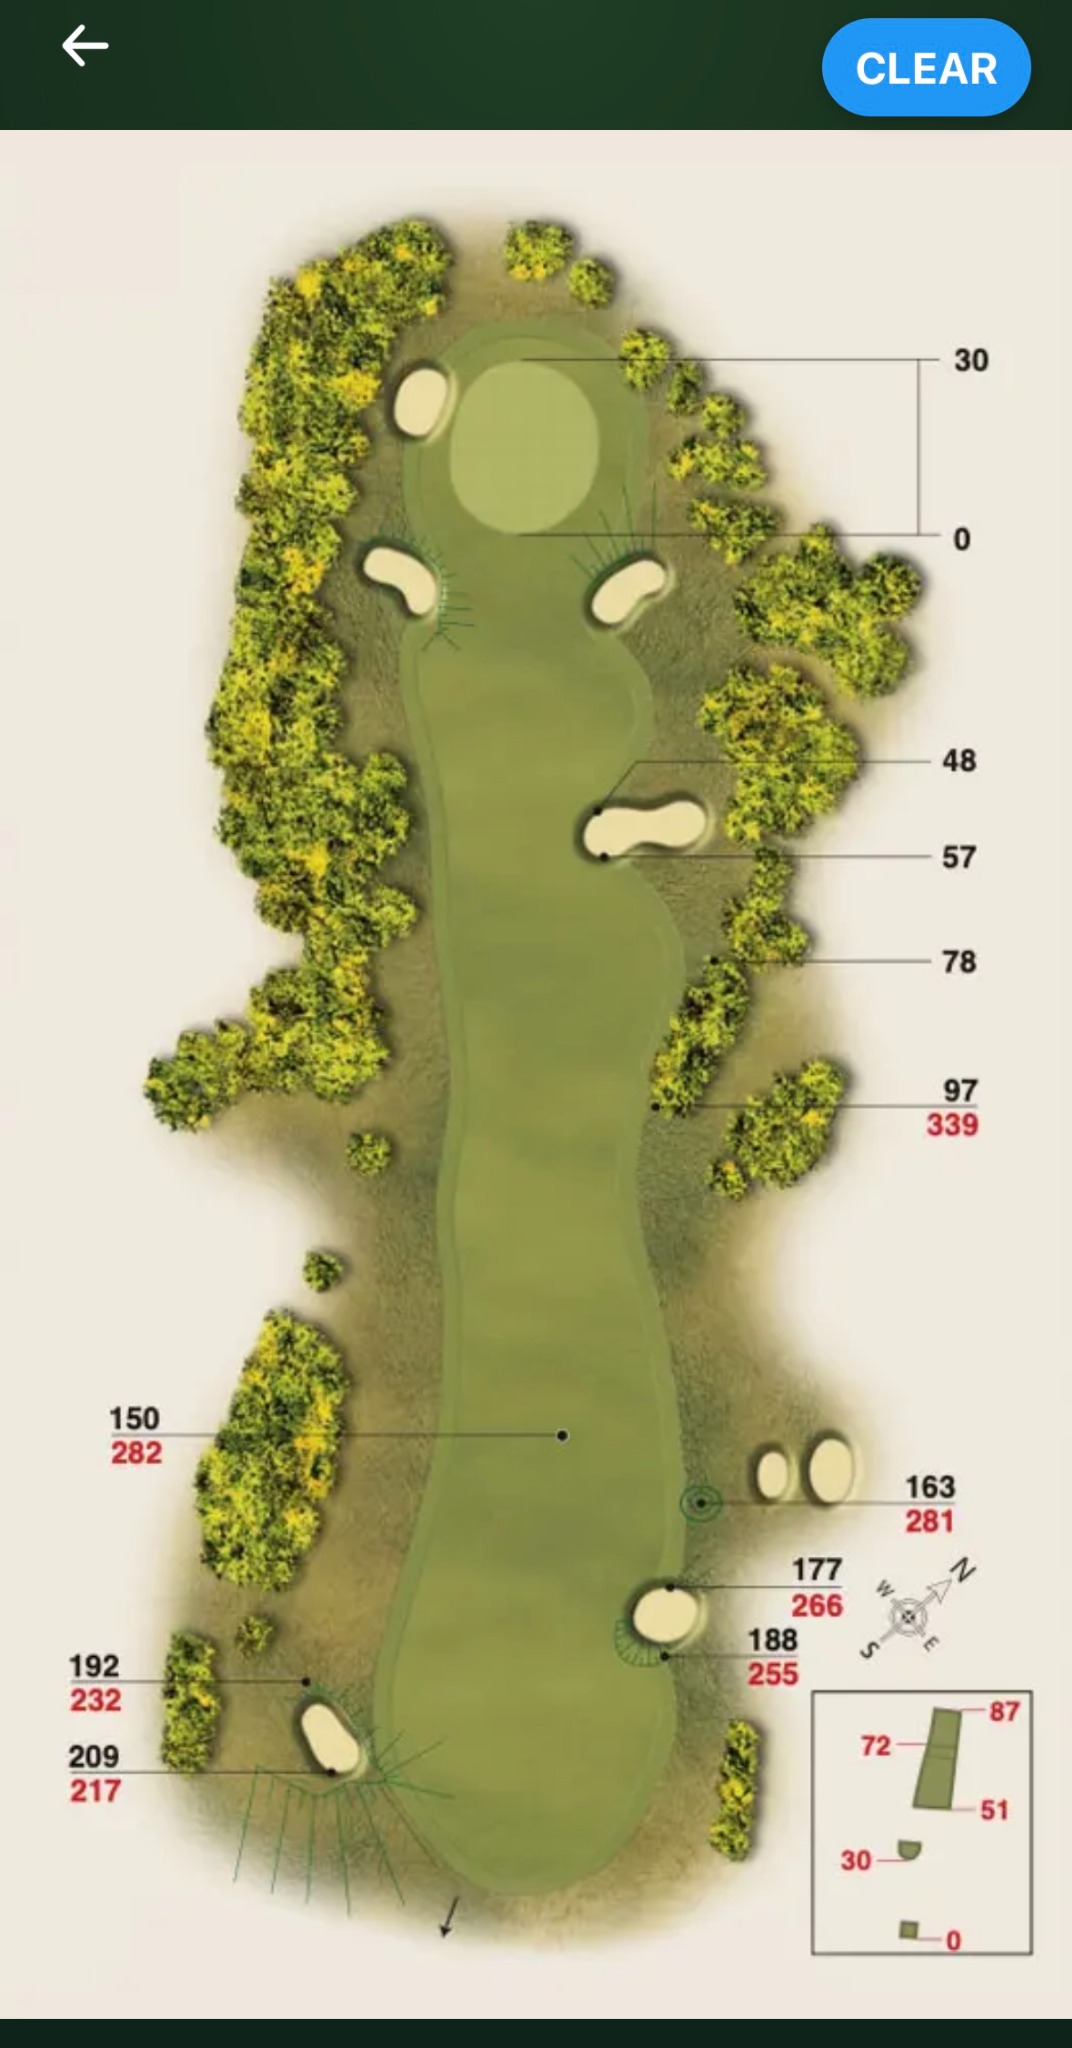
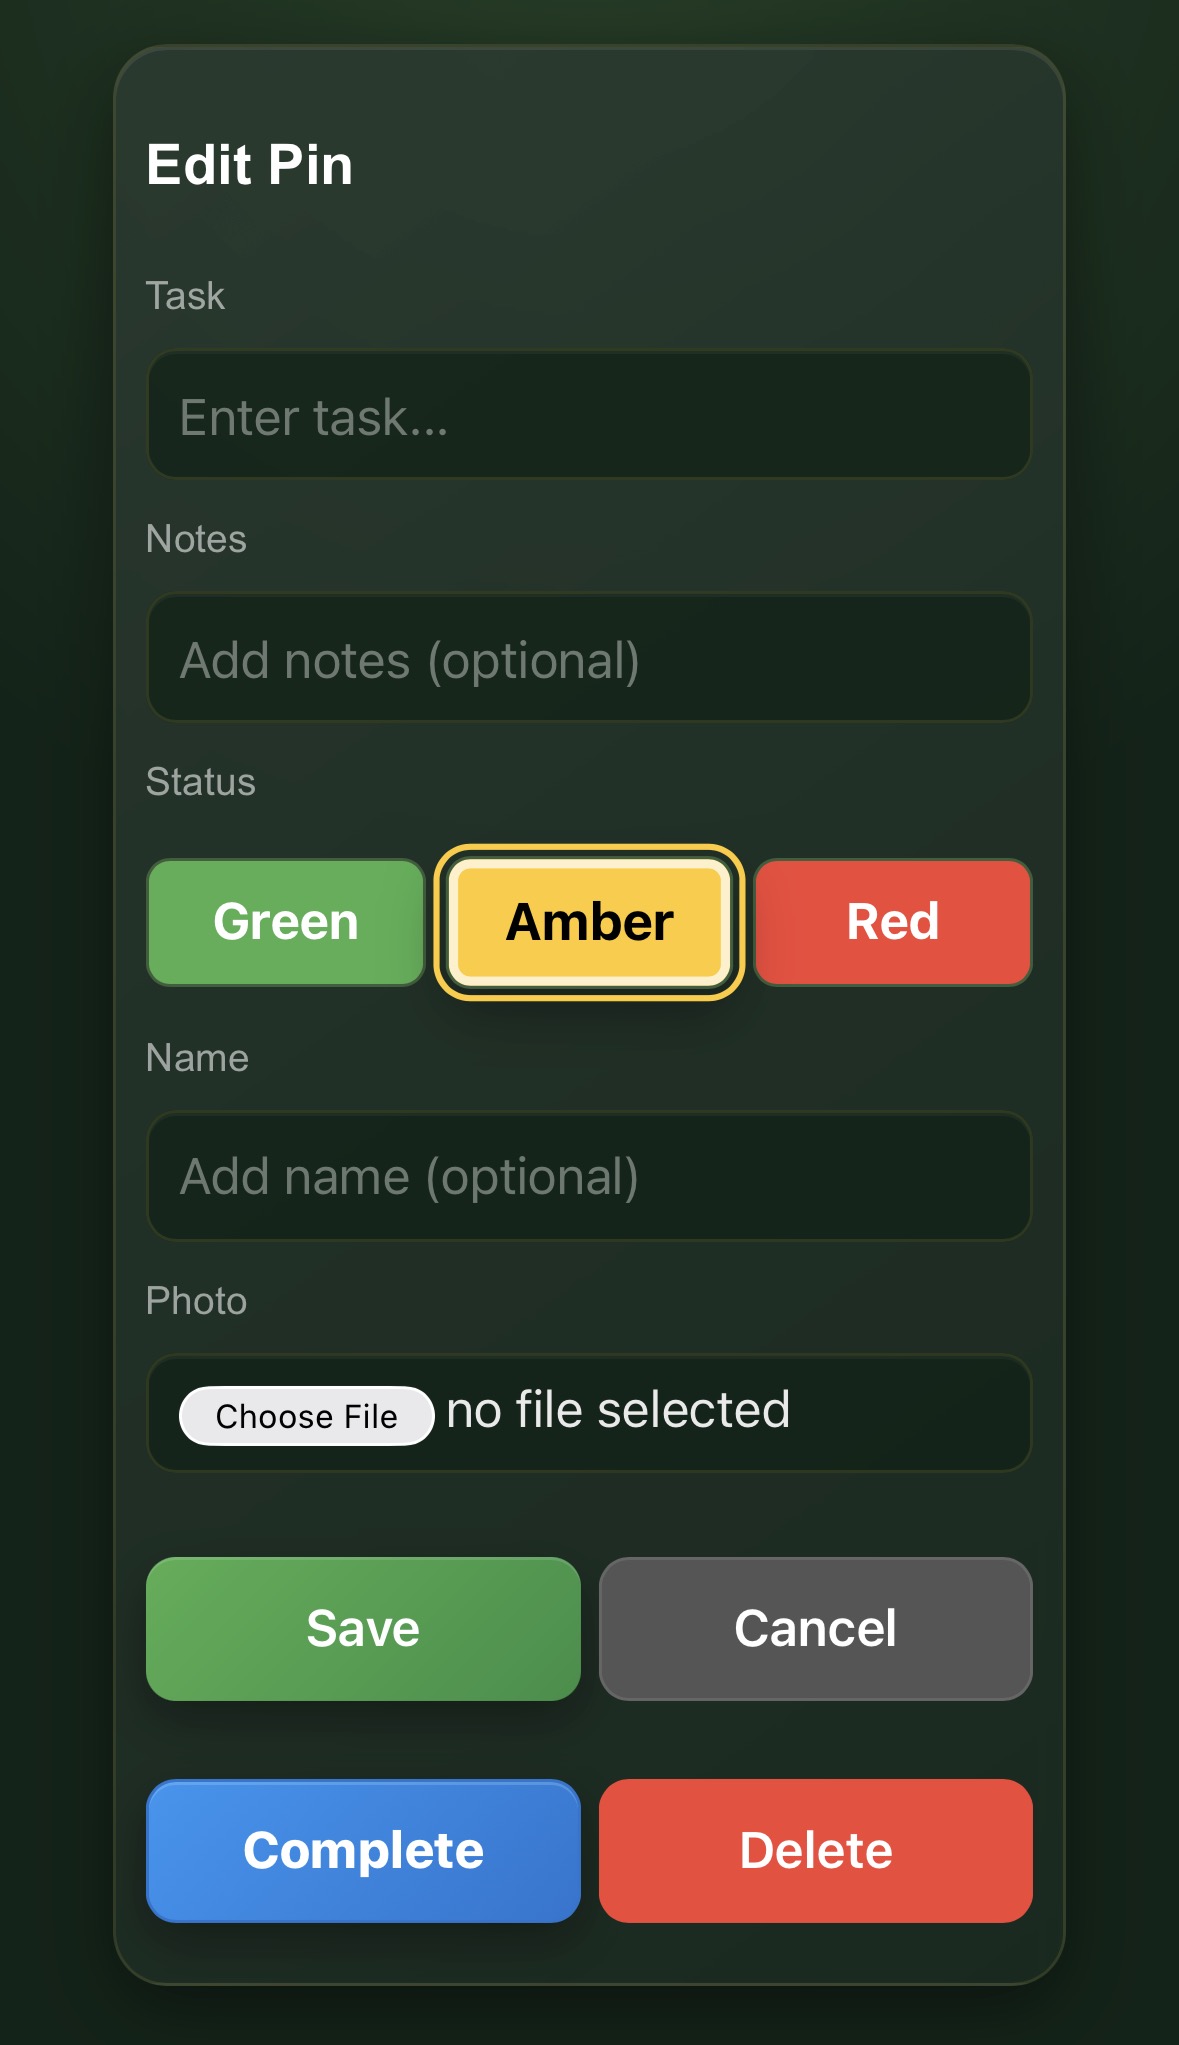
  1. Select a hole, or use the full-course map where hole maps are not available.
  2. Tap the exact location where the issue has been found.
  3. The Edit Pin form opens automatically.
Snagging hole map before a pin is placed
Select the locationTap the map at the point where the issue needs recording.

Add the snag details

  1. Enter the task or issue name.
  2. Add an optional note.
  3. Choose Green, Amber or Red.
  4. Add an optional staff name.
  5. Upload an optional photo.
  6. Tap Save.
Snagging Edit Pin form with task, notes, status, name and photo
Edit PinAdd enough detail for another team member to understand the issue.

Complete, delete and clear snags

Saved pins appear on the map and their status colours appear on the hole tiles.
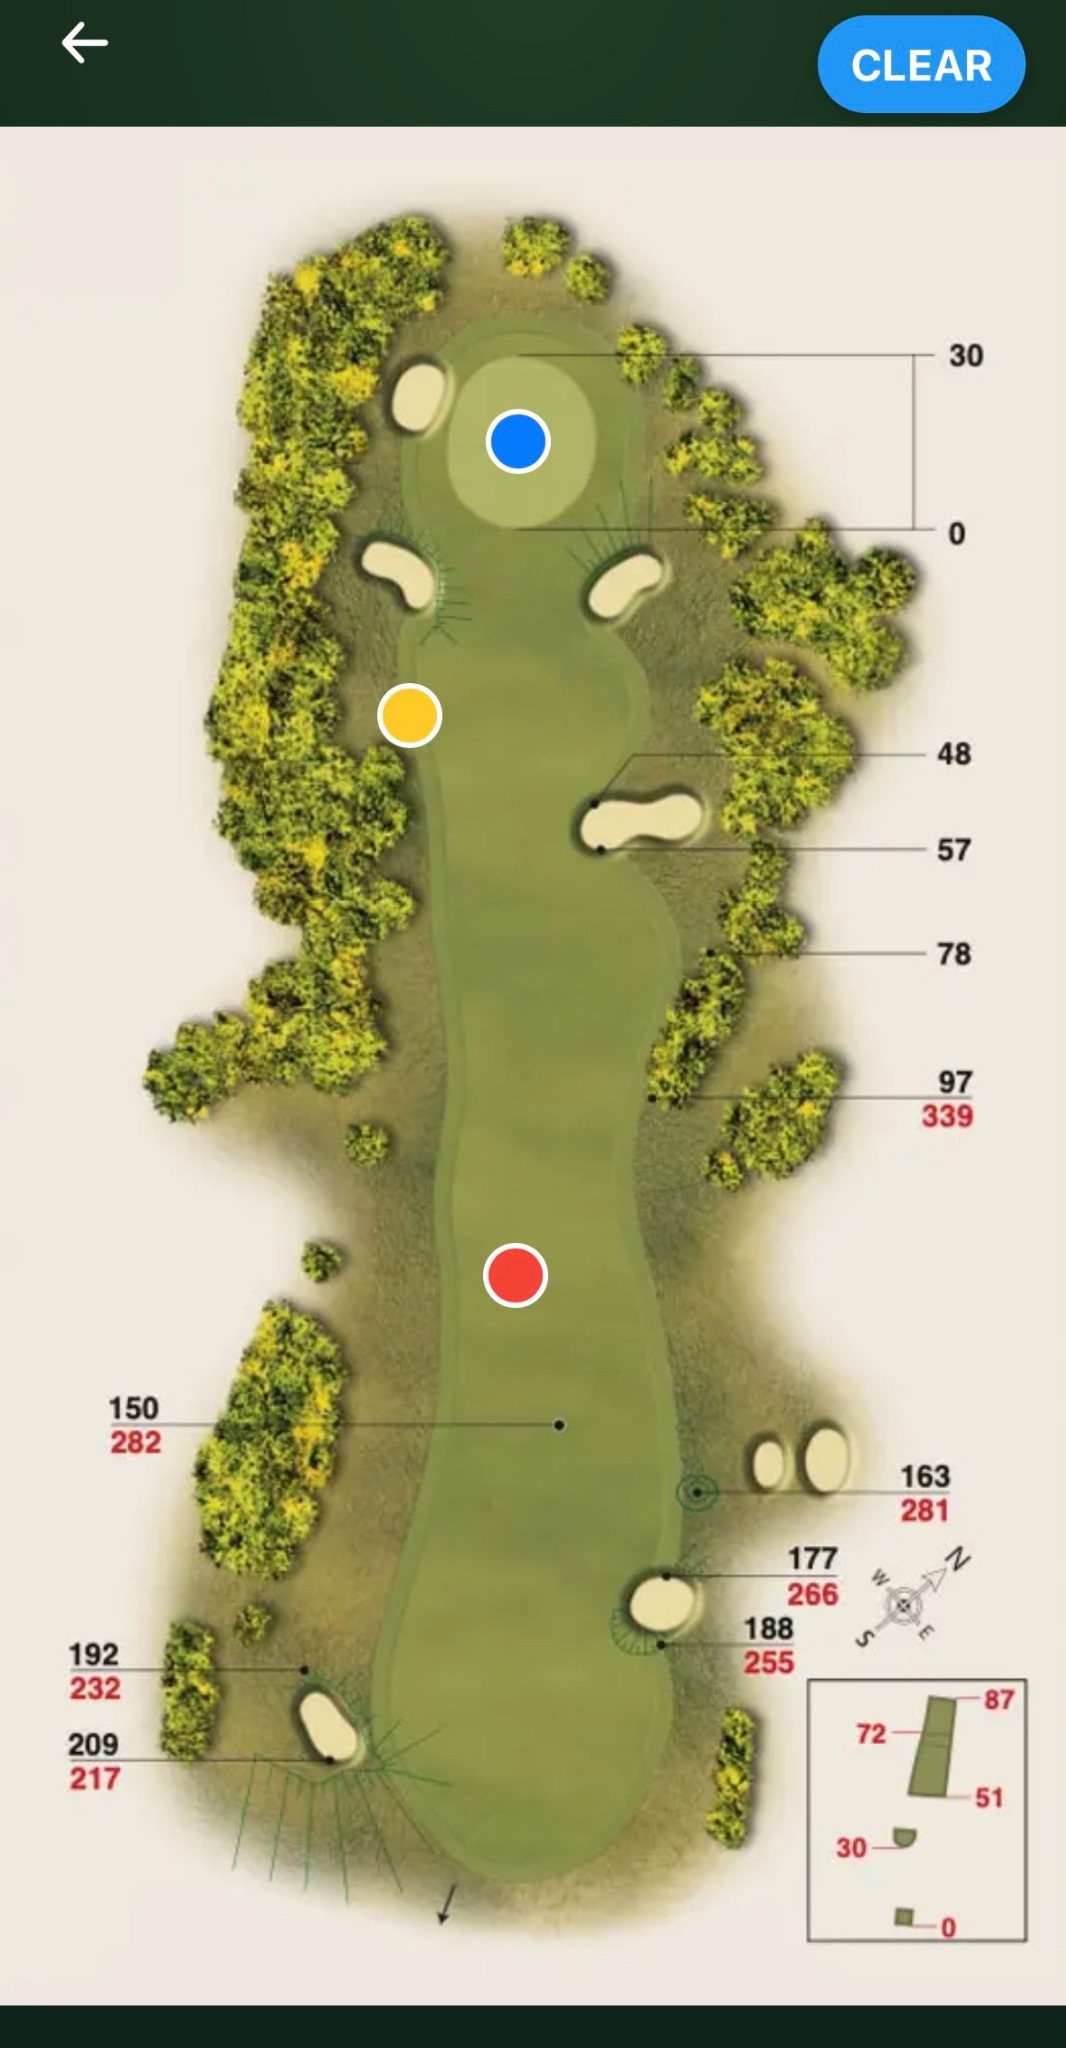
  1. Tap a pin to reopen it.
  2. Tap Delete to remove it immediately.
  3. Tap Complete to turn it blue while keeping it visible as completed.
  4. Use the blue Clear button inside a hole to remove completed pins from that hole.
  5. Use the Clear button on the Snagging home screen to clear completed pins across the whole course.
Amber — issue loggedRed — urgent issueBlue — complete, waiting to be cleared
Snagging map with blue, amber and red pins
Mapped snagsActive and completed jobs remain easy to identify.
Snagging home tiles showing status dots
Hole tilesEach tile summarises the statuses recorded on that hole.
9

Today's play

Tee Sheet

Give the greenkeeping team quick access to the day's tee times using either a temporary uploaded image or the club's own tee-sheet link.

Upload today's tee-sheet image

When admin mode is active, tap Upload photo and choose a photo or screenshot of the day's tee sheet. The current uploaded image is replaced when a new one is added and expires automatically at midnight.
Admin upload photo button for the tee sheet
Daily uploadUpload or replace the current tee-sheet image as an administrator.

Link the club tee sheet

Paste the full tee-sheet address in Team Hub Settings → Links & Sheets. Staff can then use the Tee Sheet tile to open the club system directly.
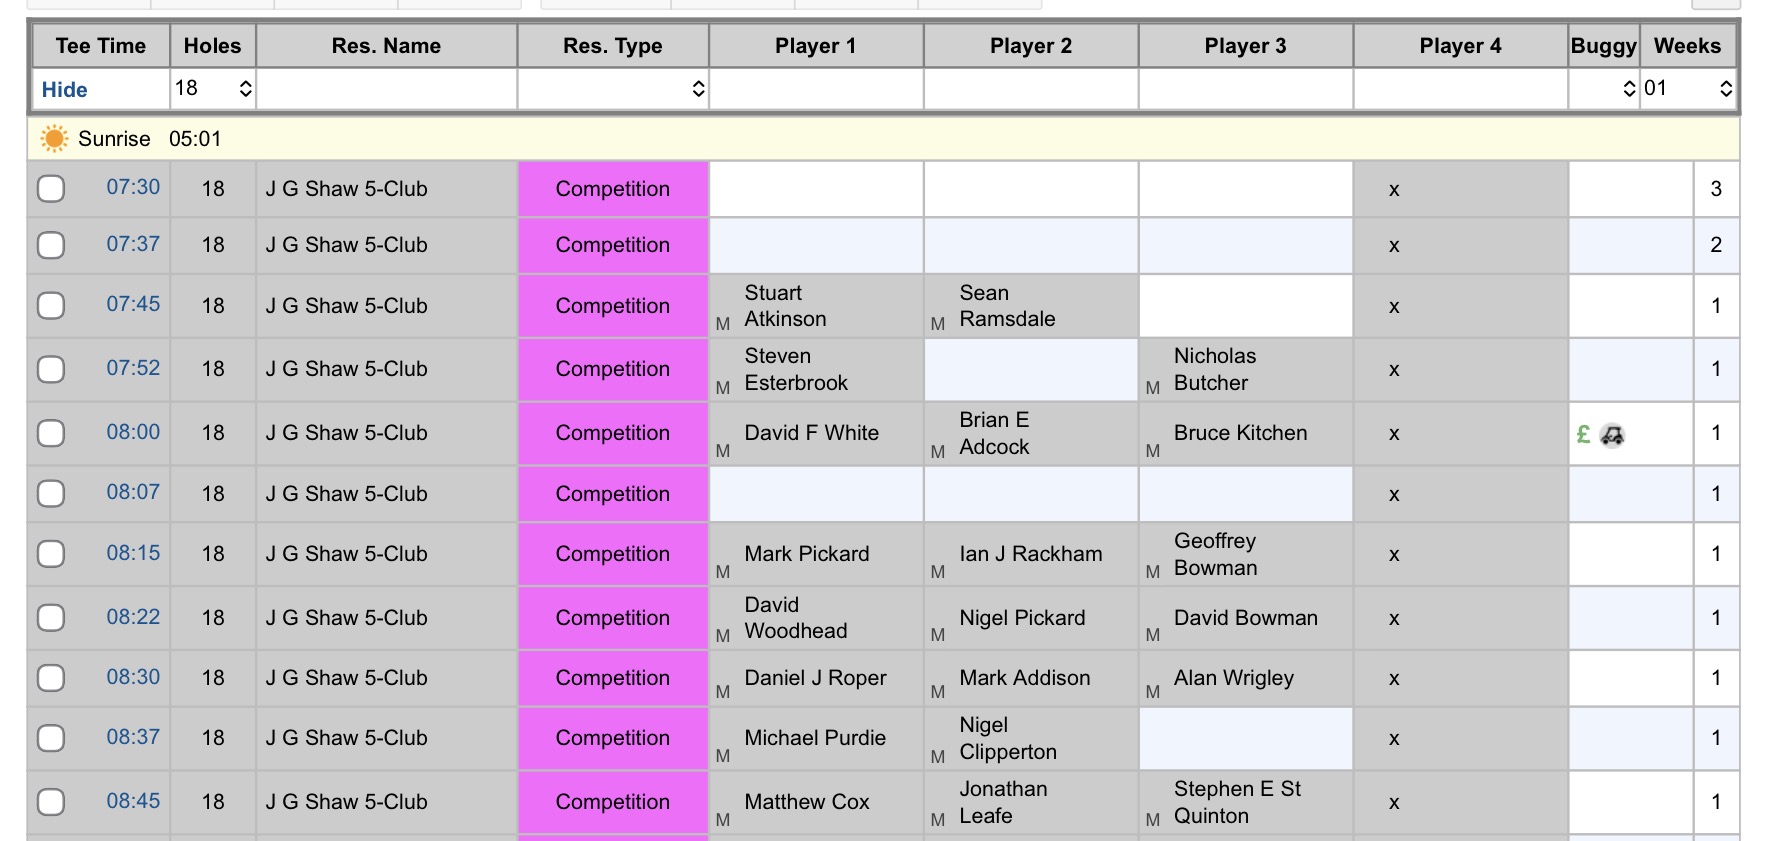
Login behaviour: external tee-sheet systems may still require each device to sign in. A link ending in .php is common for some BRS pages but is not required for every provider.
Example club tee sheet with tee times and player names
Club tee sheetThe exact appearance depends on the provider used by the club.
10

At-a-glance status

Live Team Hub Dashboard

The Team Hub tiles do more than open each module. They show the latest useful information directly on the home screen, helping the team spot faults, outstanding work, holidays, clipping results and rainfall without opening every app.

Read the live tile summaries

Status information updates from the shared club data. Tap any tile to open the full module and view or update the underlying records.
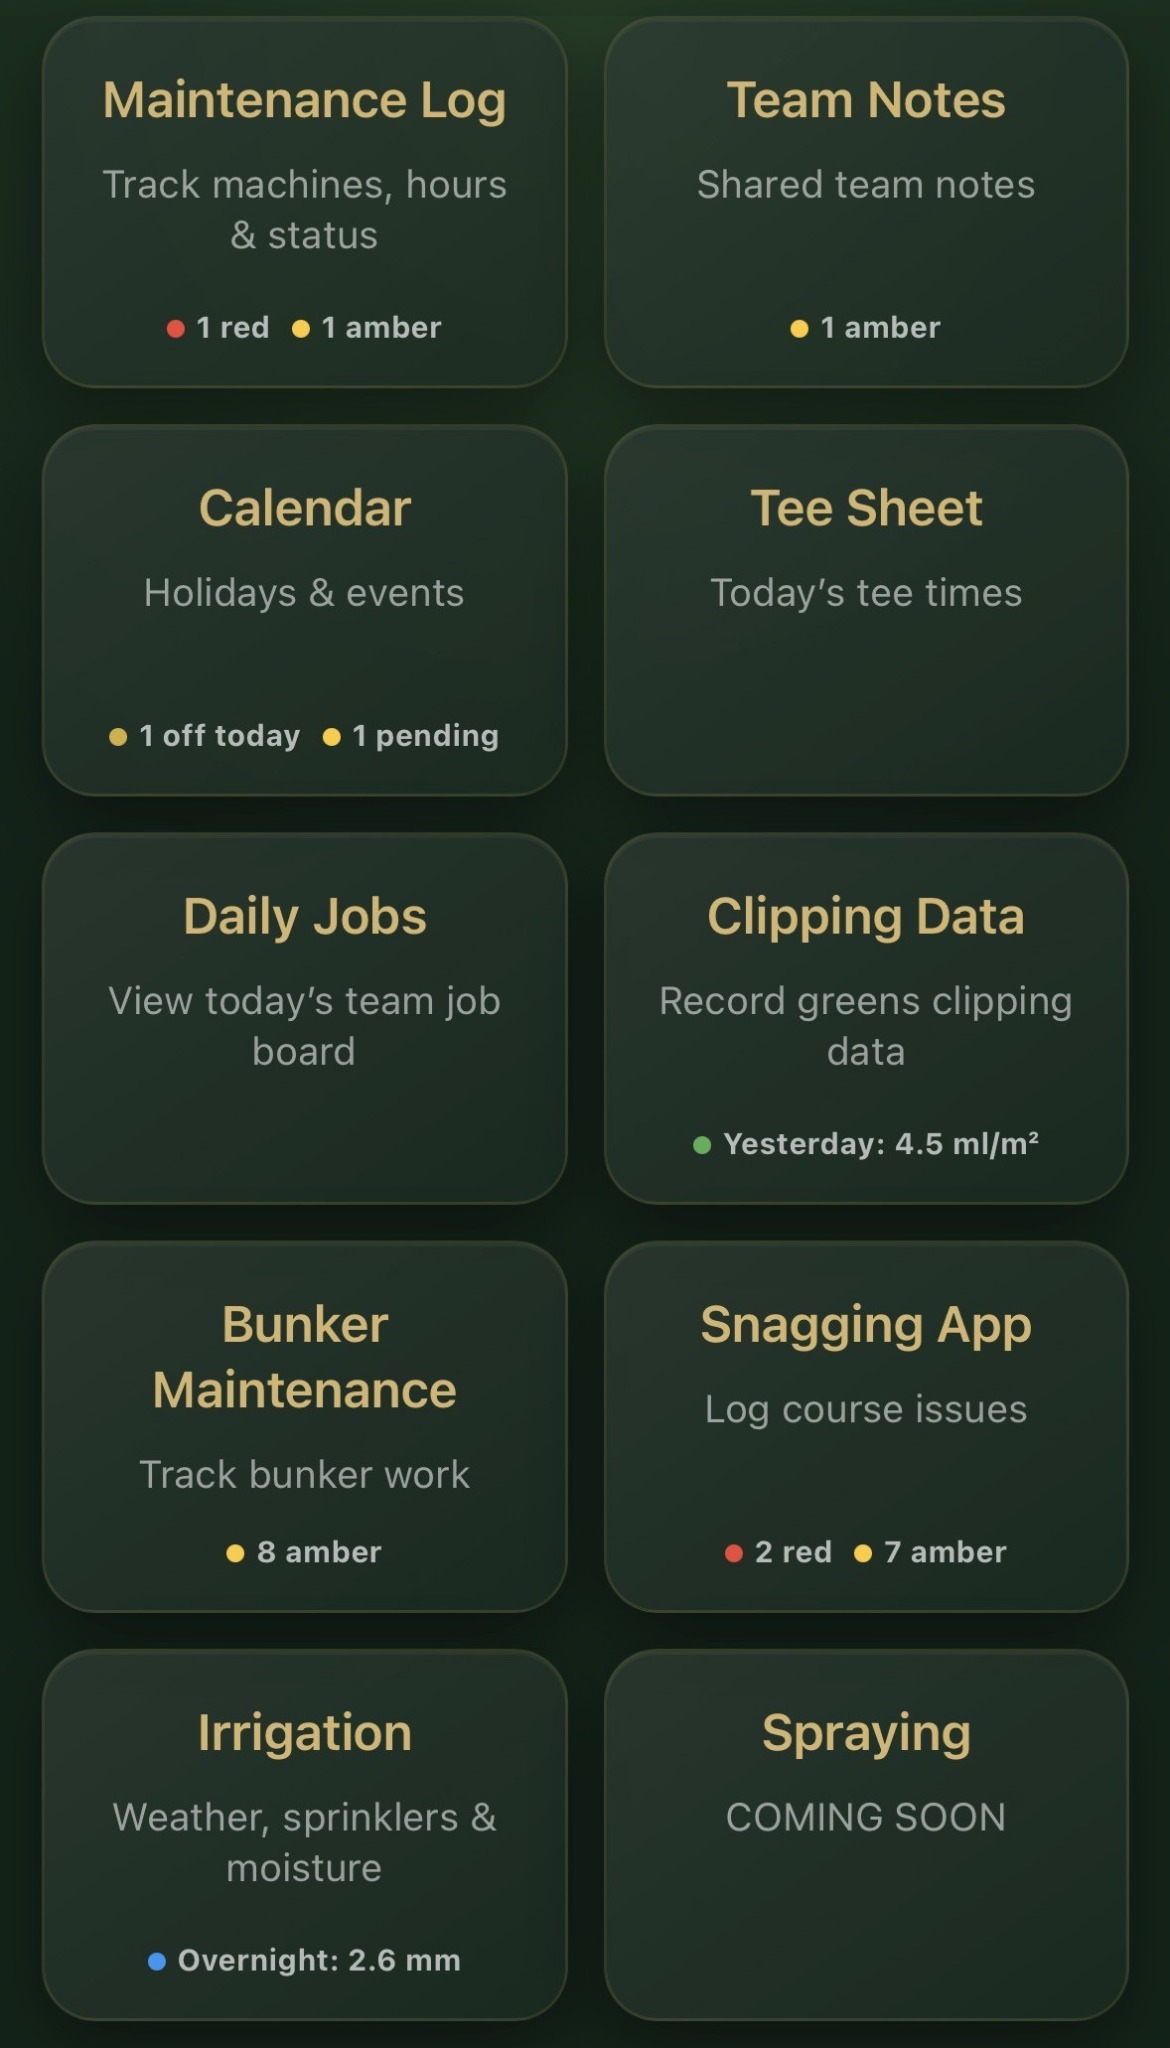
BunkerSync Team Hub dashboard showing live module summaries
Live Team Hub dashboardImportant counts and recent results are visible before a module is opened.

What each tile shows

Maintenance Log

Shows the number of active Red and Amber machines, making vehicle faults visible to the whole team.

Team Notes

Shows active priority notes by colour, so important shared messages are not missed.

Calendar

Shows how many team members are off today. When an administrator is signed in, it also shows pending holiday requests.

Tee Sheet

Opens today's uploaded tee-sheet image or the club's connected tee-sheet system.

Daily Jobs

Opens the current team job board. This tile is deliberately kept clear because the selected day's assignments and update information are shown inside the module.

Clipping Data

Shows the latest completed clipping result in mL/m², including the day it relates to.

Bunker Maintenance

Shows the total outstanding Amber and Red bunker jobs recorded across the course.

Snagging App

Shows the number of active Red and Amber course issues still requiring attention.

Irrigation

Shows the recorded overnight rainfall, while the full module contains weather, mapping, faults, coverage and stock tools.

Spraying

Displays Coming Soon until the spraying module is enabled for the club.

Colour meaning: Red highlights urgent faults or work, Amber highlights items requiring attention, Green confirms a normal result, and Blue is used for information such as rainfall.
11

Shared messages

Team Notes

Use Team Notes for short information that the whole team should see but which does not need to be placed on the Daily Jobs board or calendar.

Add a shared note

  1. Enter the message.
  2. Choose its priority.
  3. Optionally attach a team member's name.
  4. Tap Add.

The priority gives the note a clear coloured marker so important messages stand out.
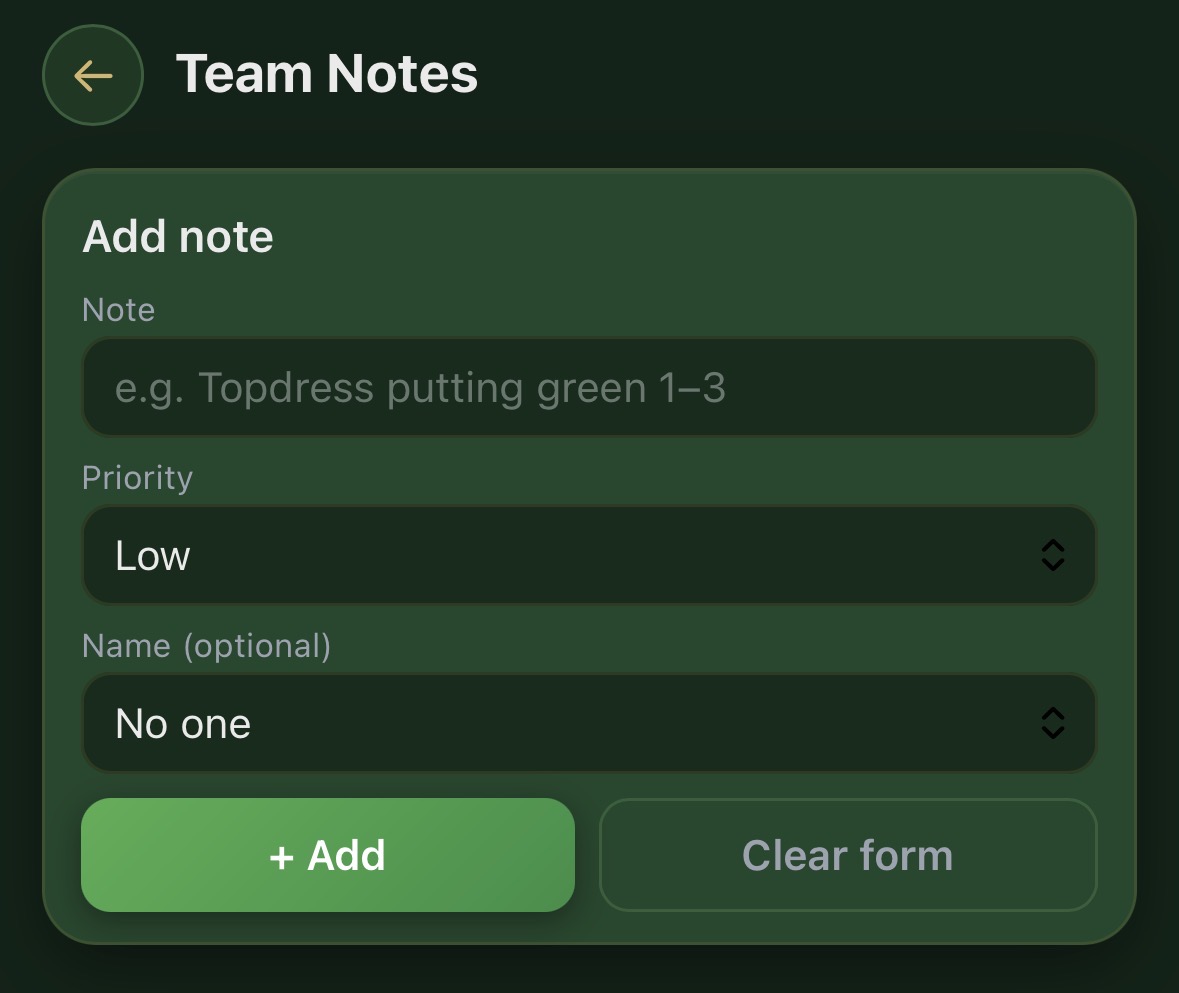
Team Notes add note form with priority and optional name
Add noteKeep messages short and useful for the whole team.

View and remove notes

Published notes appear in the shared list underneath the form. Each one shows its priority colour, message and optional name. Tap the X when a note is no longer needed.

Shared Team Note with priority colour and name
Shared listRemove completed or outdated messages to keep the list tidy.
12

Advanced course mapping

Irrigation

Build a shared visual record of the irrigation system, record faults, view sprinkler coverage and optionally connect installed assets to the club's stock inventory.

Start from the Irrigation dashboard

The home screen brings together course weather, the irrigation map, open faults and stock. Weather can use a local forecast or be connected to a supported on-site weather station.
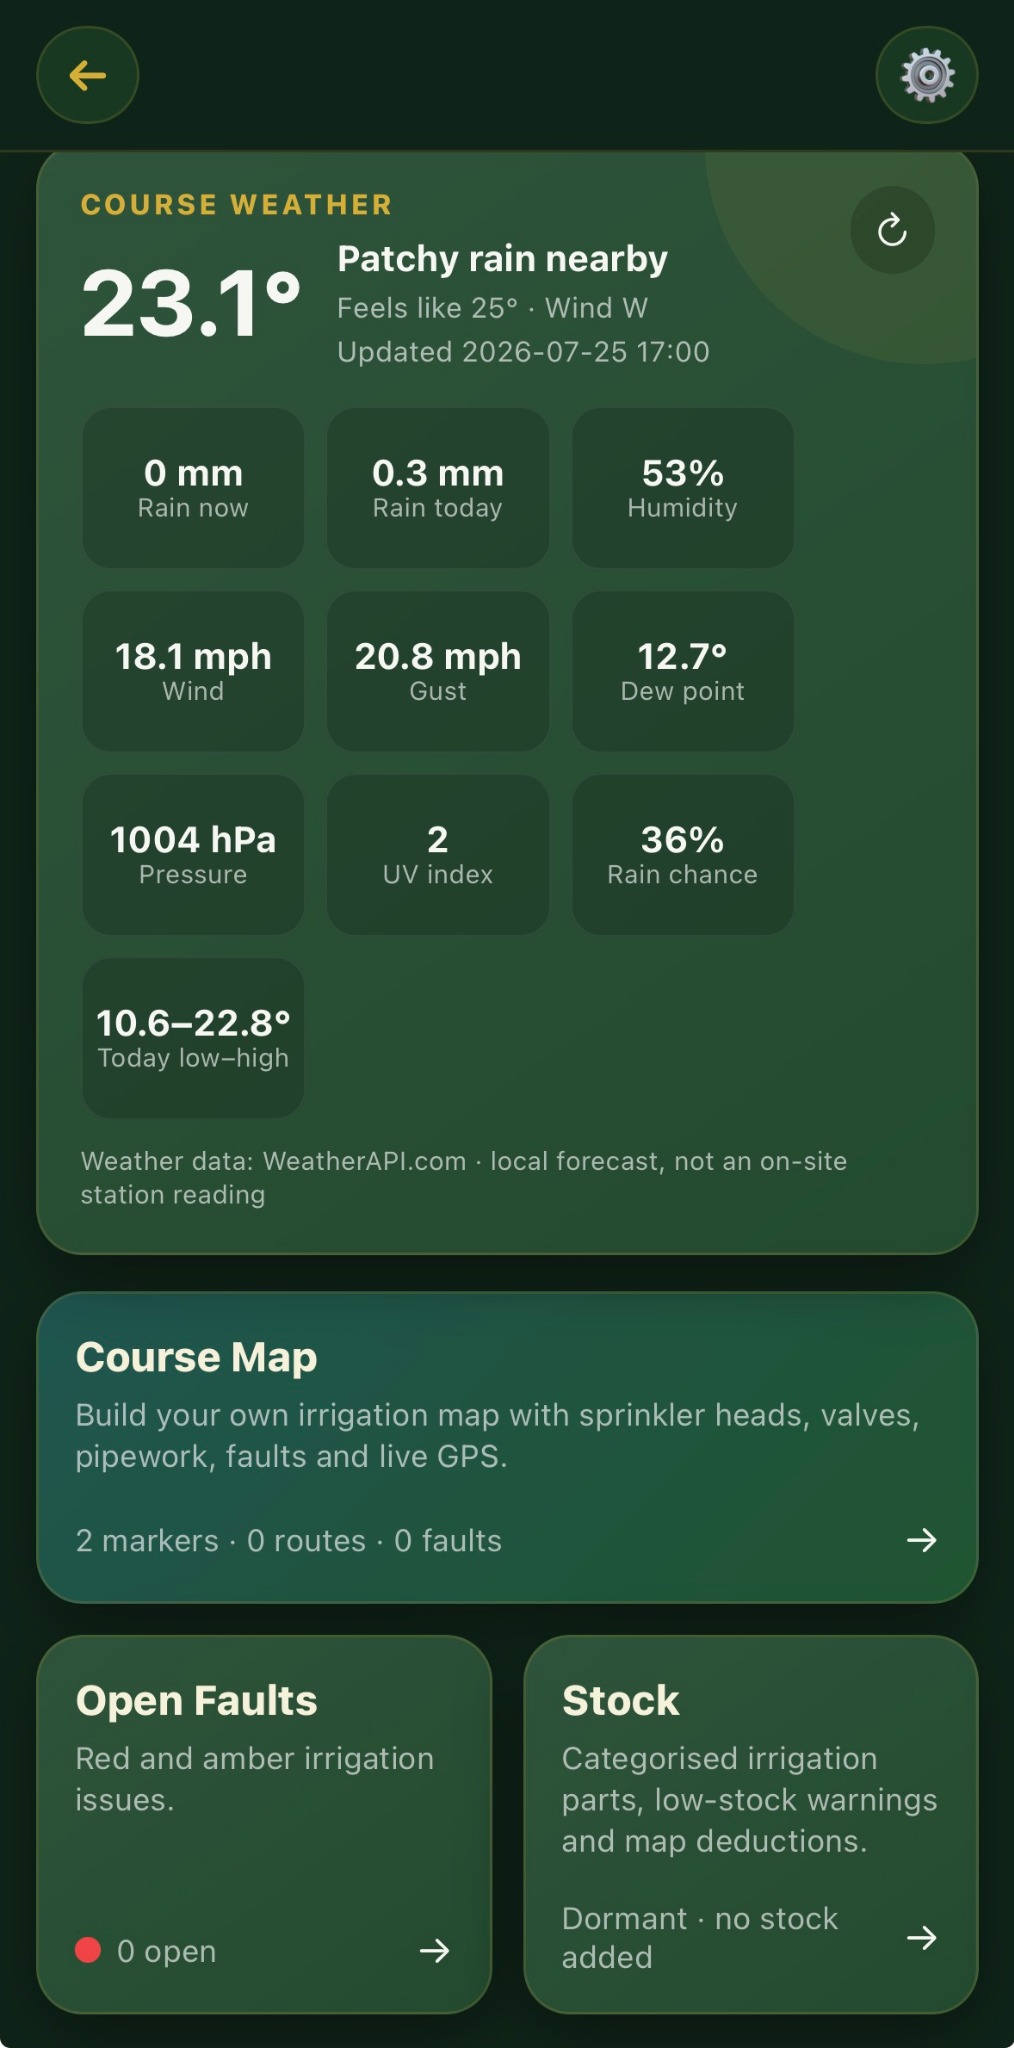
Irrigation dashboard with course weather, map, faults and stock
Irrigation dashboardSee weather, mapping progress, active faults and stock from one screen.

Set the club location

  1. Tap the settings cog.
  2. While on site, tap Use current GPS to fill the latitude and longitude.
  3. Choose the default map zoom.
  4. Tap Save settings.

The saved position centres the course map and is used to retrieve local weather.
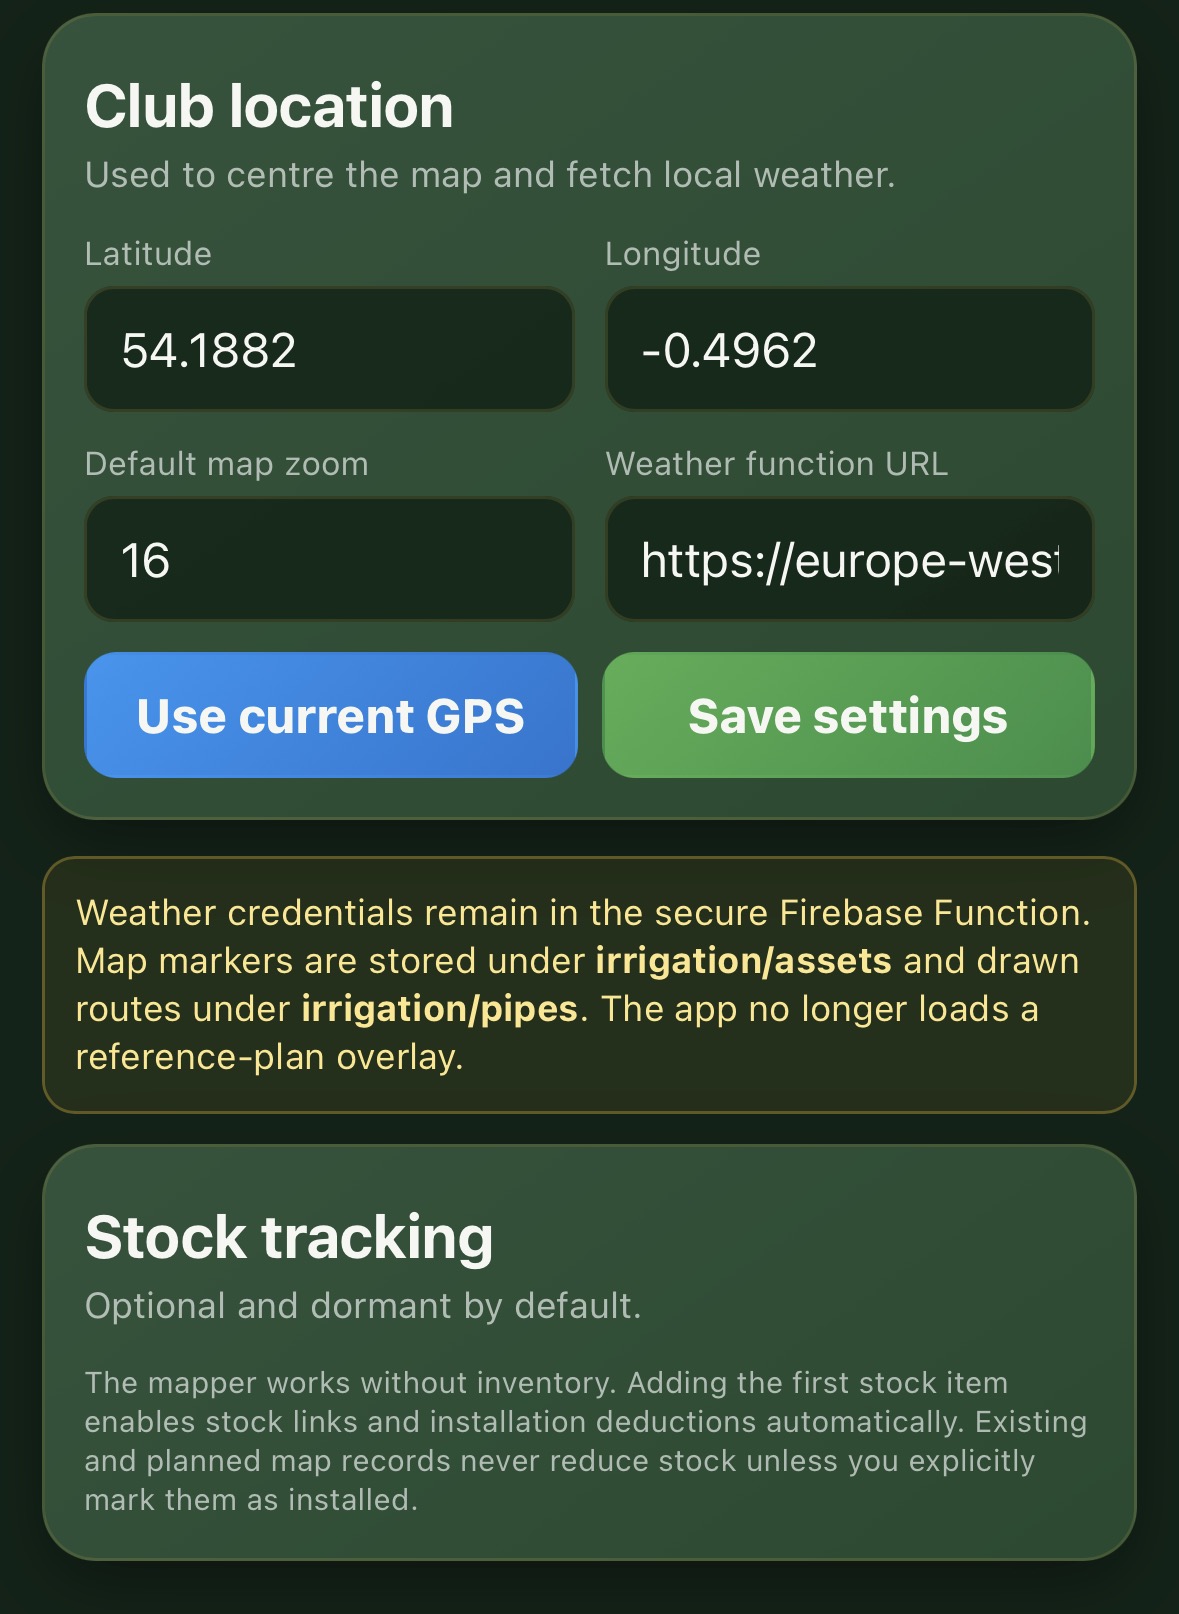
Irrigation club location and default zoom settings
Club locationSet the position once, then choose how closely the map should open.

Open the aerial course map

Tap Course Map from the dashboard. The aerial map is ready for sprinkler heads, valves, pipework, controllers, cables, joints and other assets.
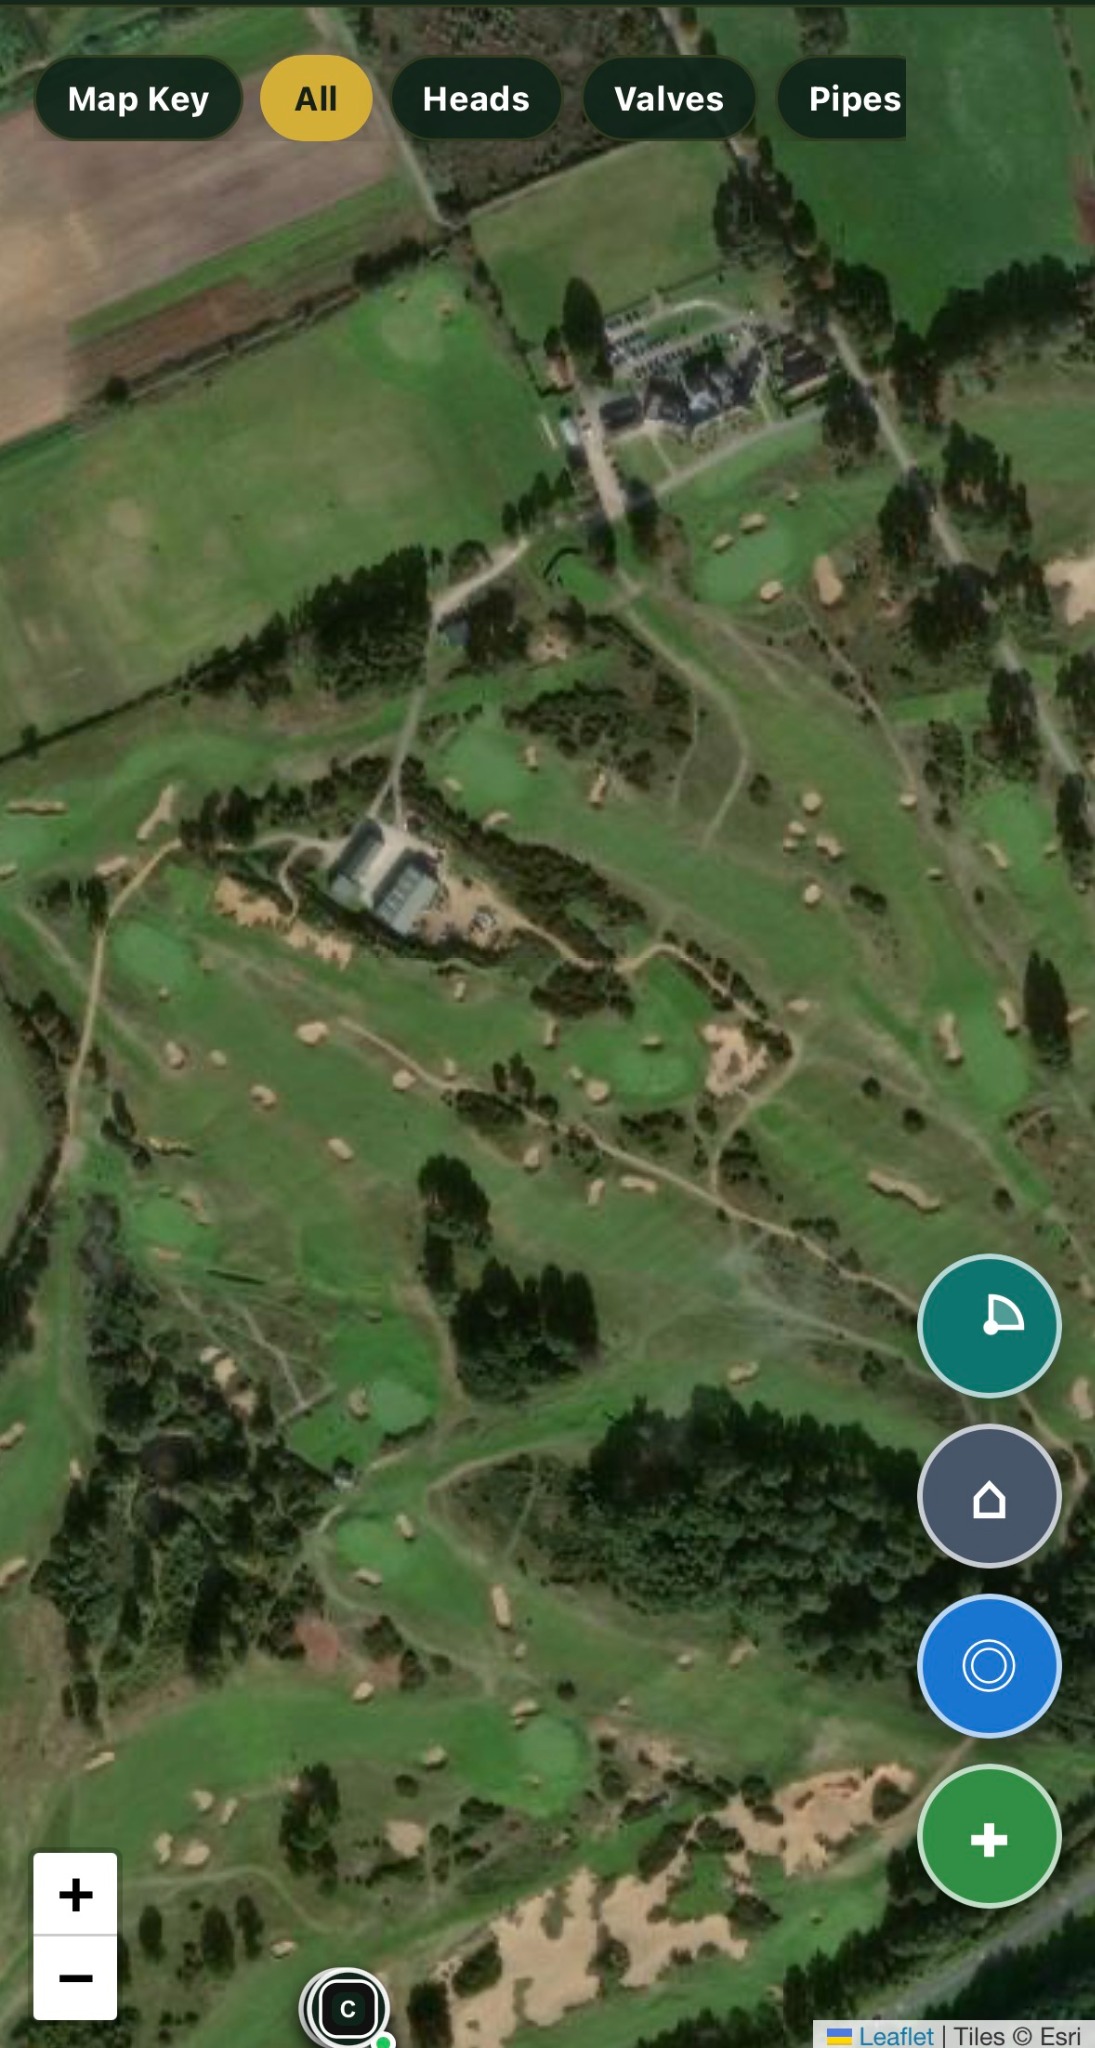
Aerial irrigation course map
Course mapMap the irrigation system directly over the aerial view.
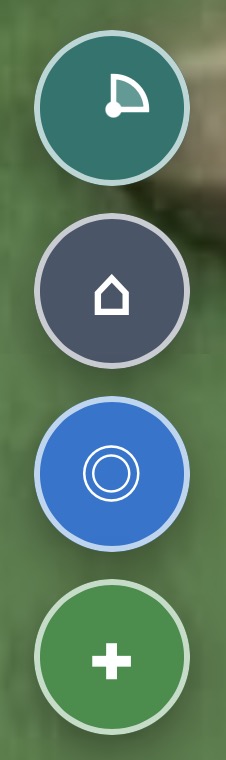
Four irrigation map controls
Map controlsAdd assets, use GPS, recenter the map and display sprinkler coverage.
  • Green +: choose an asset or route, then place it on the map.
  • Blue GPS: use the phone's current position while walking the course; tap again to stop tracking.
  • Grey Home: return to the saved club position.
  • Teal Coverage: show or hide saved sprinkler arcs and throw distances.
GPS accuracy: phone GPS normally places items within a few metres, depending on the device and conditions. Positions can be fine-tuned afterwards with Move on map or Edit route.

Use the map key

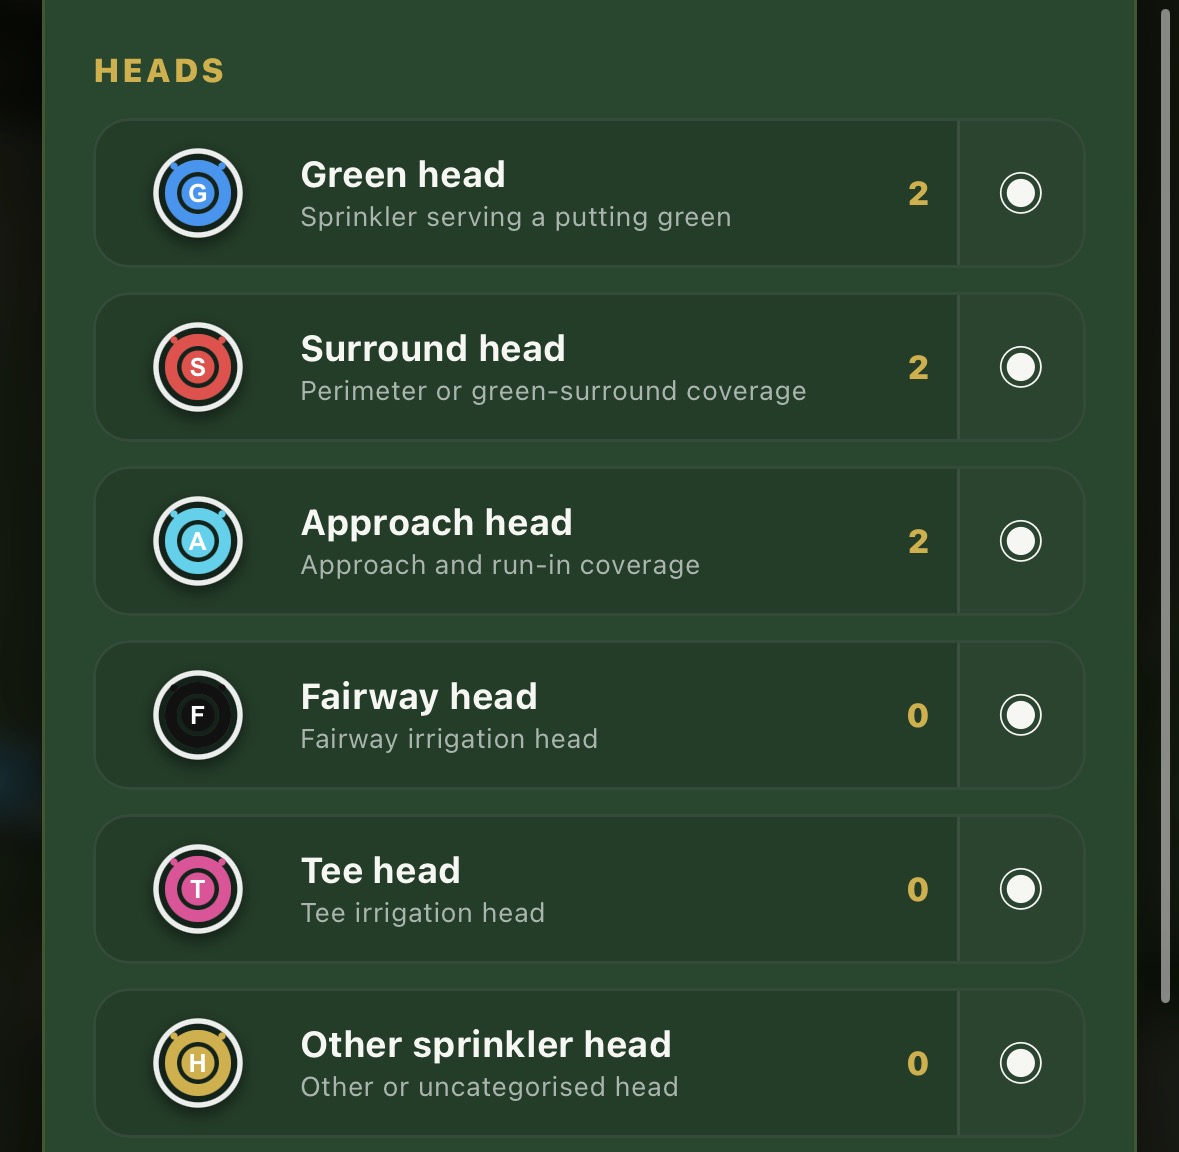
Tap Map Key at the top of the map to see the symbols, colours and line styles used throughout the module. The number beside each entry shows how many of that type are currently mapped.
Map Key button at the top of the irrigation map
Map KeyOpen the full irrigation legend.
Map key showing sprinkler head categories
HeadsGreen, surround, approach, fairway, tee and other sprinkler heads.
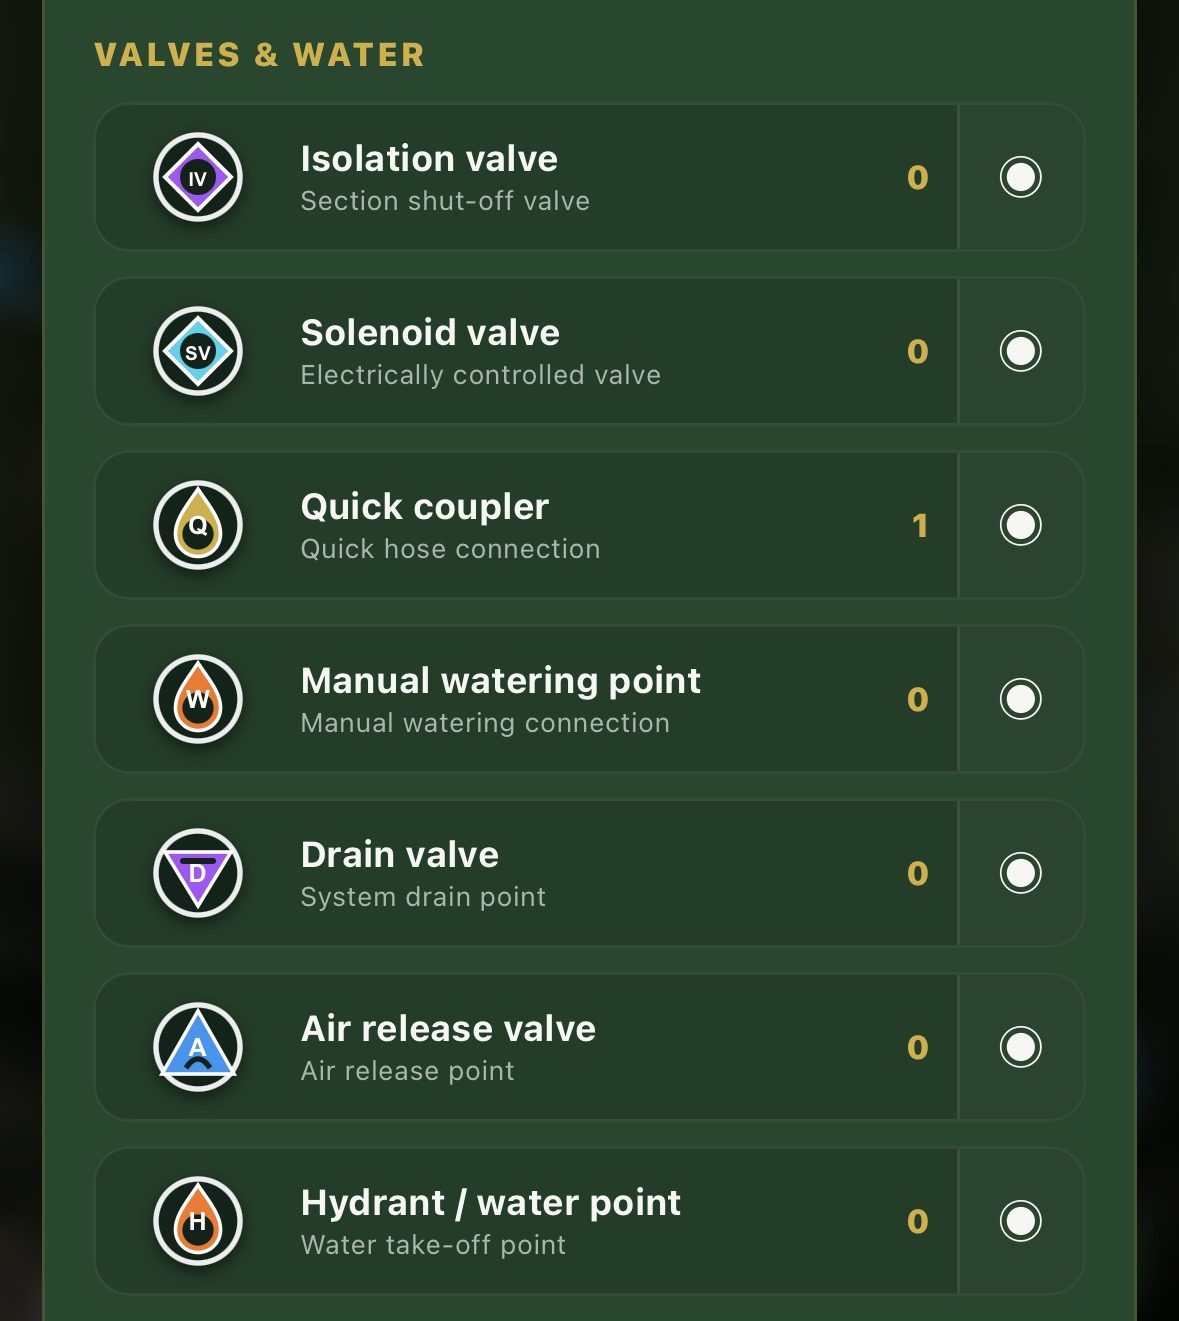
Map key showing valves and water points
Valves & WaterIsolation and solenoid valves, couplers, hydrants and other water points.
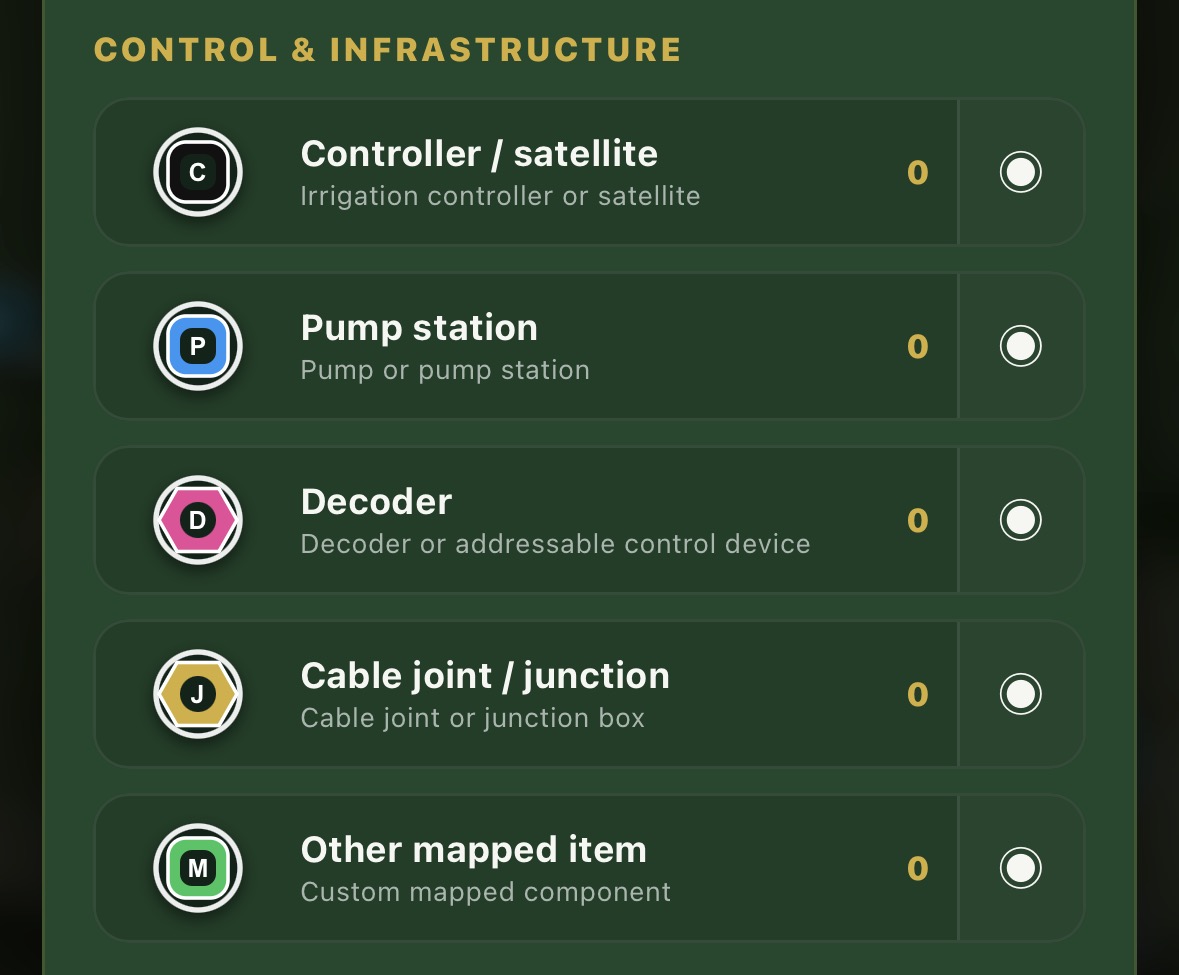
Map key showing irrigation control infrastructure
Control & InfrastructureControllers, pumps, decoders, junctions and custom mapped items.
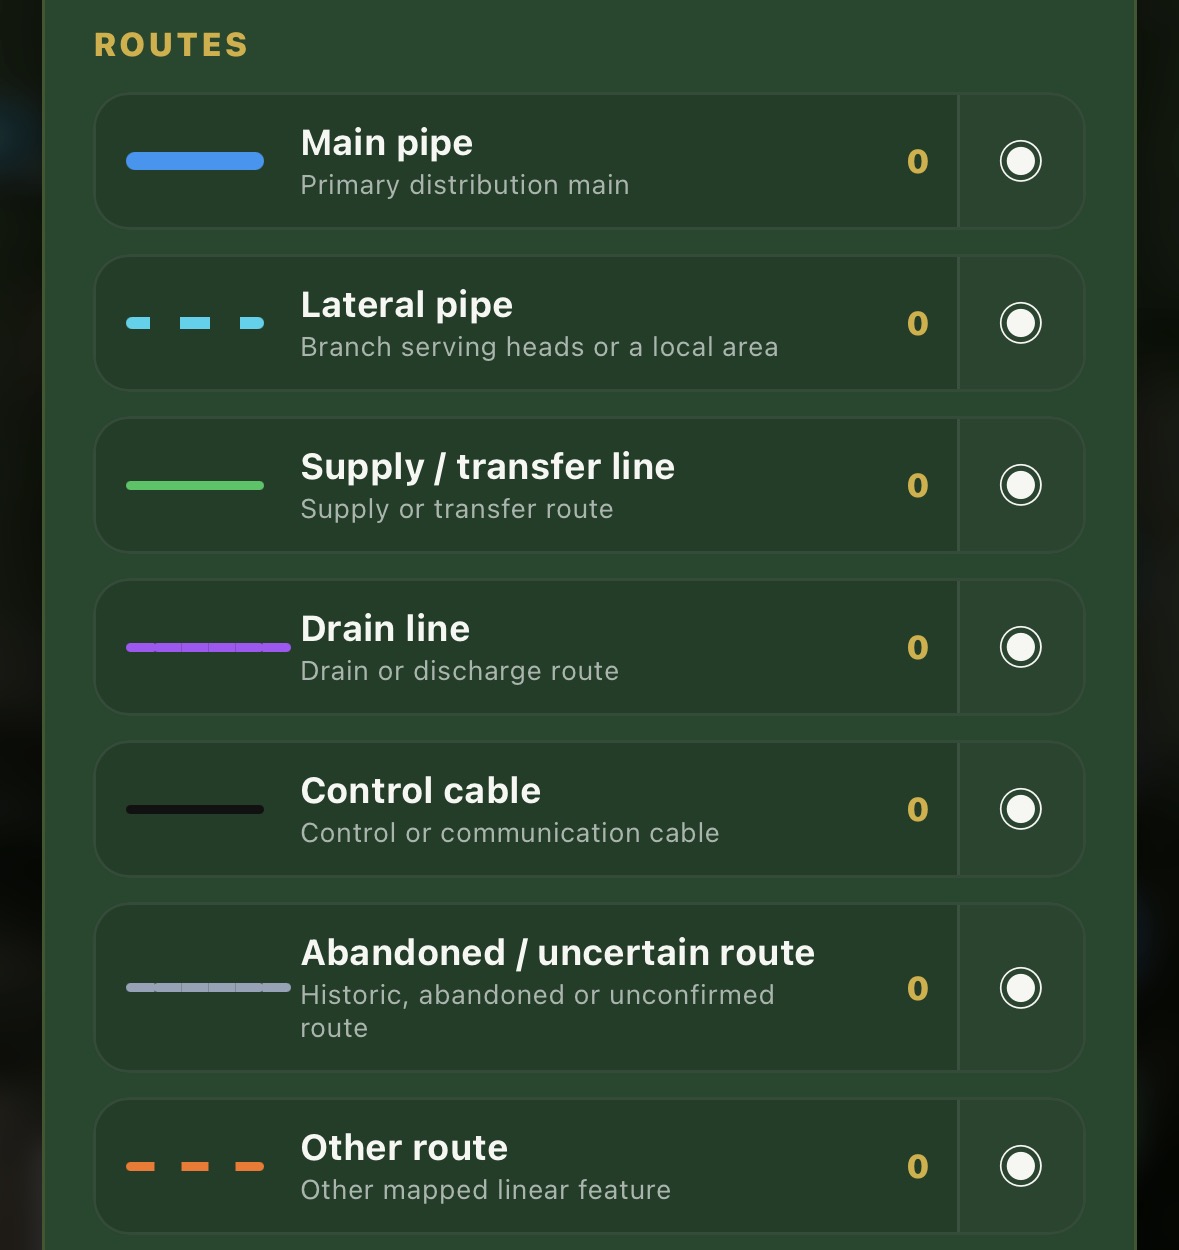
Map key showing irrigation route styles
RoutesMain and lateral pipes, supply lines, drains, control cable and uncertain routes.

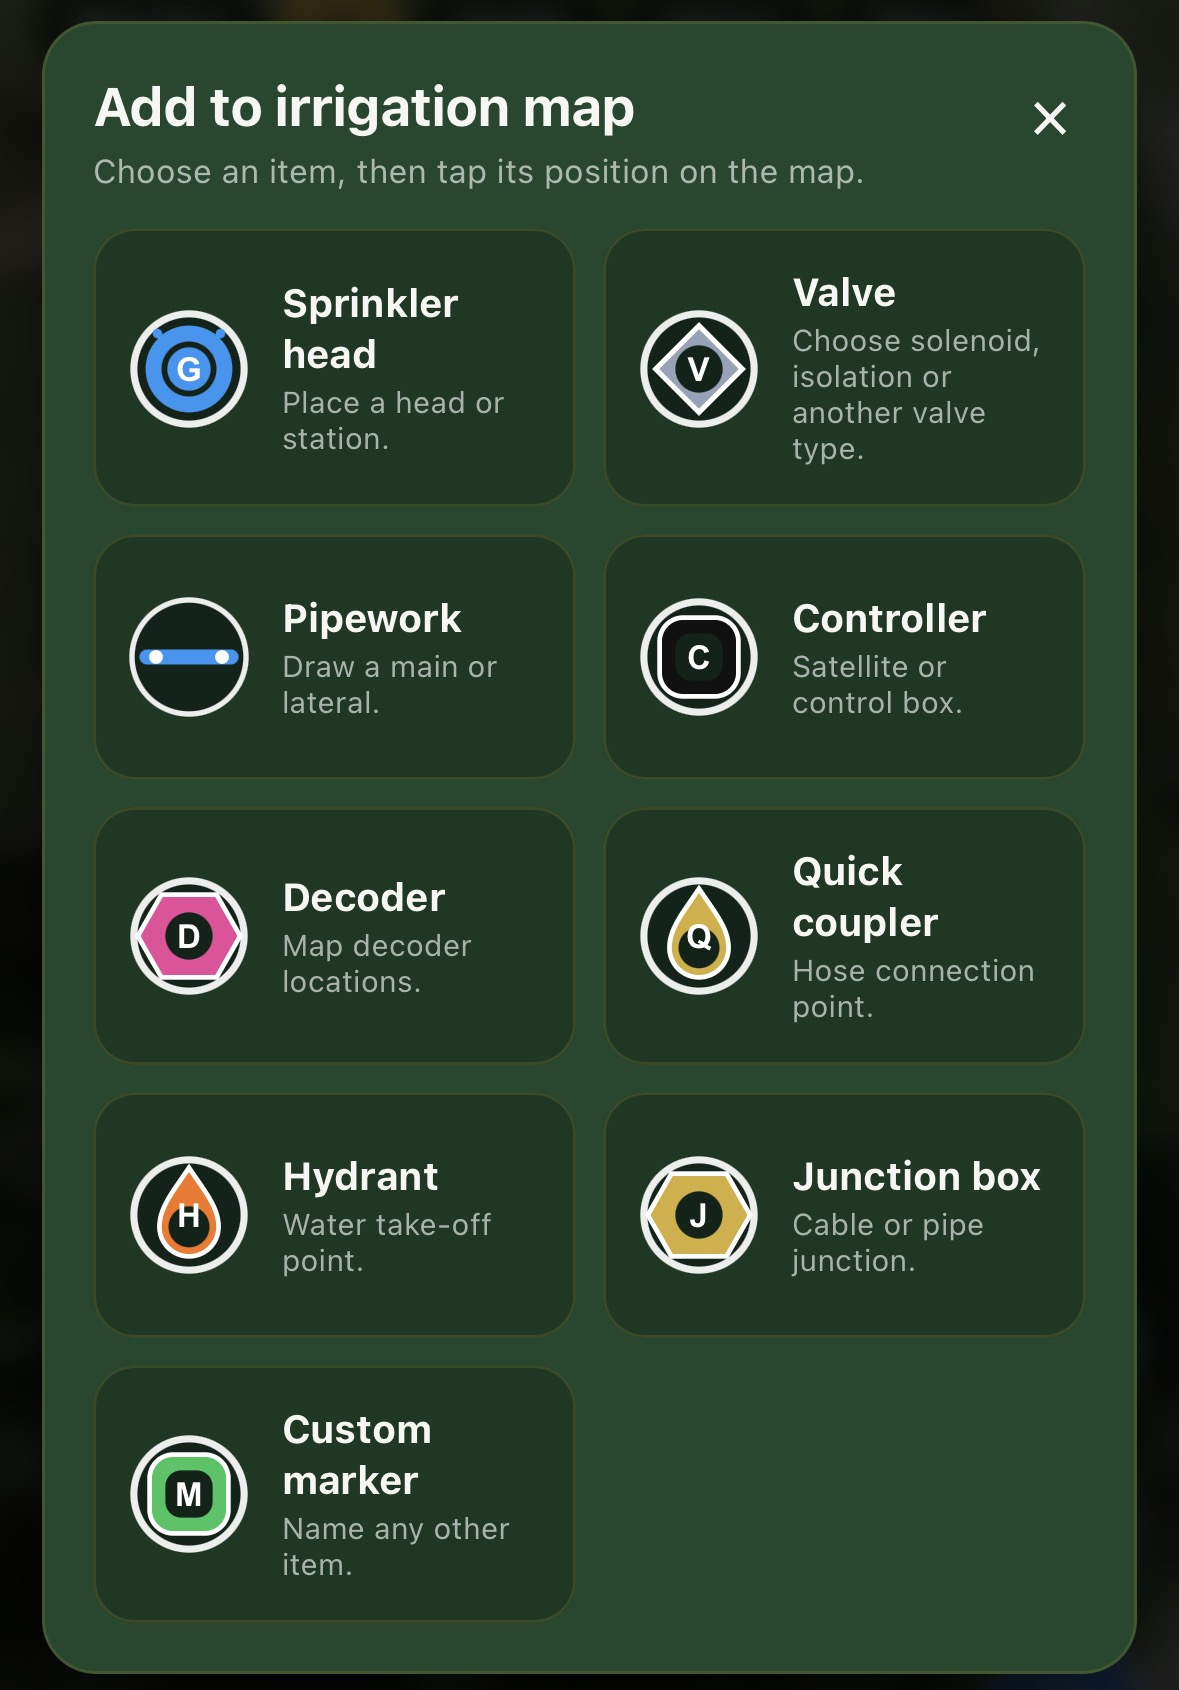
Add a mapped asset

  1. Tap the green + button.
  2. Choose the asset type.
  3. Tap the map where it should be placed.
  4. Complete the item's details and tap Save item.
Add to irrigation map selection menu
Add menuChoose a sprinkler, valve, pipework, controller, decoder, coupler, hydrant, junction or custom marker.

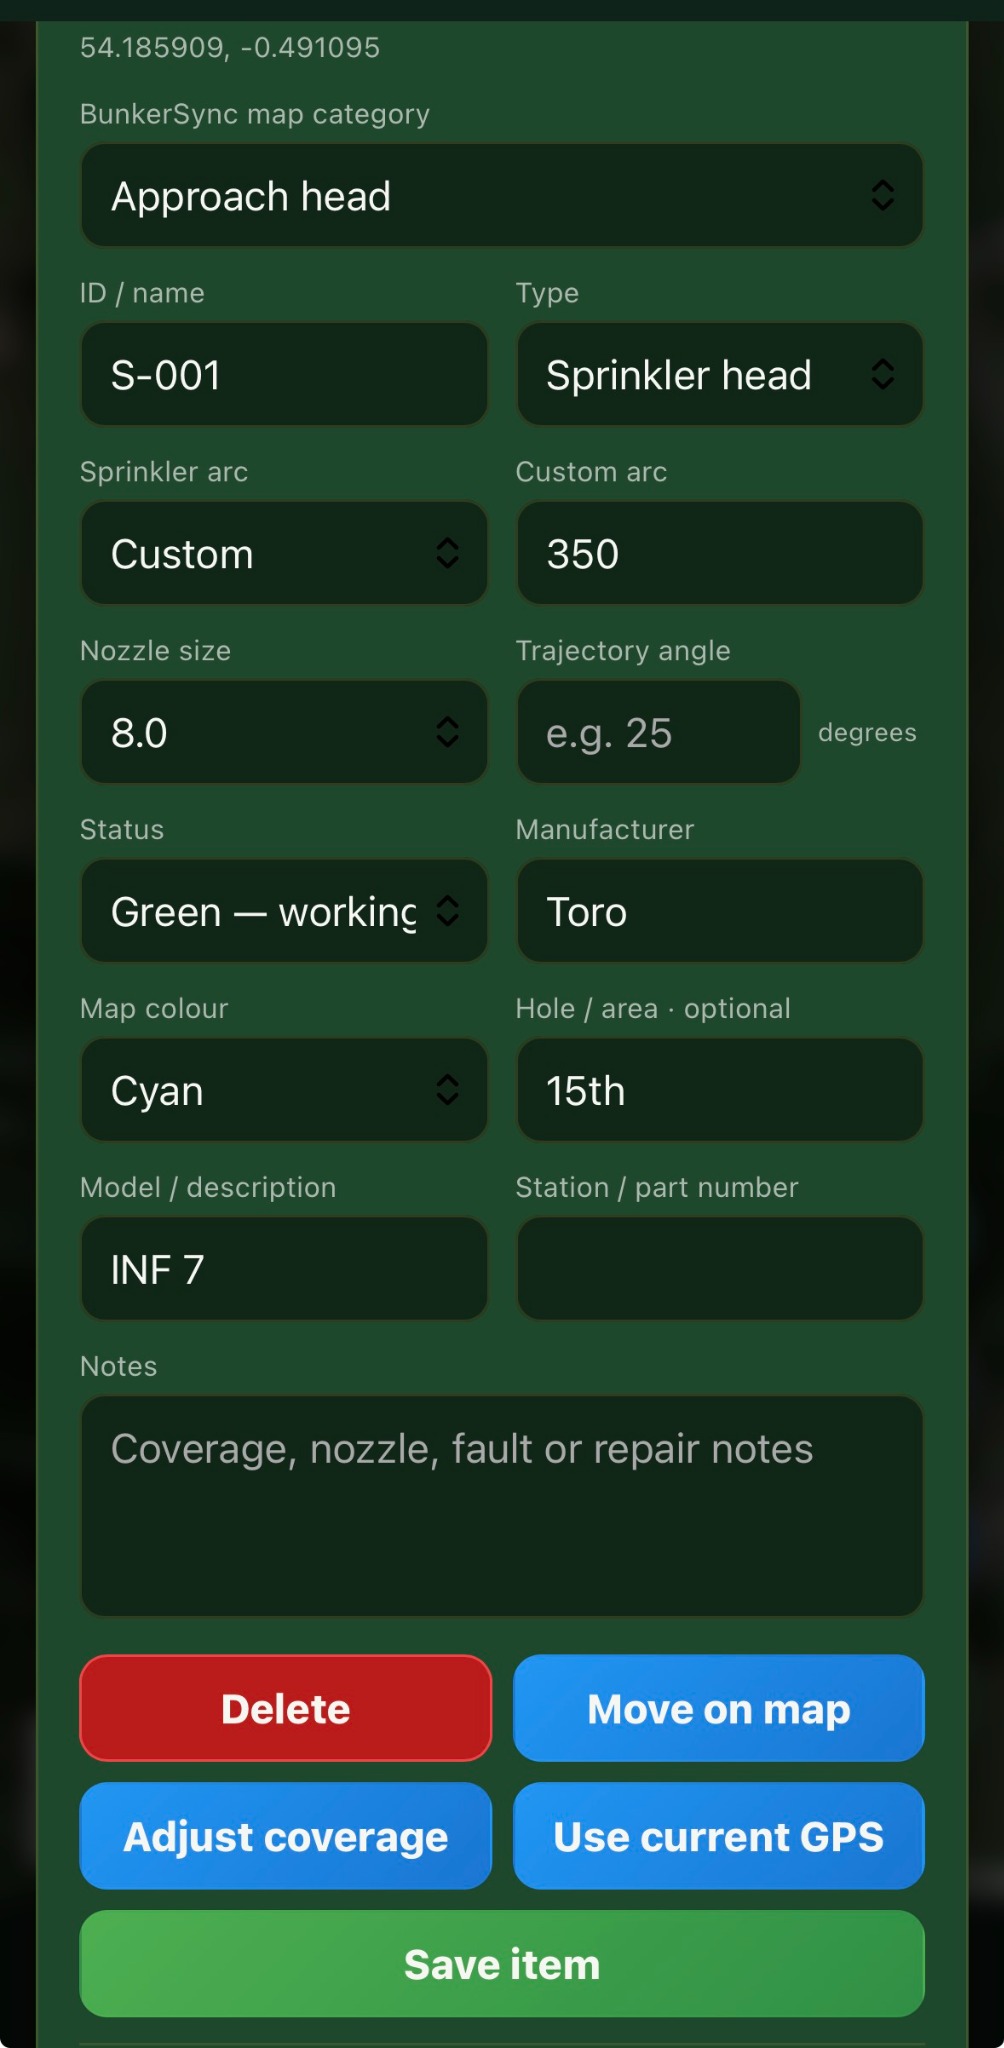
A sprinkler record can include its map category, ID, arc, nozzle, trajectory, status, manufacturer, hole or area, model, station number and notes. Tap Use current GPS to update its location or Move on map to reposition it manually.
Detailed sprinkler head information form
Sprinkler detailsStore the practical information needed to identify, inspect and repair the head.

Read the symbols and statuses

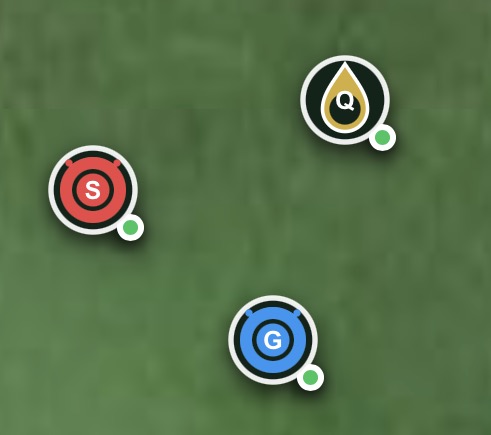
Mapped assets use distinct letters and colours. The small status dot shows whether the item is working normally or requires attention.
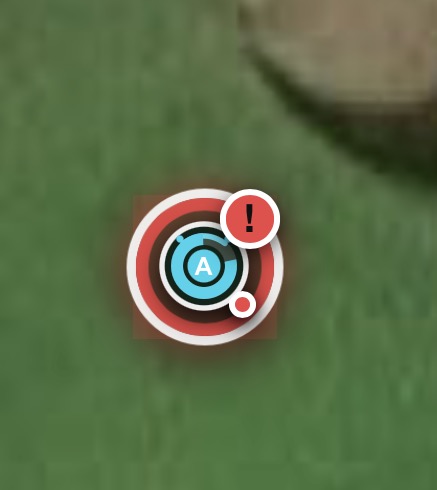
Green head, surround head and quick coupler symbols on the map
Mapped assetsDifferent symbols make each component easy to recognise.
Red irrigation fault highlighted on the course map
Fault highlightAmber and Red statuses stand out clearly on the map.
Green — workingAmber — monitor or attendRed — urgent fault

Manage irrigation faults

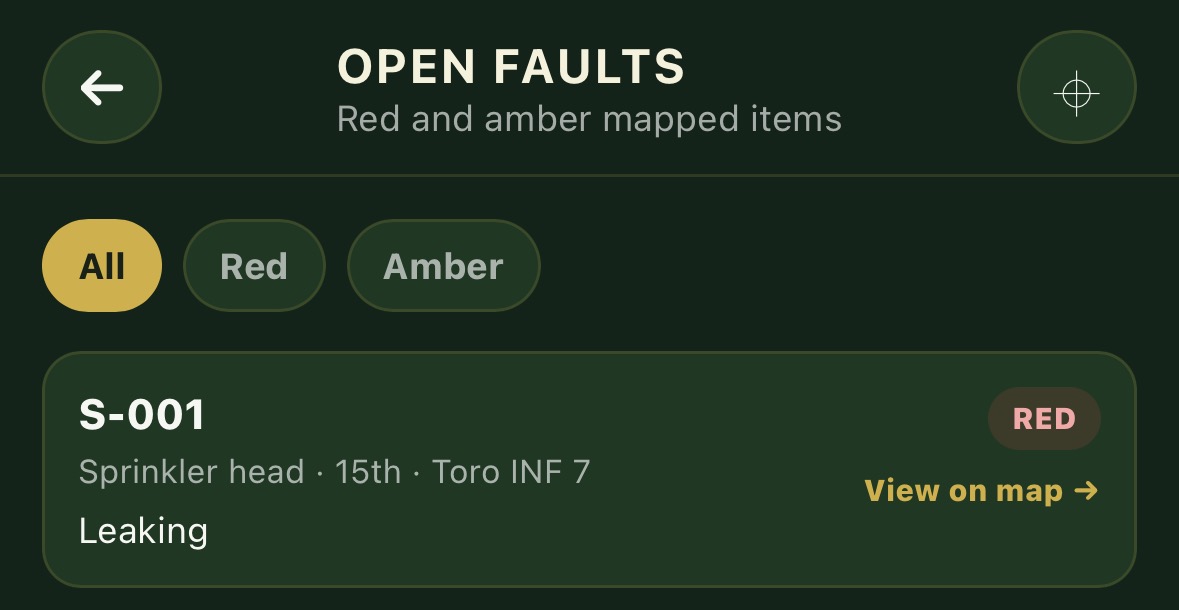
When an item is marked Amber or Red, the Open Faults tile shows the number of active issues. Open the tile to see all affected assets together, then tap View on map to jump directly to the fault.
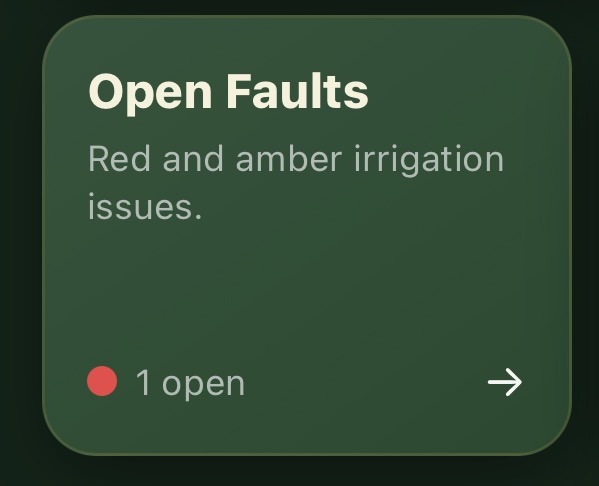
Open Faults dashboard tile showing one fault
Dashboard warningThe active fault count is visible before opening the map.
Open irrigation faults list with View on map link
Fault listFilter Red and Amber items and open the exact map location.

Add and organise irrigation stock

Stock is optional and remains dormant until the first item is added. Open Stock from the Irrigation dashboard, tap the + button and enter the item quantity and low-stock warning level.
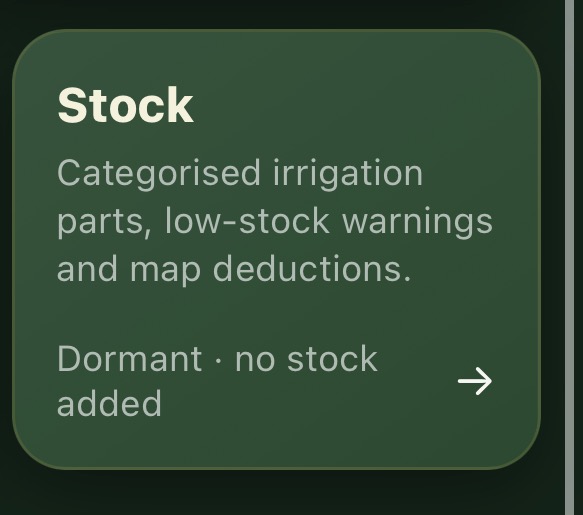
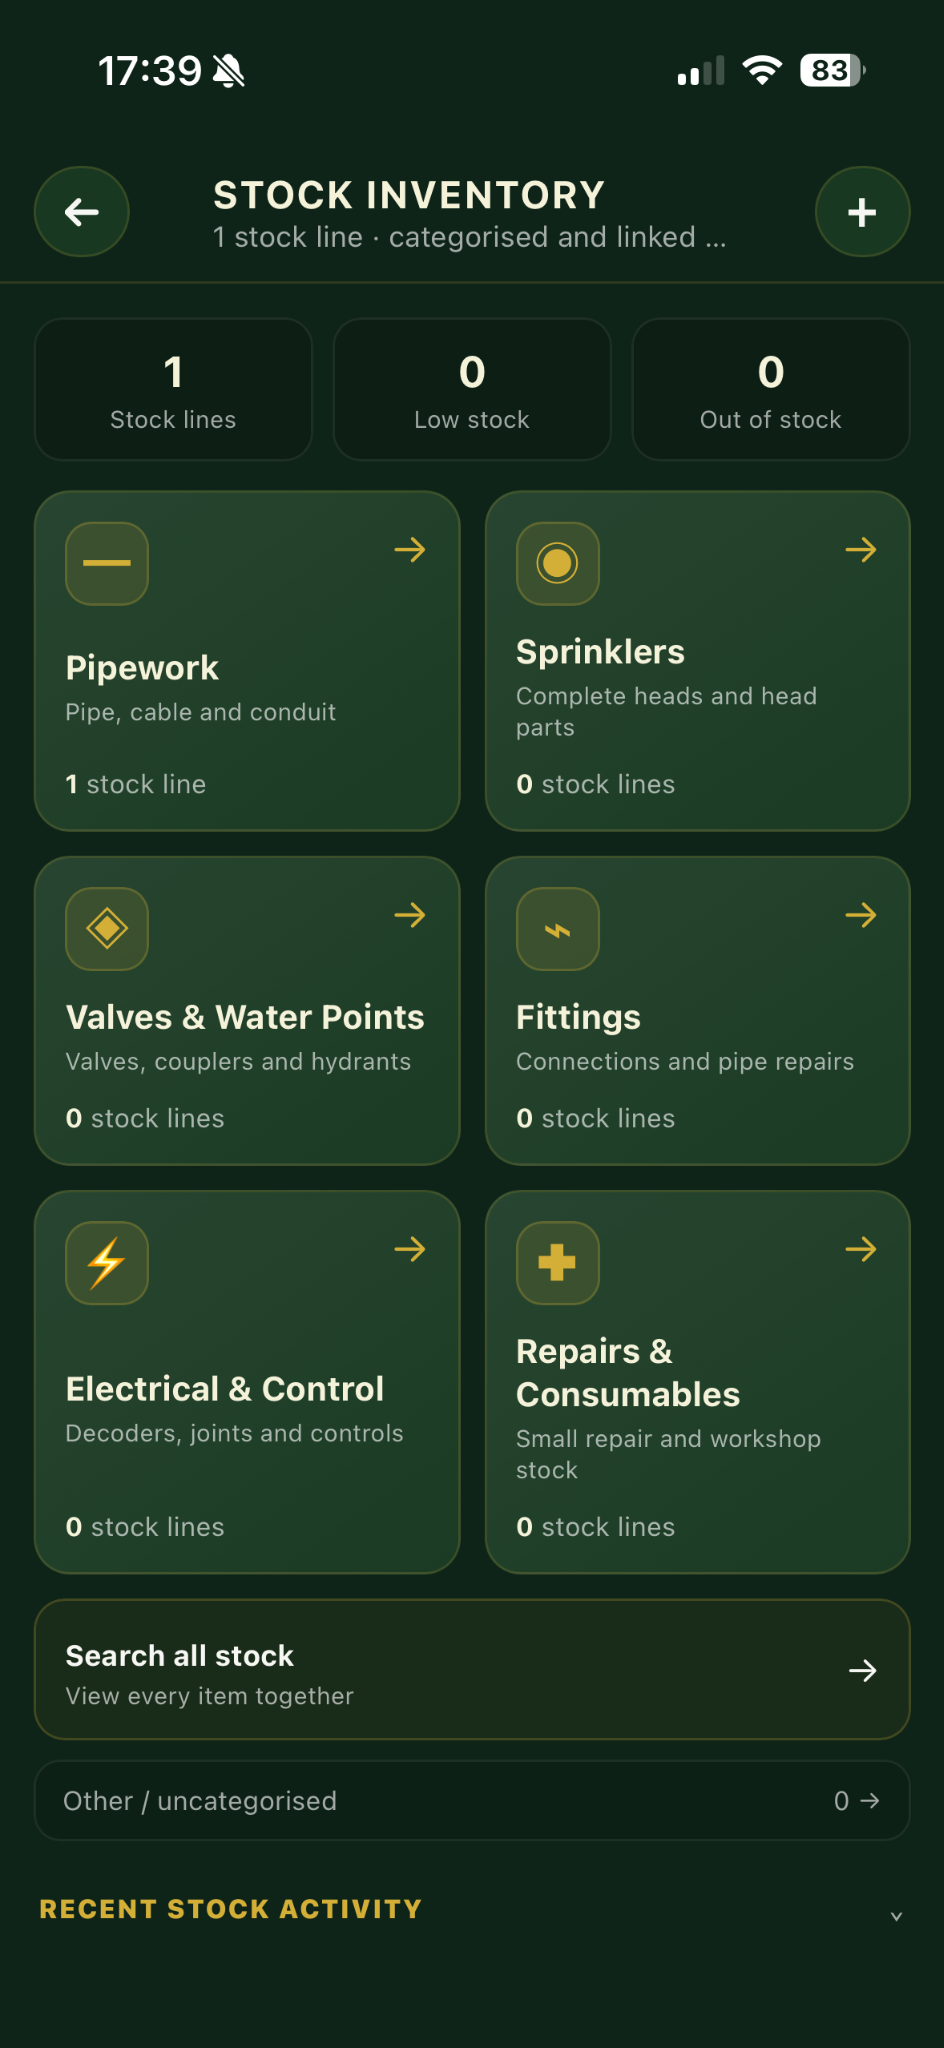
Irrigation Stock dashboard tile
Stock tileThe feature remains dormant until inventory is added.
Categorised irrigation stock inventory
Stock inventoryOrganise pipework, sprinklers, valves, fittings, electrical parts and consumables.

Deduct installed materials from stock

  1. Open the Stock use dropdown inside an asset or route.
  2. Select Deduct stock when saved.
  3. Choose the stock line.
  4. Enter the quantity used.
  5. Save the item or route.

The quantity is deducted once when saved. Existing or planned map records do not reduce stock unless this action is deliberately selected.
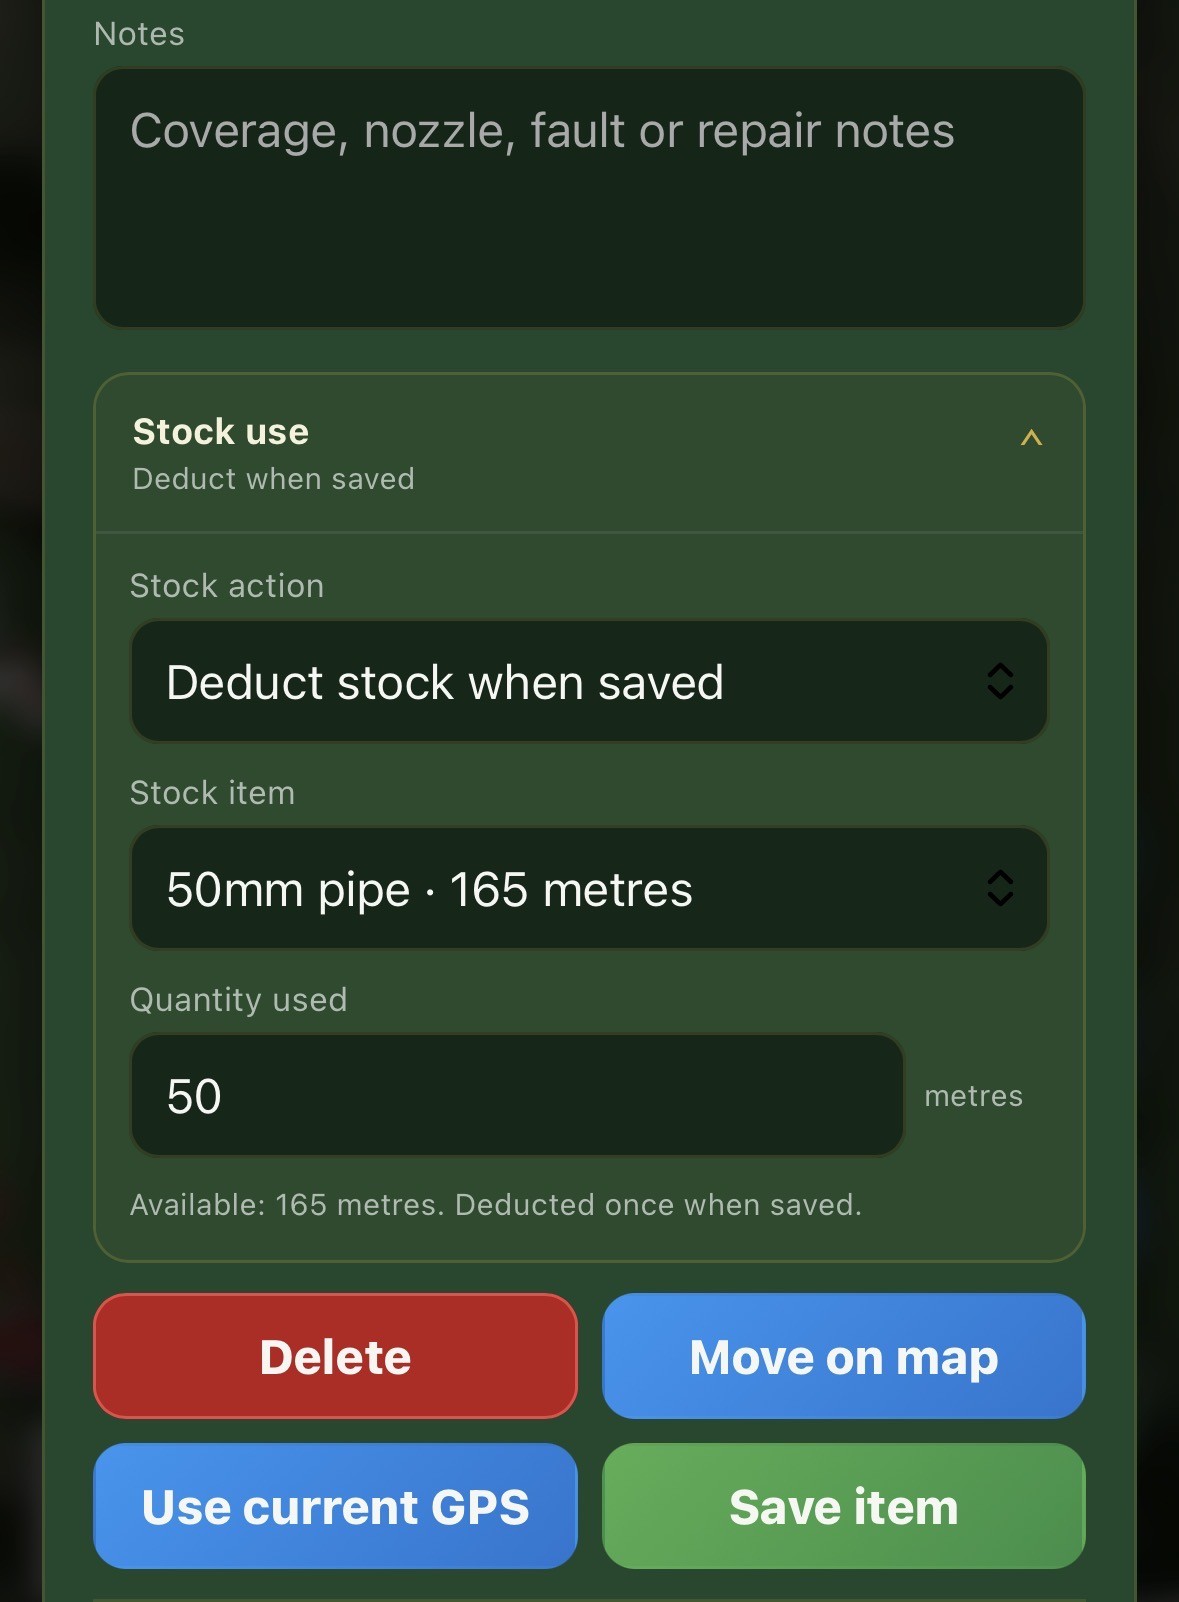
Stock use controls deducting pipe quantity when saved
Stock useFor example, saving 50 metres of installed pipe can deduct 50 metres from the selected stock line.

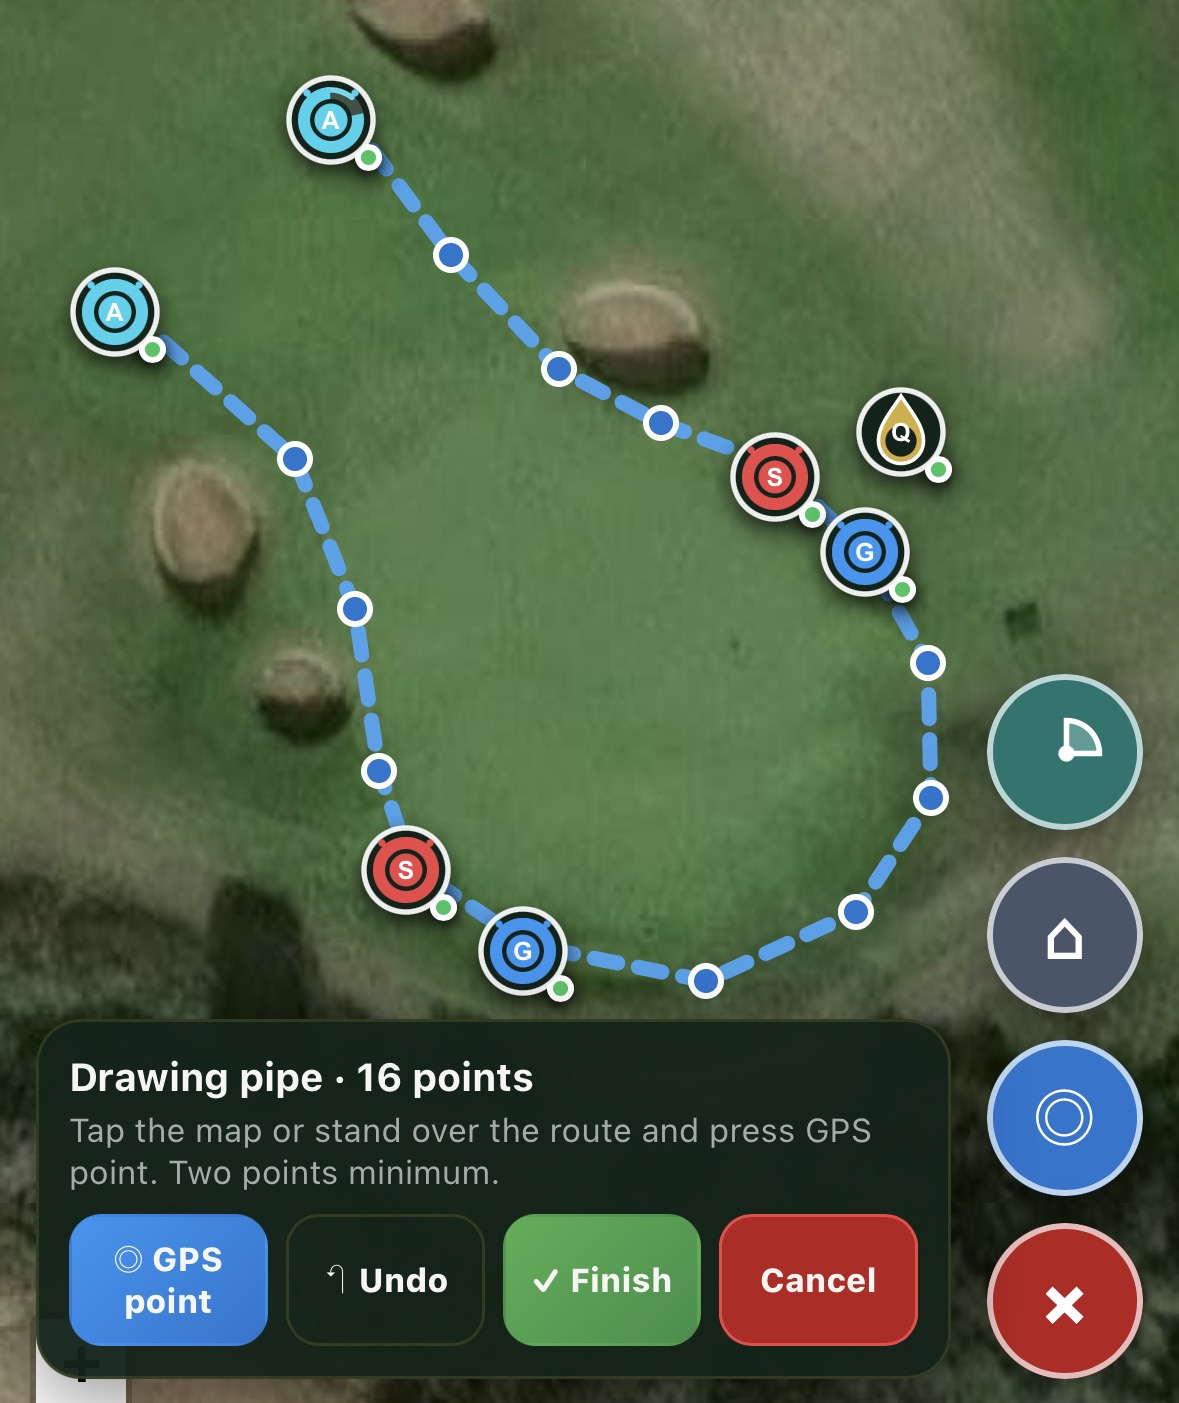
Draw pipework, cable and other routes

  1. Tap the green + and select Pipework.
  2. Tap points directly on the map, or walk the route and tap GPS point at each change in direction.
  3. Use Undo to remove the latest point.
  4. Tap Finish, enter the route details and save.
Drawing an irrigation pipe route using map and GPS points
Draw the routeTwo points are the minimum; add more points to follow bends accurately.

Open an existing route and tap Edit route to move individual points and improve its alignment.
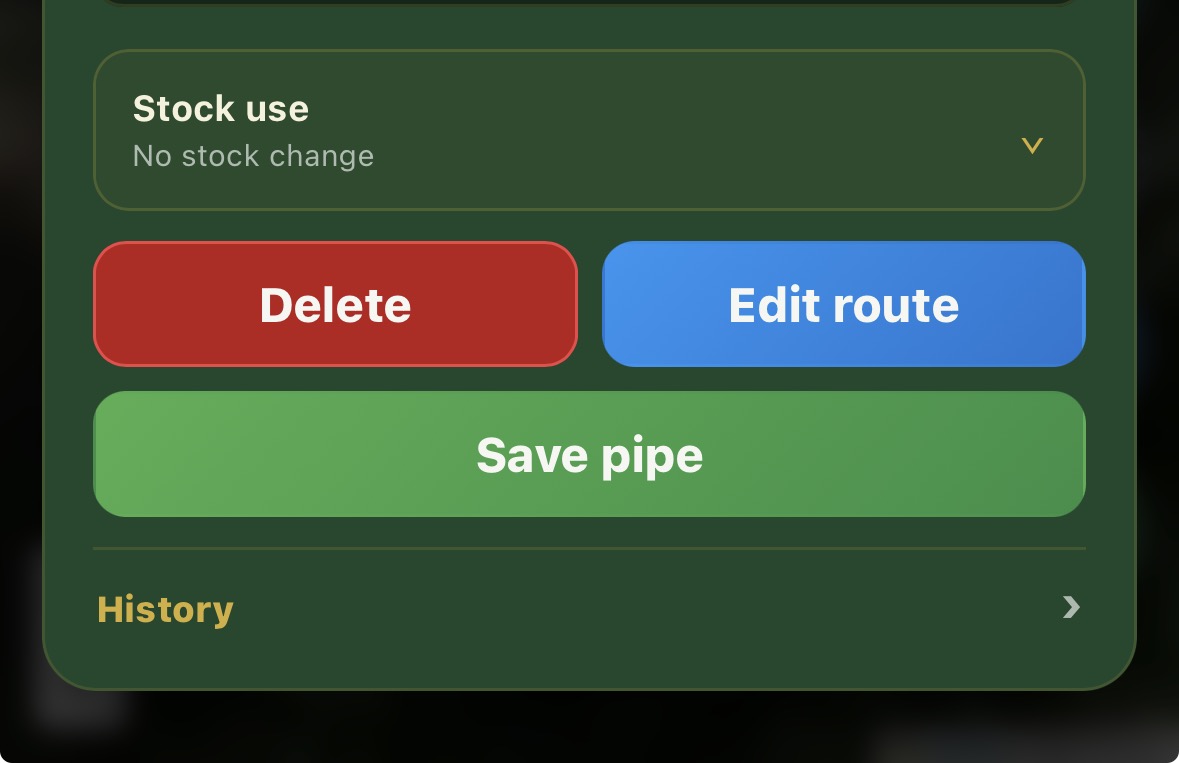
Edit route button for an existing irrigation pipe
Edit routeFine-tune a line after walking it or plotting it approximately.
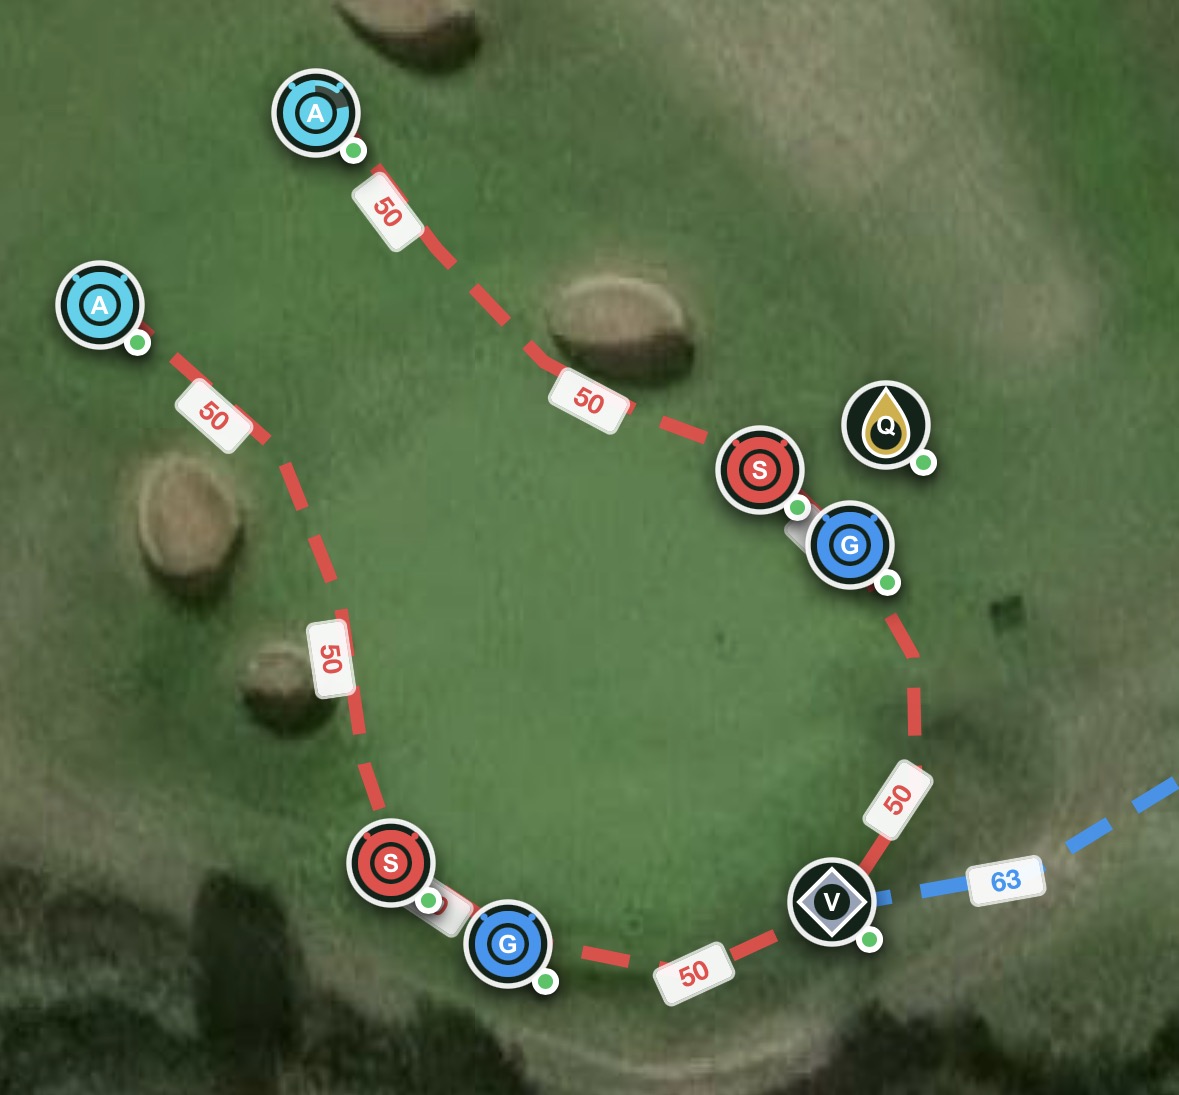
Completed irrigation map with labelled pipe sizes and assets
Completed sectionPipe sizes, routes, heads, valves and couplers are visible together.

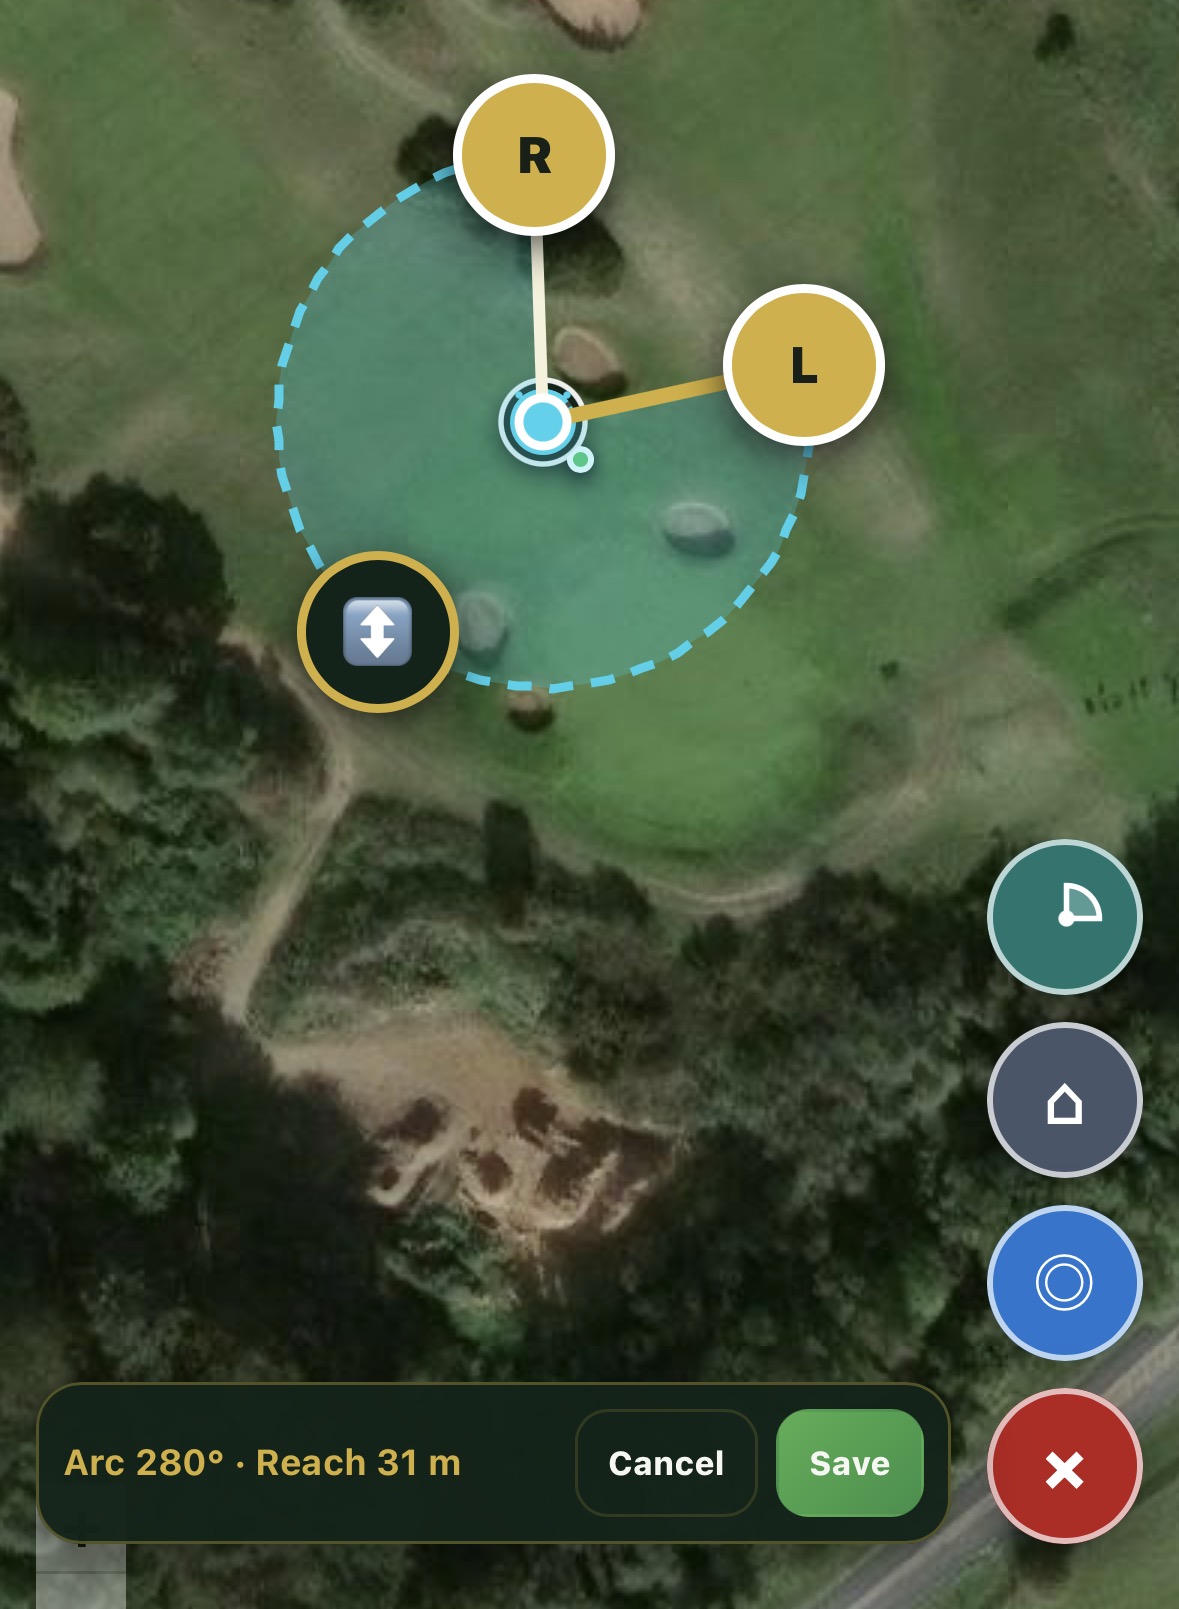
Set visual sprinkler coverage

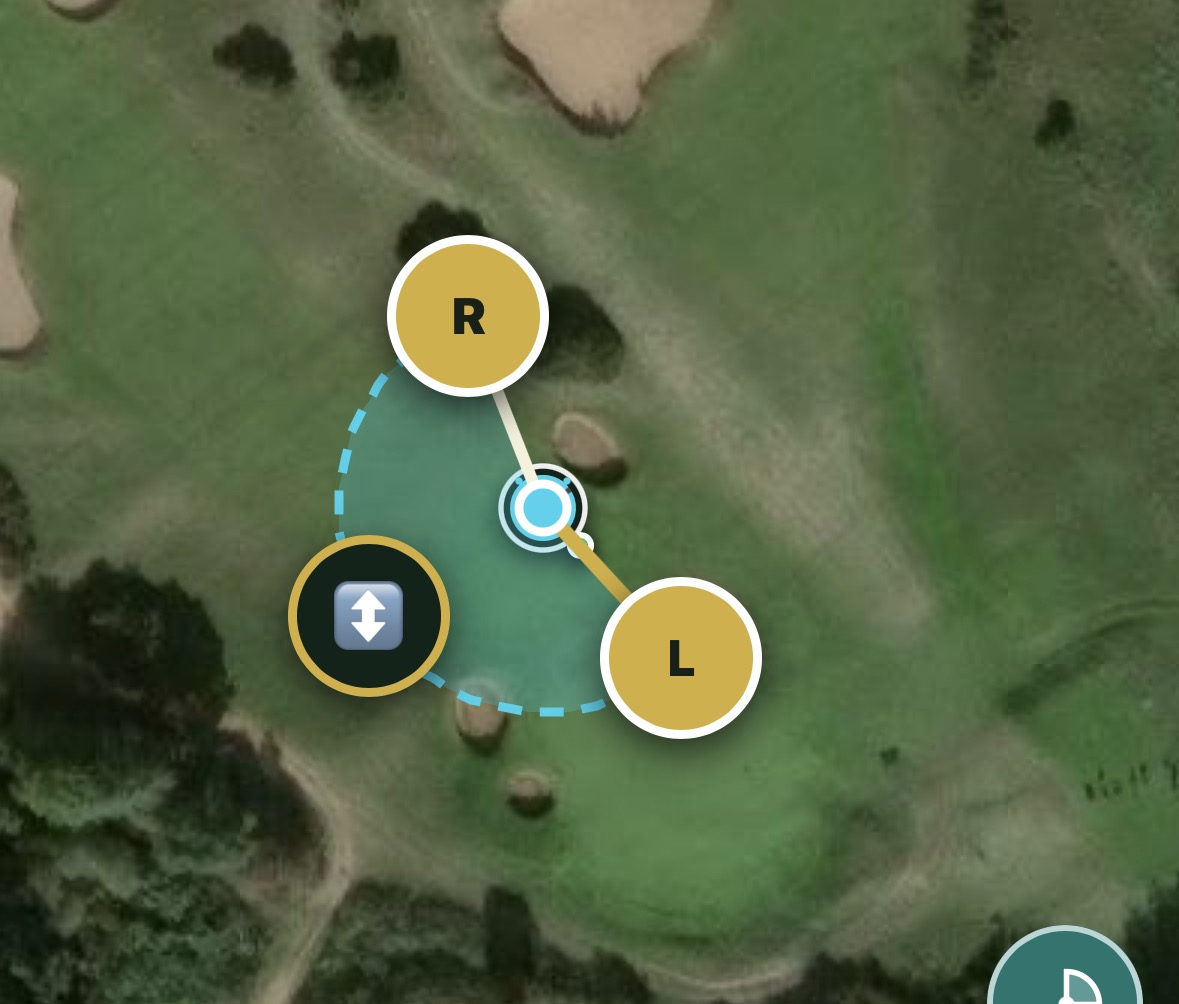
Open a sprinkler and tap Set coverage. The visual editor lets the coverage be lined up directly with the real area being watered.
Set coverage button in a sprinkler record
Set coverageOpen the visual arc and throw editor for the selected head.
Sprinkler coverage editor with left, right and reach handles
Coverage controlsDrag L for the left stop, R for the opposite edge and the centre control for reach.
Adjusted sprinkler arc and reach ready to save
Save the resultThe current arc in degrees and reach in metres are shown before saving.

View coverage and filter the map

Tap the sprinkler-coverage button to display every configured arc together. This makes overlap, gaps and incorrect throw distances much easier to see.
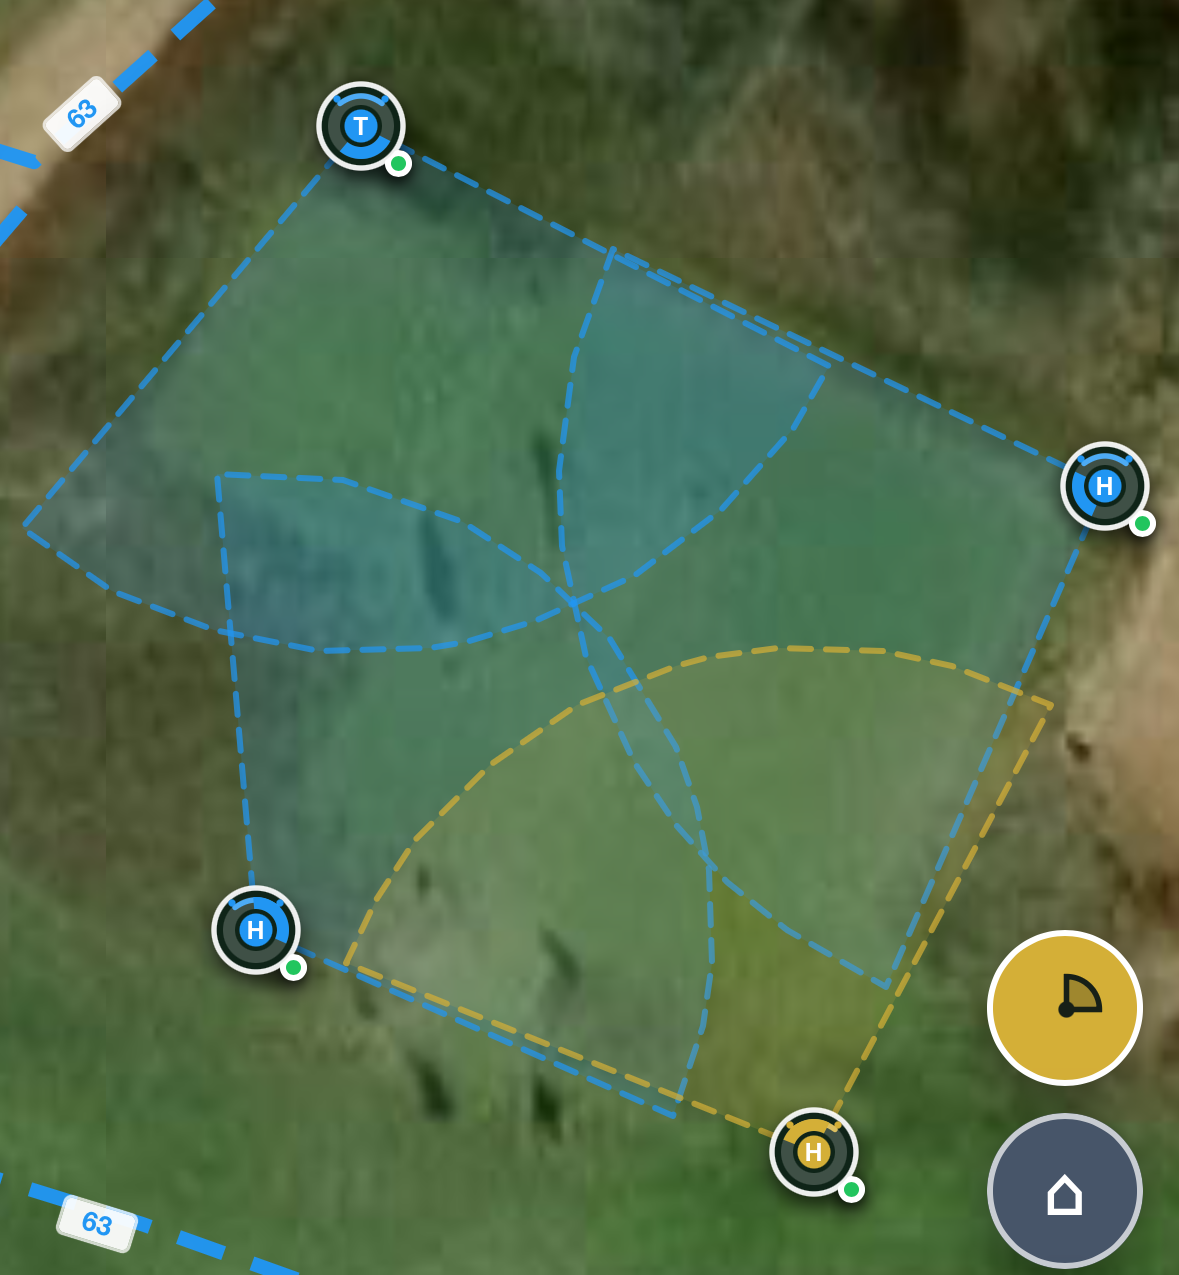
Several sprinkler coverage areas displayed together
Coverage viewCompare full-circle and part-circle heads across the same area.

The filter buttons at the top of the map can show only Heads, Valves, Pipes or Faults. The selected filter turns gold.

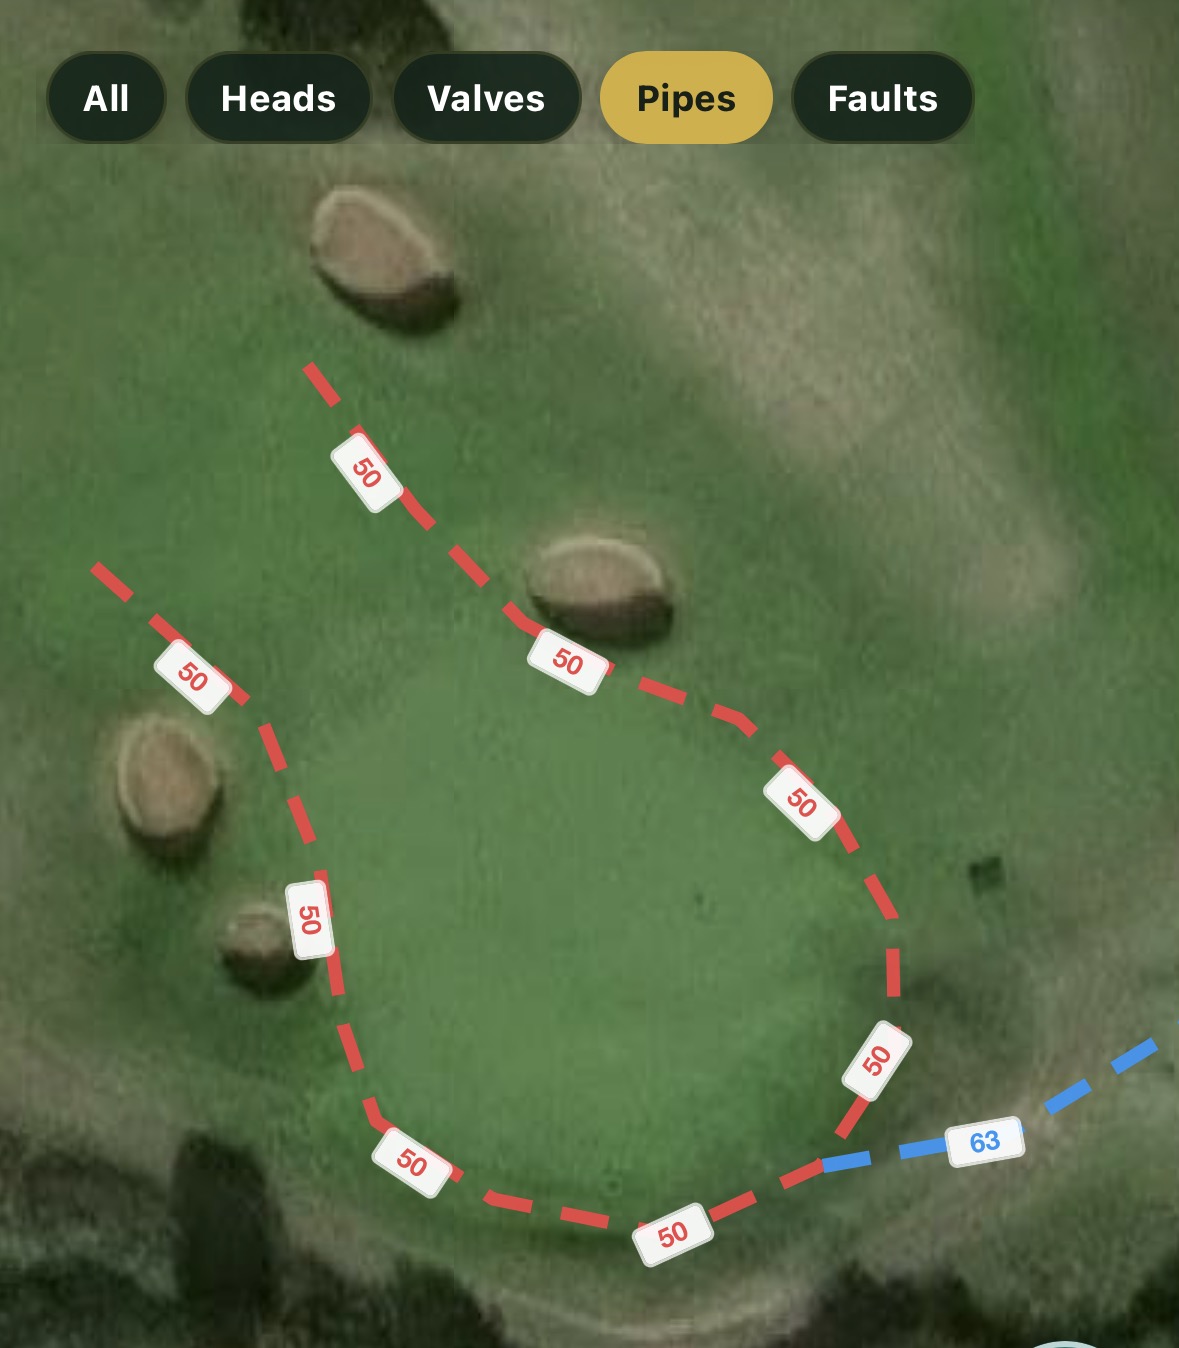
Irrigation map filters for heads, valves, pipes and faults
Map filtersSwitch between asset groups without deleting or hiding data permanently.
Irrigation map showing only pipe routes
Pipes onlyRemove visual clutter when inspecting the underground network.
Best way to learn it: map one small area first — a green, its heads, a nearby valve and the connecting pipework. Once that workflow is familiar, mapping the rest of the course becomes straightforward.